The Aplos Check Printing page is a print queue of transactions that can be printed as a check. This will basically be a list of your expenses, whether recorded in a register or Accounts Payable. Below are the steps to print your checks from Aplos.
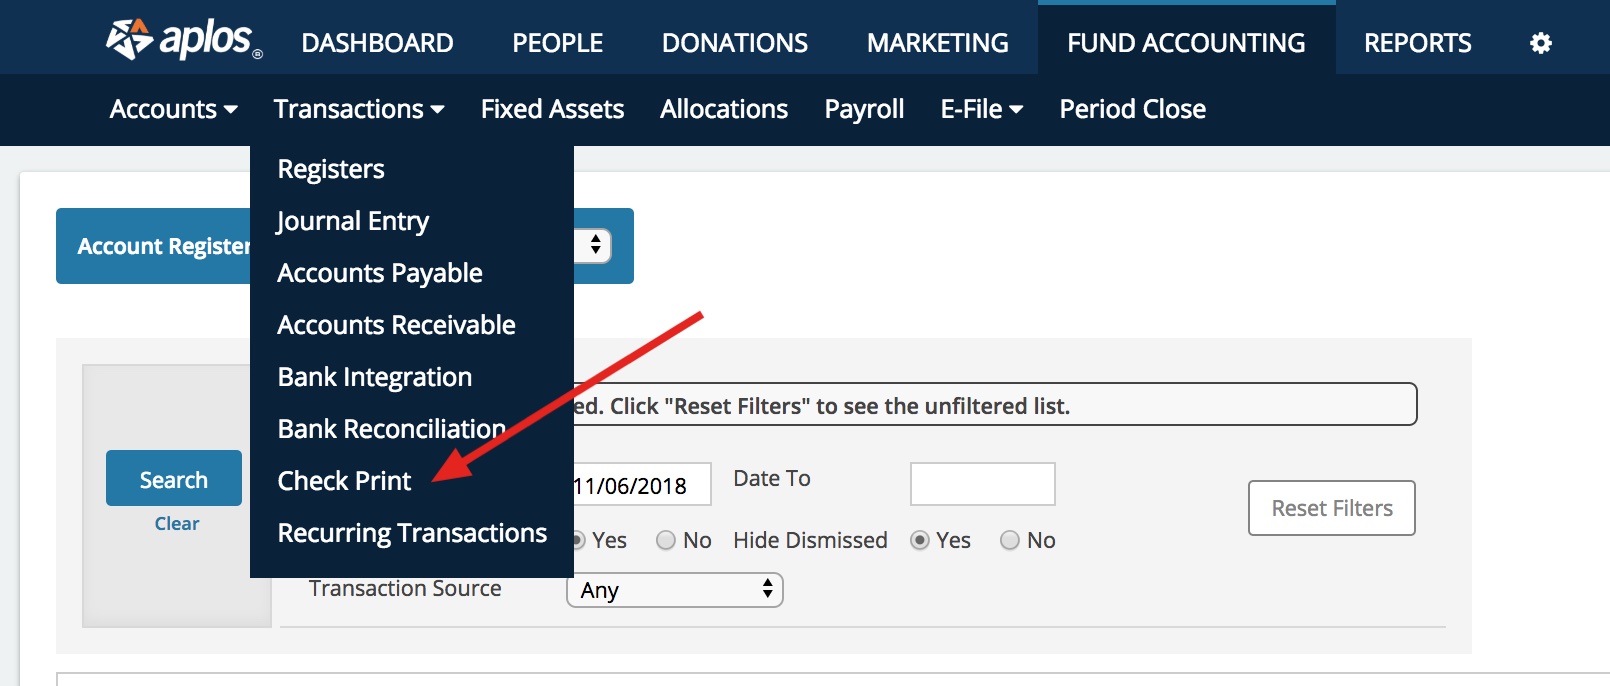
You can access your check printing page from Fund Accounting > Transactions > Check Print.
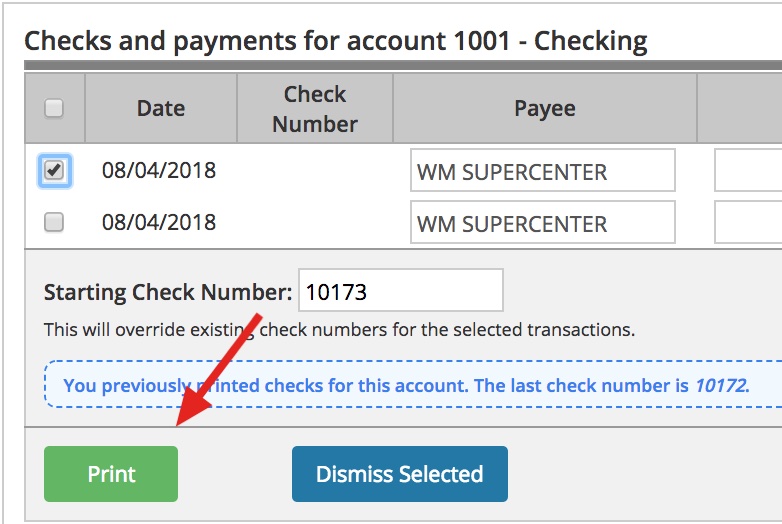
Select Payments to Print Checks
Simply select the payments you want to print by checking the box next to each transaction listed, enter the starting check number, and then click print.
Check Print Fields
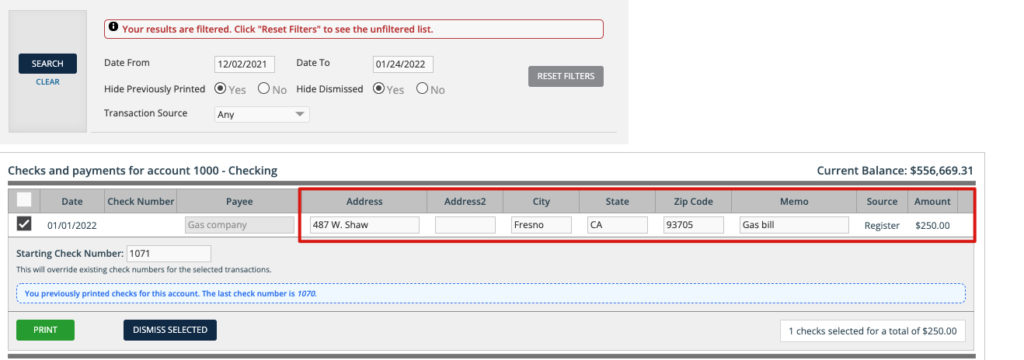
Before printing checks, you can update any necessary address field or the memo field in the Check Print screen. Any update to the address fields will automatically update the contact’s profile information. Updates to the memo field may add a Note field onto the check print.
This additional Note field is created under the following logic:
If a payment is created from the Register page and the pre-filled memo is updated on the Check Print screen, then the original Memo will print as a Note field on the check. The new custom memo will print on the Memo field on the check.
Printing Configuration:
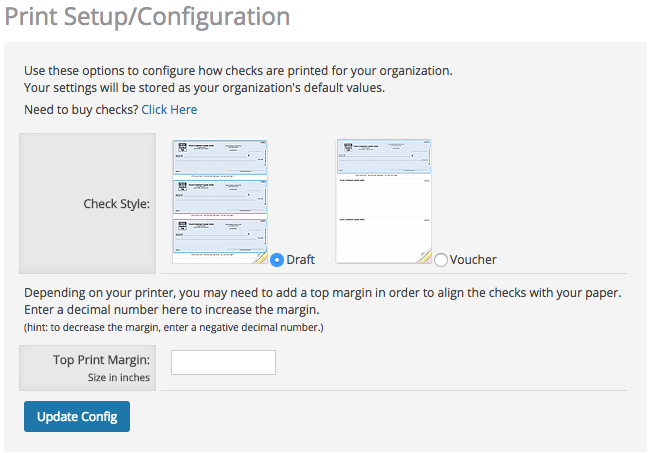
You might need to edit configuration so that your checks print correctly. If this is your first time printing a check, you’ll need to be sure to choose the correct style of check. Draft style allows for printing three checks per page. Voucher style prints a single check at the top of the page and two check stubs below.
You can also edit the print margin settings. We recommend that you print a test run on a blank sheet of paper and hold that up to one page of your check stock to check the alignment. If the printed fields are too high or too low, you can increase or decrease the margins by entering a number in the Top Print Margin field. Start small and work your way up. Each time you change the number in the Top Print Margin box, you’ll need to click the Update Config button.
Reprinting a Check:
You can reprint a previously printed check in Aplos. You will need to search for the check that you are wanting to reprint from the check print screen.
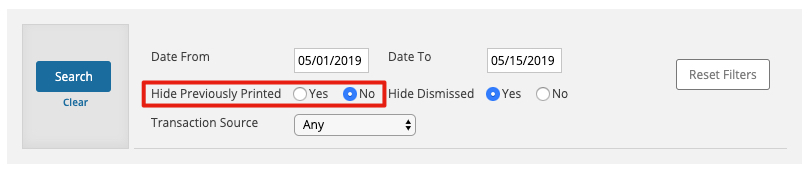
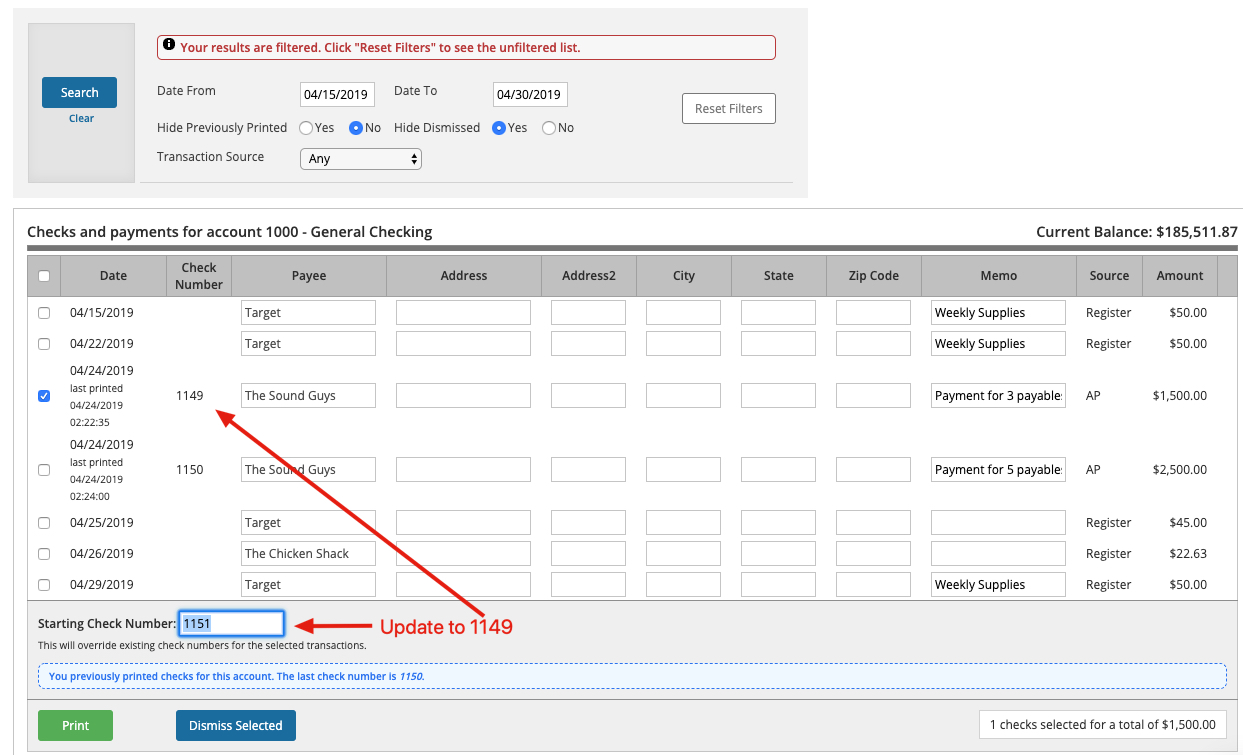
Since you’ve already printed this check, you’ll want to toggle the option for Hide Previously Printed to “No.” You can also set a date range if you have one.
Once you have updated the search options click the Search button to apply them. This will show you the checks that you’ve already printed. So from here you can check off the one that you need to print. You will want to make sure you adjust the starting check number to the proper one so that the order stays the same.
Ordering Your Check Stock:
If you do not already have checks for your organization, you can purchase them through our preferred provider. They have options for both a voucher and draft style.
Dismissing Transaction on the Check Print Page
The Check Print page in Aplos is a list of expenses that you’ve entered either in a register, or from your Accounts Payable module. This is basically a queue of transactions that you could print a check for. This list might contain transactions paid with a debit card, or maybe setup to pay from auto-pay, so these won’t ever need to be printed as a check. We have a dismiss option so that you can remove these from your queue, leaving you with a list of transactions that only need a check printed.
Dismissing transactions from your Check Print Page:
From your Check Print page, check the box on the left of each transaction that you’d like to dismiss.

Once you’ve selected all of the transactions that you’d like to hide, click “Dismiss Selected.” This will move those transactions to a hidden page.
Accessing Dismissed Transactions:

Once you’ve dismissed transaction from the Check Print page, you can access them at a later point. From your search options at the top of the page, click the radio button for “No” next to Hide Dismissed, then click Search.This will show you a list of any transactions that you’ve previously dismissed. If you need to restore them back to your Check Print page, you can do so by checking the box on the left of each transaction that you’d like to restore, then click “Show Selected”. Additionally, you can print checks directly from your page of dismissed transactions.

Now, you’ll notice that those transaction show on your queue of transactions that you can print a check for. Once printed, all transactions will move to a different hidden page of previously printed checks.