Printers for Check-In Labels
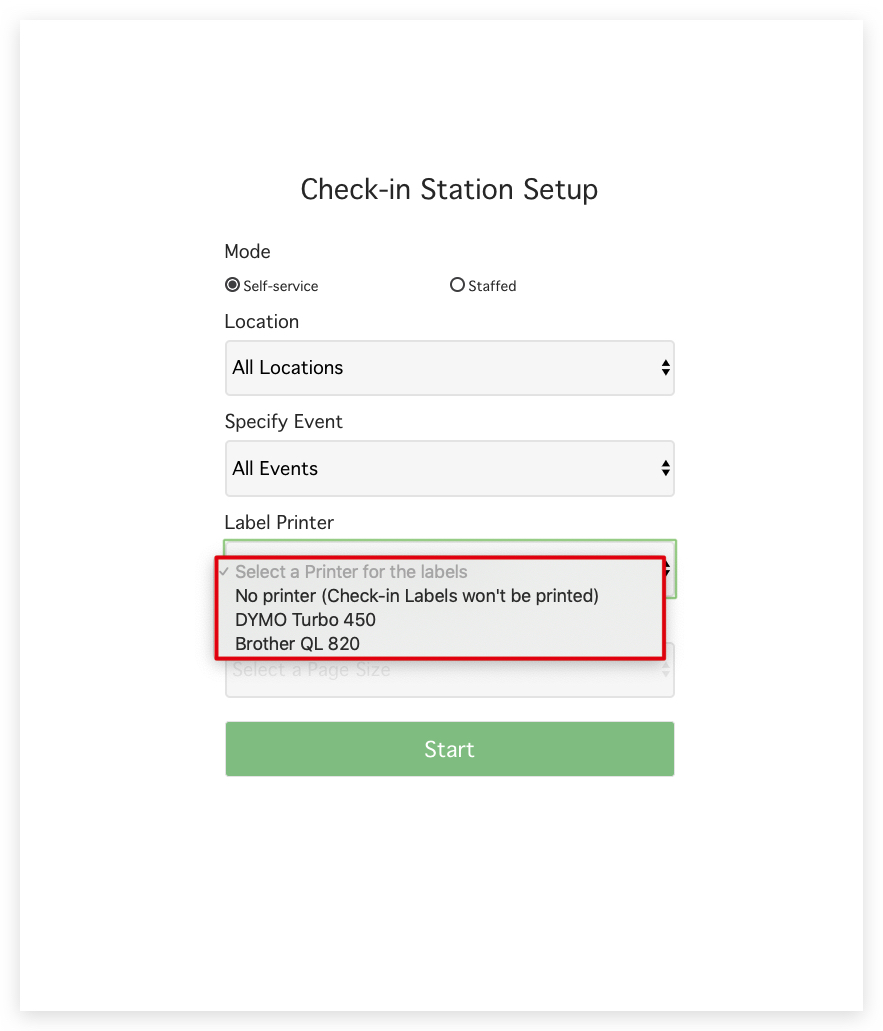
When you click and sign into the Kiosk it’ll take you to the Check-In Station Setup. Upon setting up either Self-service or Staffed you’ll have the option to choose which printer to use. You’ll have three options to choose from:
- No Printer
- DYMO Turbo 450
- Brother QL 820
Label Printer & Sizes
There are two printers available to select. DYMO Turbo 450 and Brother QL 820. For additional information, click on each below.
*All printers require purchasing labels separately*
AirPlay Printing
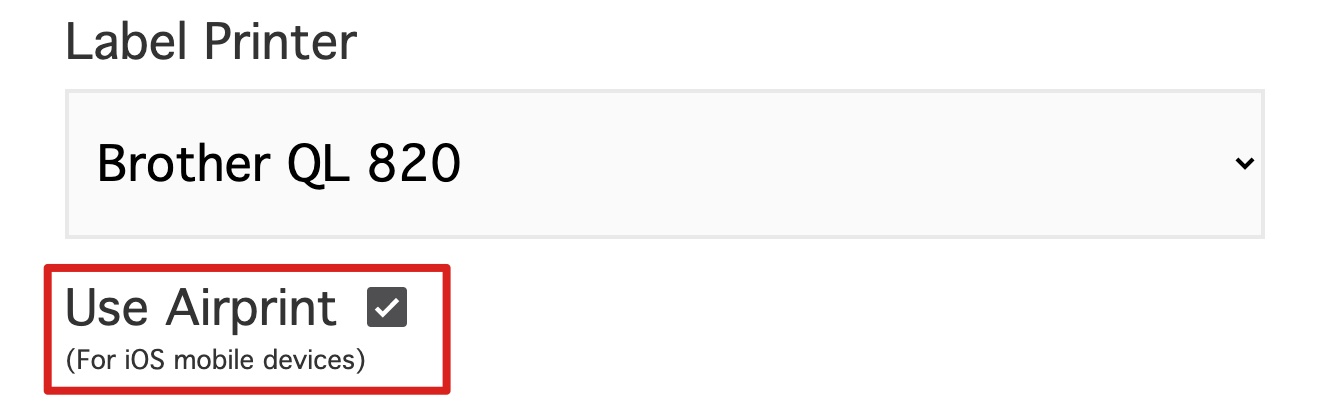
If you wish to utilize the Brother QL 820 Airplay feature on your iPad, you can enable this function at the Check-in Station Setup by selecting the Brother QL 820 printer. This will allow you to select the Use Airprint option. Click to enable and finish your Check-in Station Setup.
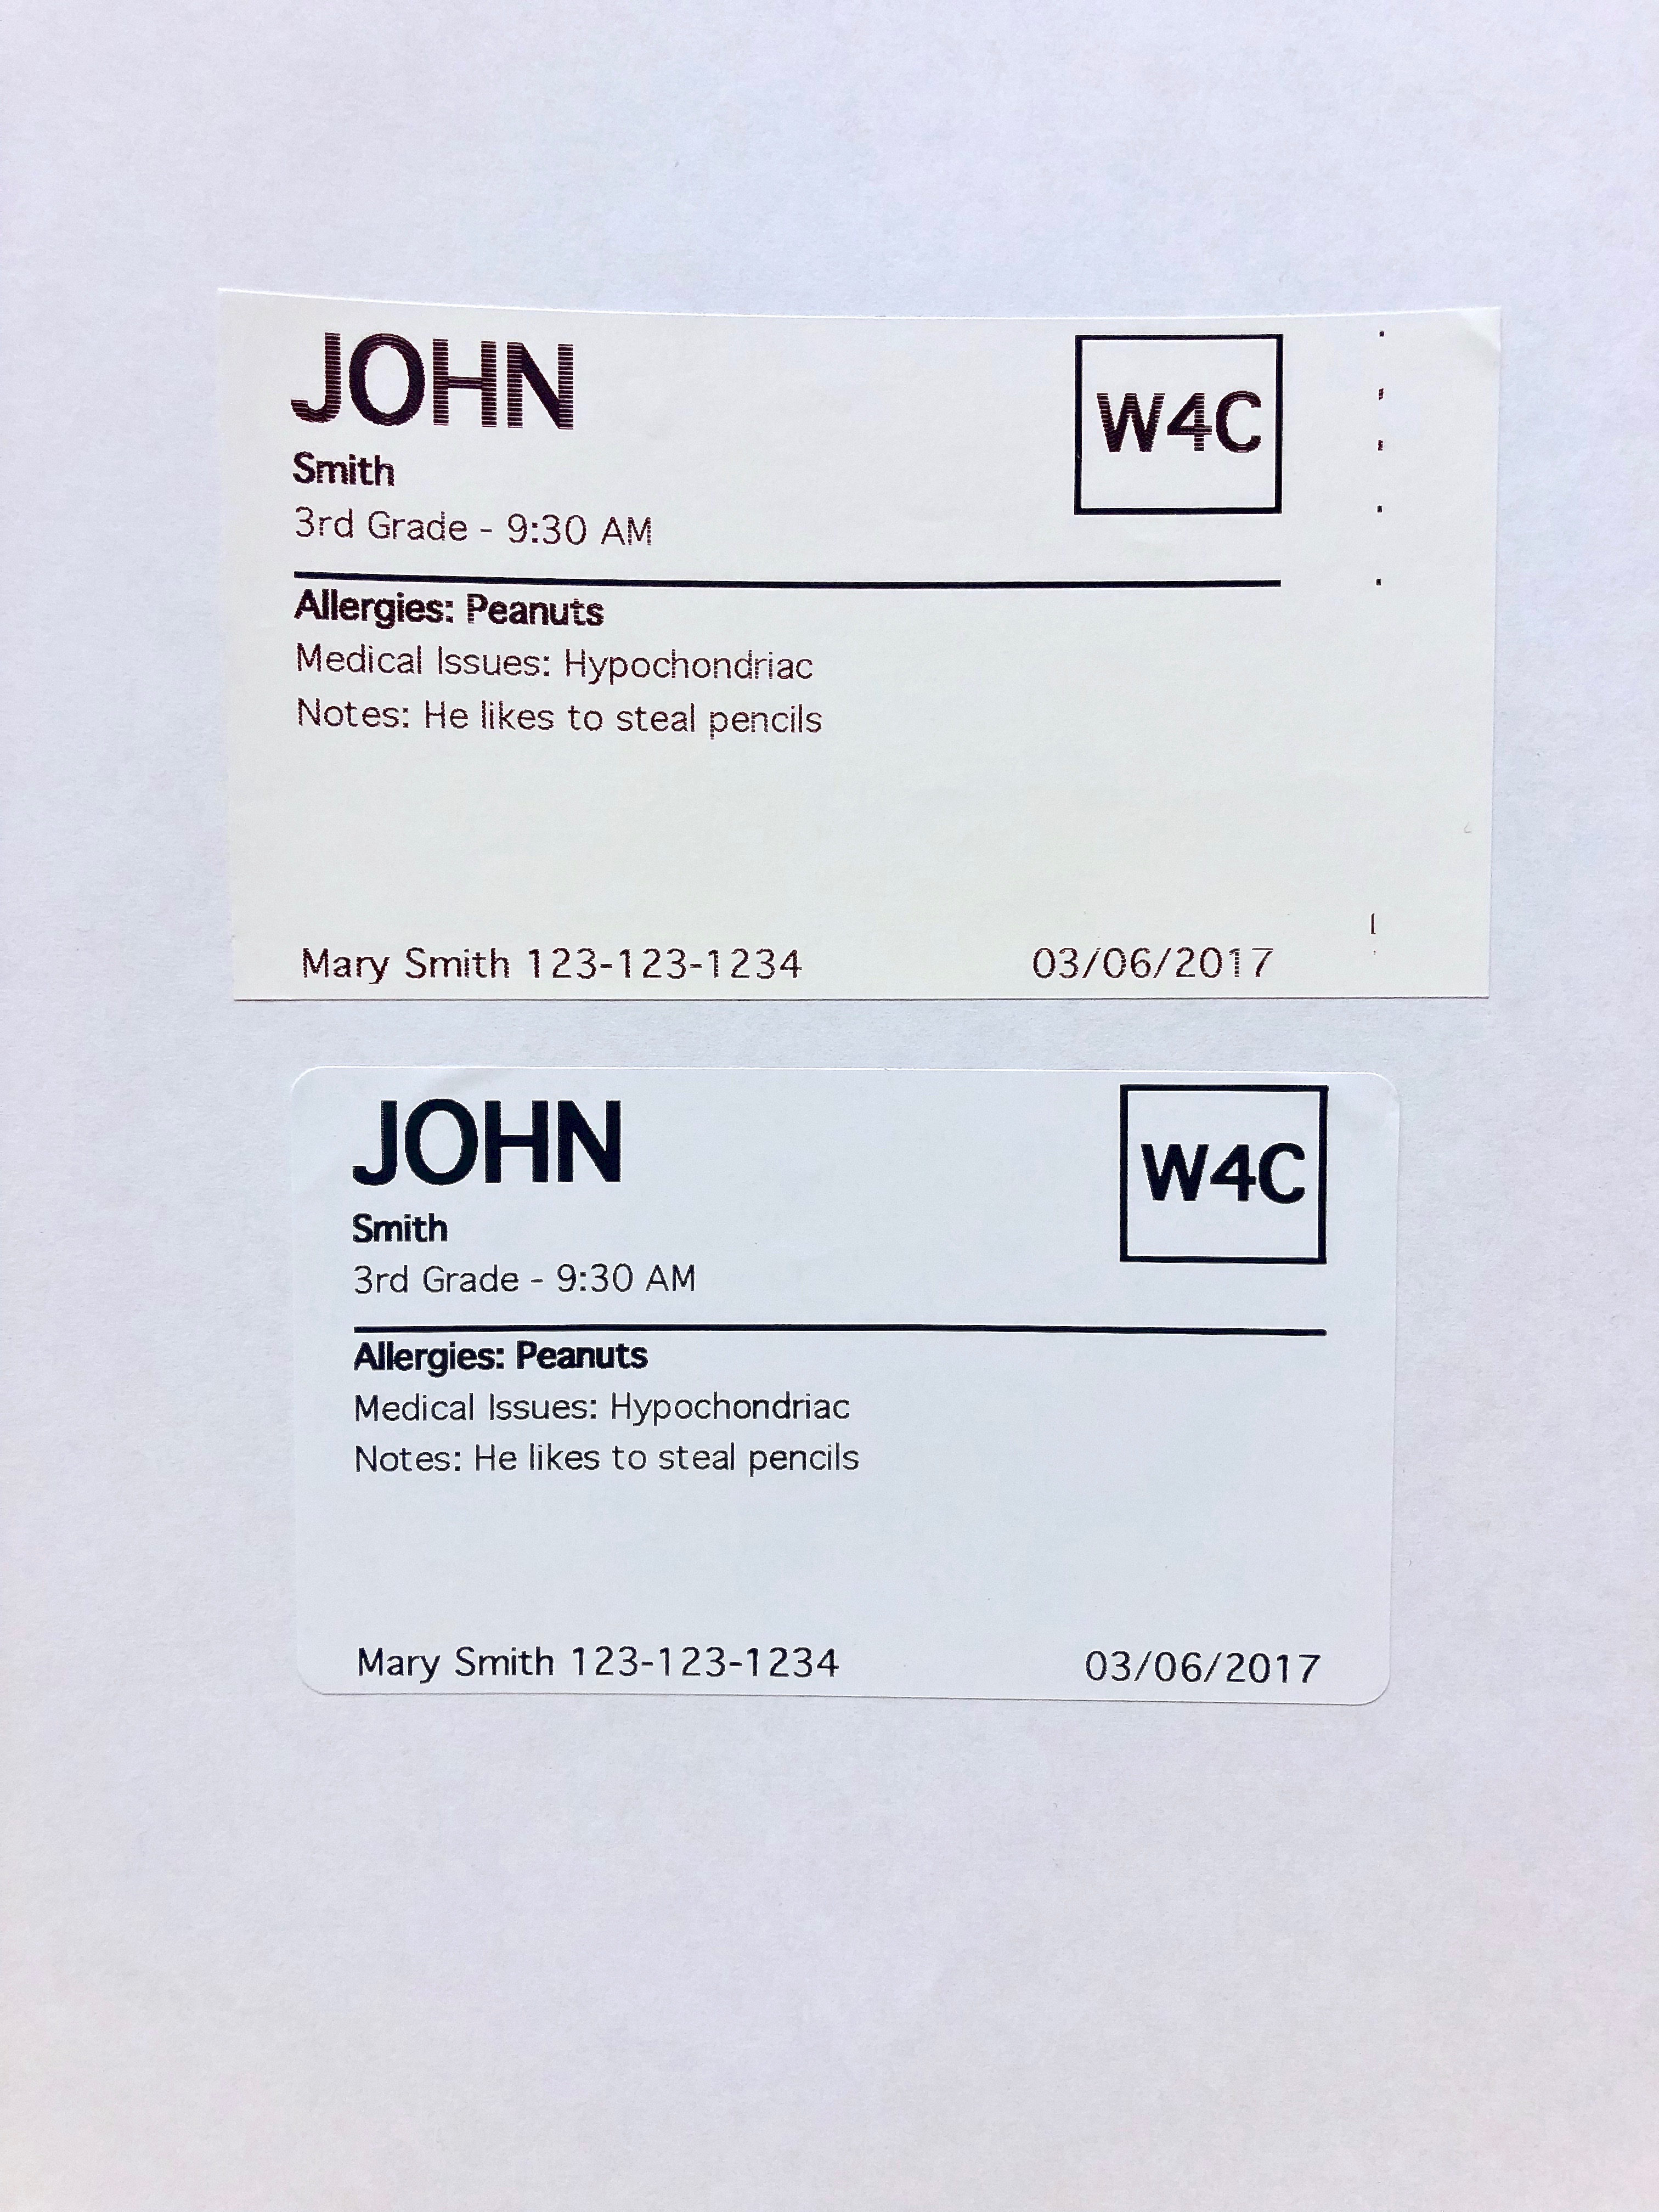
Label Examples
The top example is from DYMO Turbo 450.
The bottom is from Brother QL 820.
Label Configuration
Label configuration allows you to configure your labels you will be printing with custom fields. This allows you to view the child and parent label and examples for both. To get to the configuration screen you will need to select the actions button on the top right as seen below:

This is where you can view your Label and Custom Fields. These examples are the templates for the check-in labels. To further configure and select your custom fields, three of the fields require new Custom Fields to be created then associated with the fields in the label. See below for more information.

Custom Fields on Check-In Labels
Custom Fields allow you to further customize what fields show up on your labels for Check-In. To create Custom Fields go HERE. Click on the green button on the top right to create a new custom field and then go back to the Label Configuration screen HERE.

Edit Label Configuration
After you have your Custom Fields and are needing to select them, select the Edit Configuration button on the top right.

This will pop a Custom Fields widget where you can select the custom fields you created as seen below:
