The Accounts Receivable import tool can assist users who wish to create a large volume of new receivables, such as uploading historical information when first setting up your account or creating a batch of new receivables. To import receivables, you will format it to the provided Aplos Import Template and import it to the Import Accounts Receivable page.
The Accounts Receivable import tool can be utilized by any user with role permissions of administrator, manager, accounting manager, or Accounts Receivable manager.
Formatting Your Import File
Downloading the Accounts Receivable Import Template
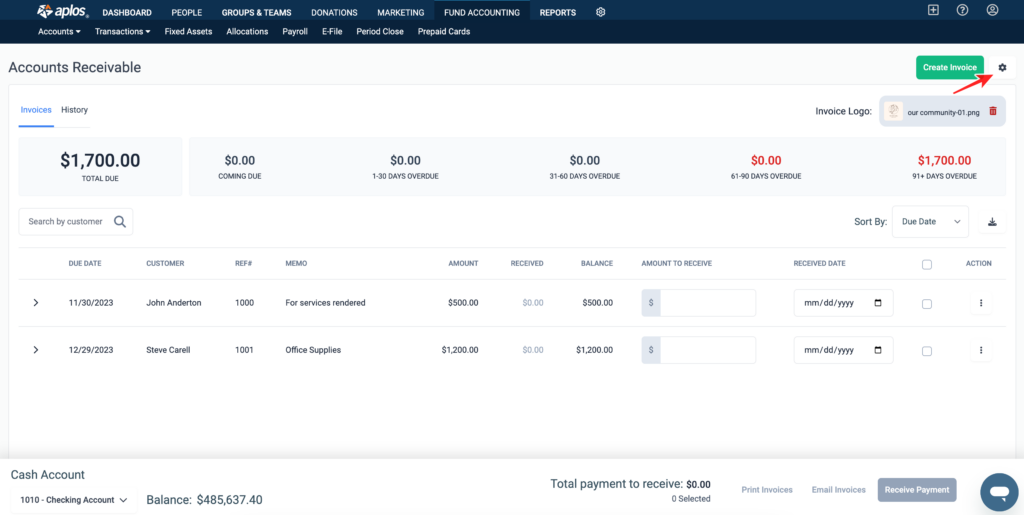
From the Accounts Receivable screen, click the gear icon at the top right and then choose “Import.”
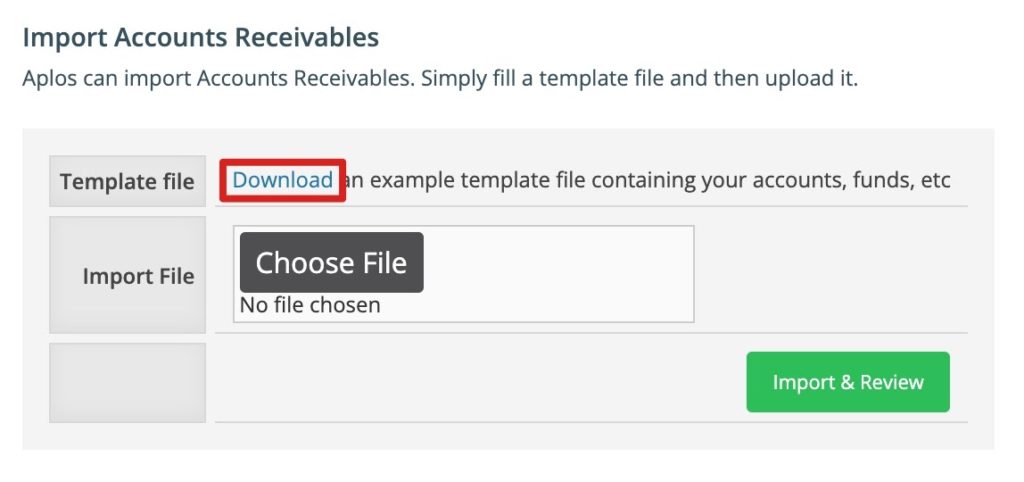
From the Import Accounts Receivable screen, click “Download” to save the file for formatting. You will need Excel or a similar spreadsheet program that can save files in a .xls or .xlsx format.
Once downloaded, you can open the template. The first tab titled “Imports” is a templated format for your Accounts Receivable. The following tabs include the list of your accounts, funds, and tags that are available in Aplos. When formatting your file, do not add any columns or rename any of the columns in the template.
Formatting Receivable Details for Import
For each Accounts Receivable entry, an Invoice Date, Terms, and Due Date are required.
- Invoice Date: The invoice date is a unique identifier to distinguish when a new account receivable entry starts. You will need to note one date on the first row of your account receivable entry. Invoice date is the date of the receivable, and it will be used as its accrual date. This is a required field.
- Terms: The Terms field refers to the due-date range in which you expect this receivable to be paid. It must contain one of the following: no terms, due on receipt, net 15, net 30, or net 60. This is a required field.
- Due Date: The due date refers to when the bill is expected to be paid. This should be a valid Excel date (format: mm/dd/yyyy), and it is required if “Terms” is set for “no terms.” Leave the due date blank if “Terms” is not equal to “no terms.”
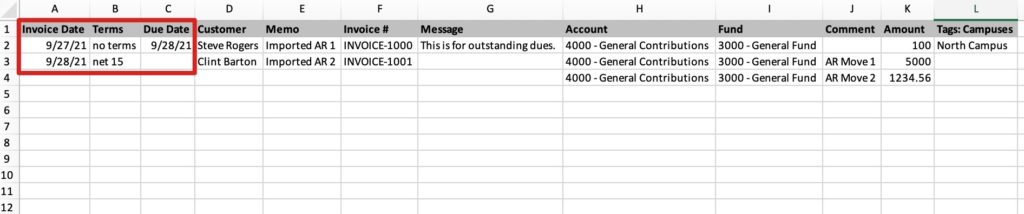
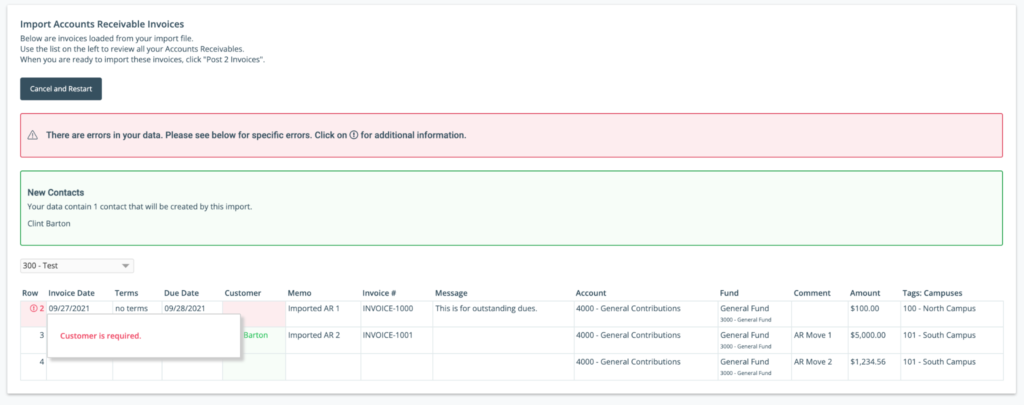
- Customer: Customer refers to the contact name that will be used for the receivable. If the contact does not exist, it will be created upon import. This is a required field for upload. To avoid creating a duplicate contact, ensure that the spelling of the customer’s name matches the entry in the contact database exactly. When uploading and reviewing your file, you can view any new contacts that will be created when the import is completed.
- Memo: The memo is an internal note for the receivable. This is a required field for upload.
- Invoice #: This is the number you would like to assign to the invoice; it is usually increased in increments of one with each new invoice. This will display on the invoice if it is printed or emailed. It must be a unique value, and the field is optional for upload.
- Message: This is a custom field of text that will be displayed on your invoice.

Assigning Accounts, Funds, Comments, and Amounts
Next, you will need to enter your account and fund for each line item of your Accounts Receivable. If your bill needs to be split across multiple accounts or funds, you can create a second line item for the invoice and provide the additional account or fund with the associated amount. To improve efficiency, utilize the tabs on the worksheet to copy and paste the accounts, funds, or tags into the corresponding cells. This will provide you with the correct formatting for your accounts and improve the success of your import.
- Account: Commonly an income account, the account will need to follow the format shown in the image above of (NUMBER – NAME). This is a required field for upload.
- Fund: The fund can be the number and name, the fund name, or just the fund number. This is a required field for upload.
- Comment: This is a text field that will show on transactional reports for the account, fund, or tag you are reviewing. This will display on the invoice if printed or emailed.
- Amount: This is the dollar amount of the provided bill. If the bill is split, insert the amount of each split in their corresponding line item because the import will calculate the total amount.

Assigning a Tag to Receivable Imports
If you have tags enabled, you’ll also have the option to include a tag for each invoice line item. The Import Template will have columns added to the right of the Amount column for your enabled tag layers. To check if you have tags enabled, you can view the Tag Management screen.
You can enter your tag name for any row on your Import Template. For example, if you have a tag layer enabled called Campuses, you will see “Tags: Campuses” as one of your columns. If you have a tag for “North Campus,” you will enter that in the appropriate field.

The tag formatting can be the number and name (100 – North Campus), the tag name (North Campus), or just the tag number (100). You can also utilize the tabs in the worksheet to copy and paste the tags into the corresponding cells.
Importing Required Tags
If your organization requires tags per transaction, it is recommended to include tags in the import. However, it is not required, and you can edit the entry after you import your file and post the entries to add any required tags.
Importing 990 Tags
If your organization has 990 tags enabled, a 990 tag is recommended when importing. However, you can complete the import without having 990 tags. You can also edit the Account Receivable after you import your file and post the entries to add 990 tags.
Saving the Import Template
Once you review the data and ensure the accuracy of each entry, you will want to save the file under one of the following format types: .xlsx or .xls. To do so, click “File” and then “Save As” at the top of your screen. Choose where to save your worksheet, select the correct file format, and click “Save.”
Importing and Posting AR Entries
Once your file is formatted and you have saved it, you’re ready to import. From the Import Accounts Receivable screen, click the Choose File button and select your file. Then click “Import & Review.”
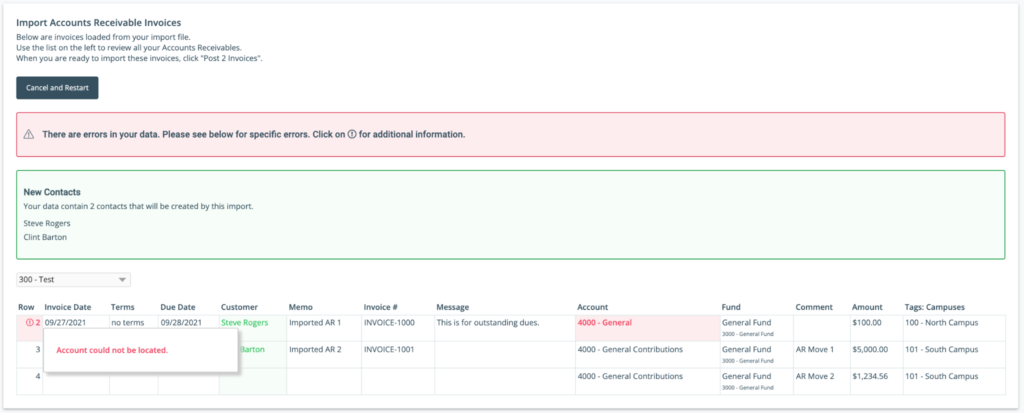
Once uploaded, you will review your imported file before completing the import and posting the new receivables in the system. From this screen, you can review errors in your file and view new contacts that will be created by this import.
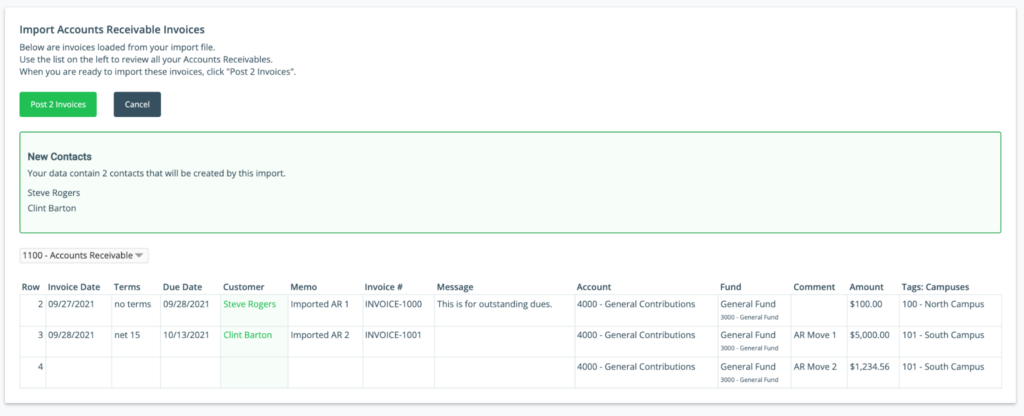
Post Invoice: You can post the invoices if there were no errors and you are ready to finish the import.
Once you import them, they will hit your accounting and become an open invoice in the Accounts Receivable module. You can review and edit them further on this screen. Until you post the entry, it is only pending and not yet applied to your accounting.
Cancel: You can click “Cancel” to go back to the Accounts Receivable screen and not import the file.
Cancel and Restart: If you have an error in your file, you will need to update the file in Excel to correct the error and re-import your file. From the Review screen, click “Cancel and Restart.” This will take you back to the Accounts Receivable screen where you can follow the steps for Importing Your File to continue.
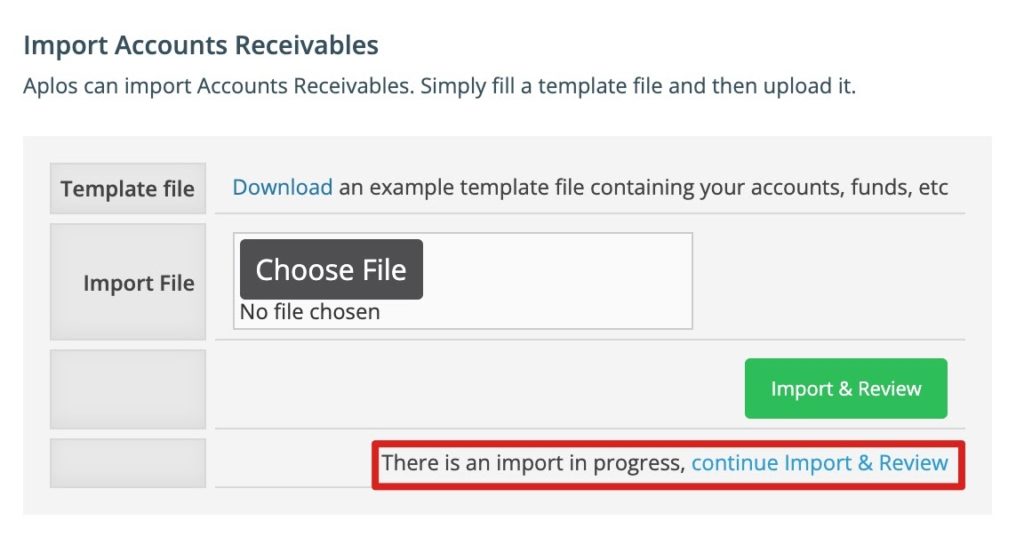
If you leave the Importing Accounts Receivable page at any point, you can go back to that screen and select “Continue Import & Review” to complete your pending import.
If you need assistance with this process, feel free to reach out to our support team.
AR Import Error Handling
When there is an error in your file, you will see a message with entries that will show an alert symbol and red text.
To successfully import your entries, you will need to update the file in Excel and re-import it. From the Review screen, click “Cancel and Restart.” This will take you back to the Accounts Receivable screen where you can follow the steps for Importing Your File to continue.
Once errors are cleaned up in the Excel file, you will be able to re-import and post any pending entries.
Unrecognized Category (Account, Fund, Tag)
If you have included an unrecognized account, fund, or tag on your Import Template, you will see a red error message. You will need to enter the correct account, fund, or tag name to proceed. Utilize the provided account or fund names on the Import Template tabs to resolve this error.
Importing Without Required Information
If you import your template and forget to include a required field, you will receive the following error. For information on which fields are required, see above or refer to the legend in the template file.
Importing Without a Date Combines Two Invoices
If you import your template and a date is missing for any of the entries, the import will not recognize the individual entry and will skip to the next one with a valid date. The entry with the missing date will become a part of the entry above it. You’ll need to go back to your template, add a date on the missing row, and re-import.
