If you need to get caught up on entering donations or wish to bring in donations from another giving platform, you can import a batch of donations using an Excel template. Importing your donations into the Donation section of Aplos will ensure you are tracking each donation by Donor and using the correct Purpose. If you desire, you can also create a deposit of these donations to track them in the Accounting.
Here is a quick walkthrough of how to import donations in Aplos:
Step 1: Download The Template
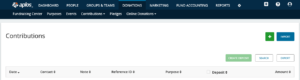
Navigate to the Contributions Screen and Click the Import button. (Donations > Contributions > Contributions).
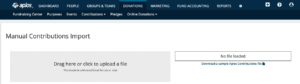
On this page, you will find a link to a sample Aplos contributions file. Download this file and follow the key to format your donations before importing.
Step 2: Enter Your Donations
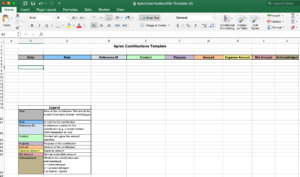
Input the available information for each donation into the template. The required fields are the Date, Contact, Purpose, and Amount.
Expense Amount: This optional field is available if there was a transaction fee or other expense tied to the donation that should appear in an Accounting Expense account.
NTD Amount: This optional field can be used to note the amount of the contribution that is considered non-deductible for tax purposes, such as event tickets.
Note: If your Contact name does not match exactly, it will create a new contact that can be merged with the correct contact later.
Step 3: Import Your File
Save your file to your computer’s desktop. Then drag and drop it to your import page. You will notice your donations listed on the bottom half of your page. From here you can make any changes to the donations, if needed. Then import.
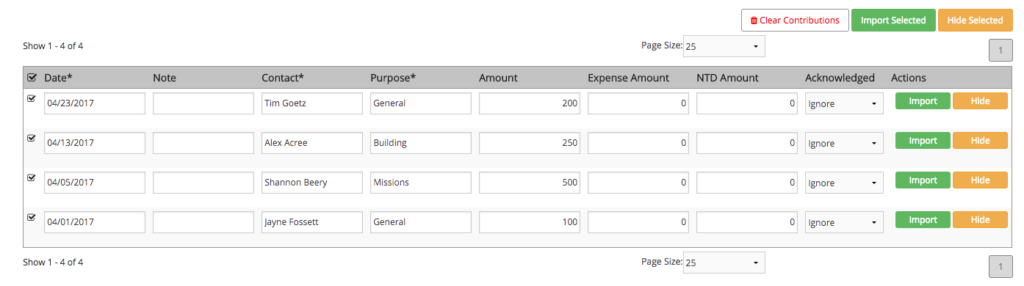
To import all donations at once, select the donations by checking the box on the left of the donation, then click Import Selected. If you see a donation you do not wish to import, you can select Hide to remove it from the import.
Importing these will save them as Contributions. After clicking Create Deposit, the Contributions Deposit form will open. Select the date of your deposit, add a batch name and description, choose the bank account where this deposit was made, and click Save.
Need more in-depth info? Check out our article on Contributions and Deposits.
Other Related Articles:
Collecting Online Donations in Aplos
How to Import Donations from Paypal