
You’ve been using some of the best systems in the nonprofit technology space— Now let’s get them synced up! This integration allows users to maximize efficiency by avoiding the need to complete double entry within their church management system and their Aplos accounting. Now, contributions entered into your Church Community Builder account will funnel into your Aplos accounting, meaning you’re free to spend more time on your mission instead of your administrative duties. We’d say that’s a huge win!
Follow the steps below to begin using this integration. We suggest having both your Aplos and Church Community Builder accounts open and accessible when completing the set-up.
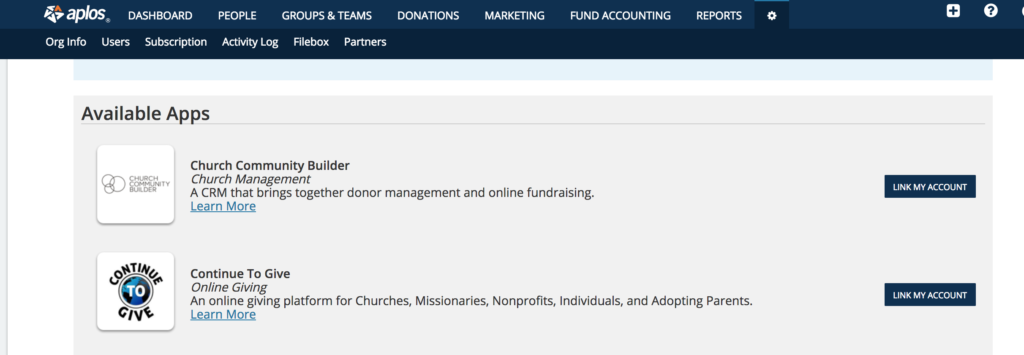
Step 1: Login to your Aplos account and make your way to the partners section under settings and select “Link My Account” for the Church Community Builder Application.
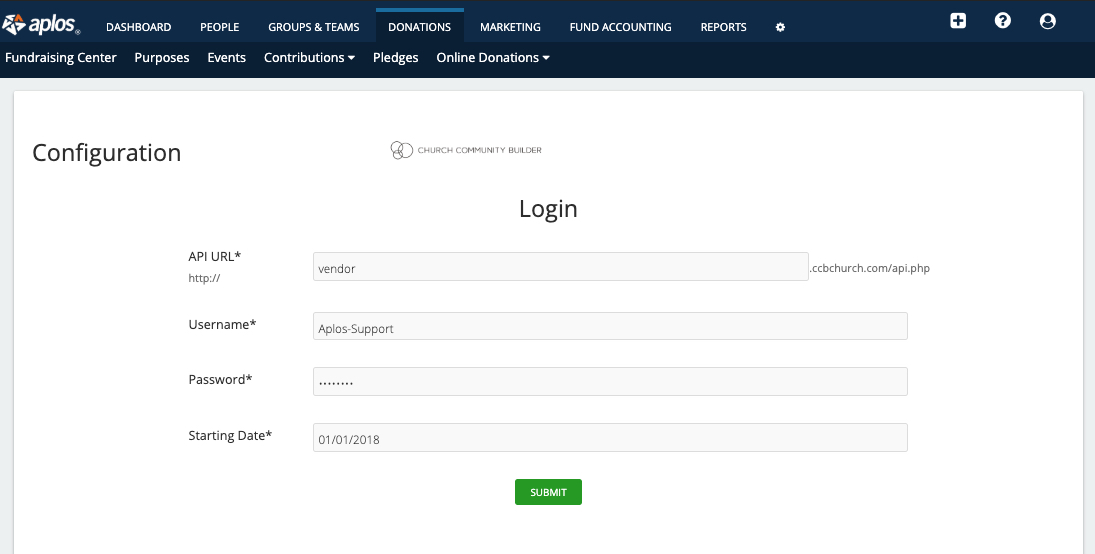
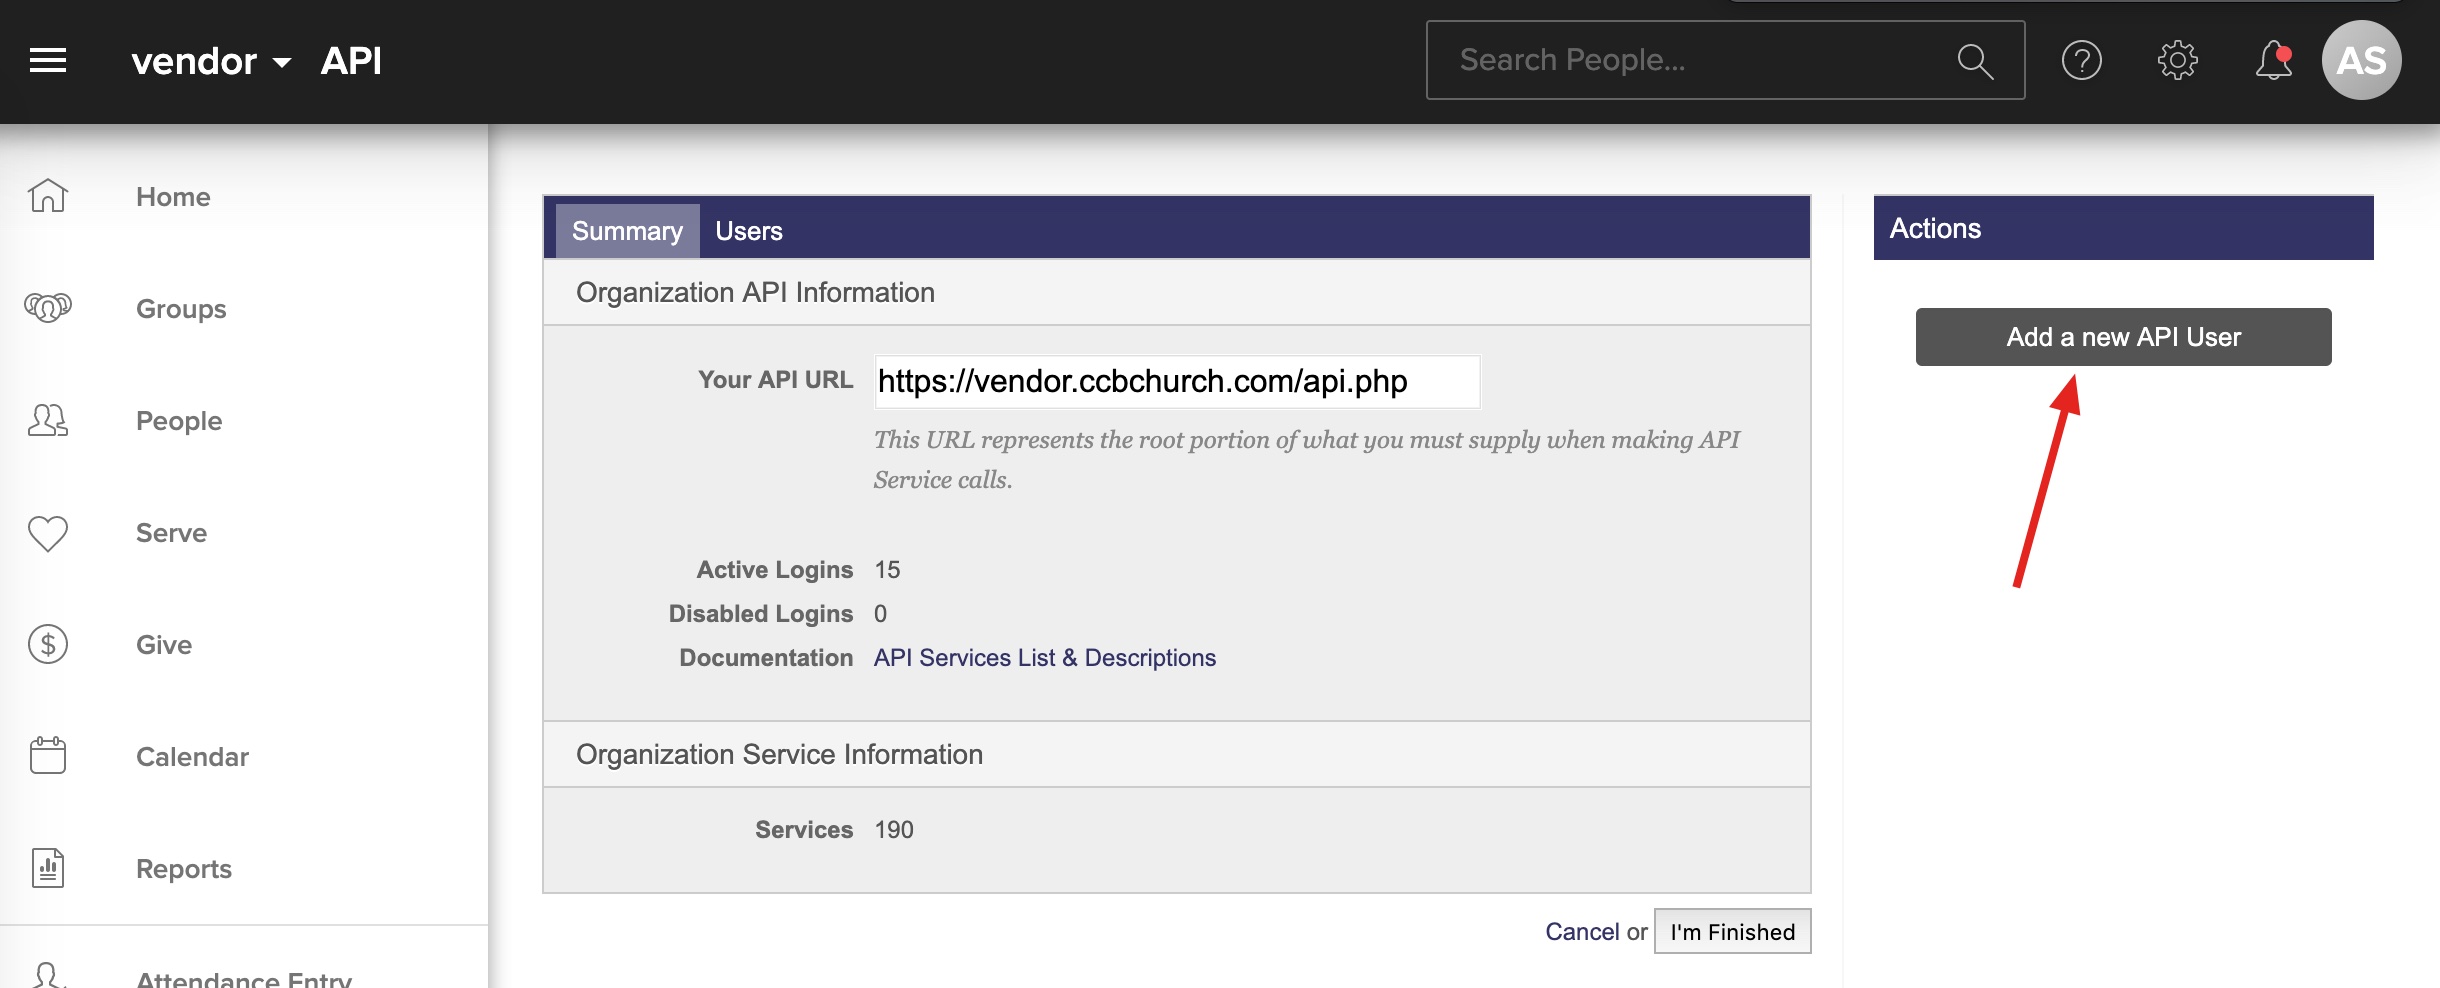
Step 2: Complete the setup form by entering in your Church Community Builder API URL, Username, Password. All of which are provided in your Church Community Builder account.
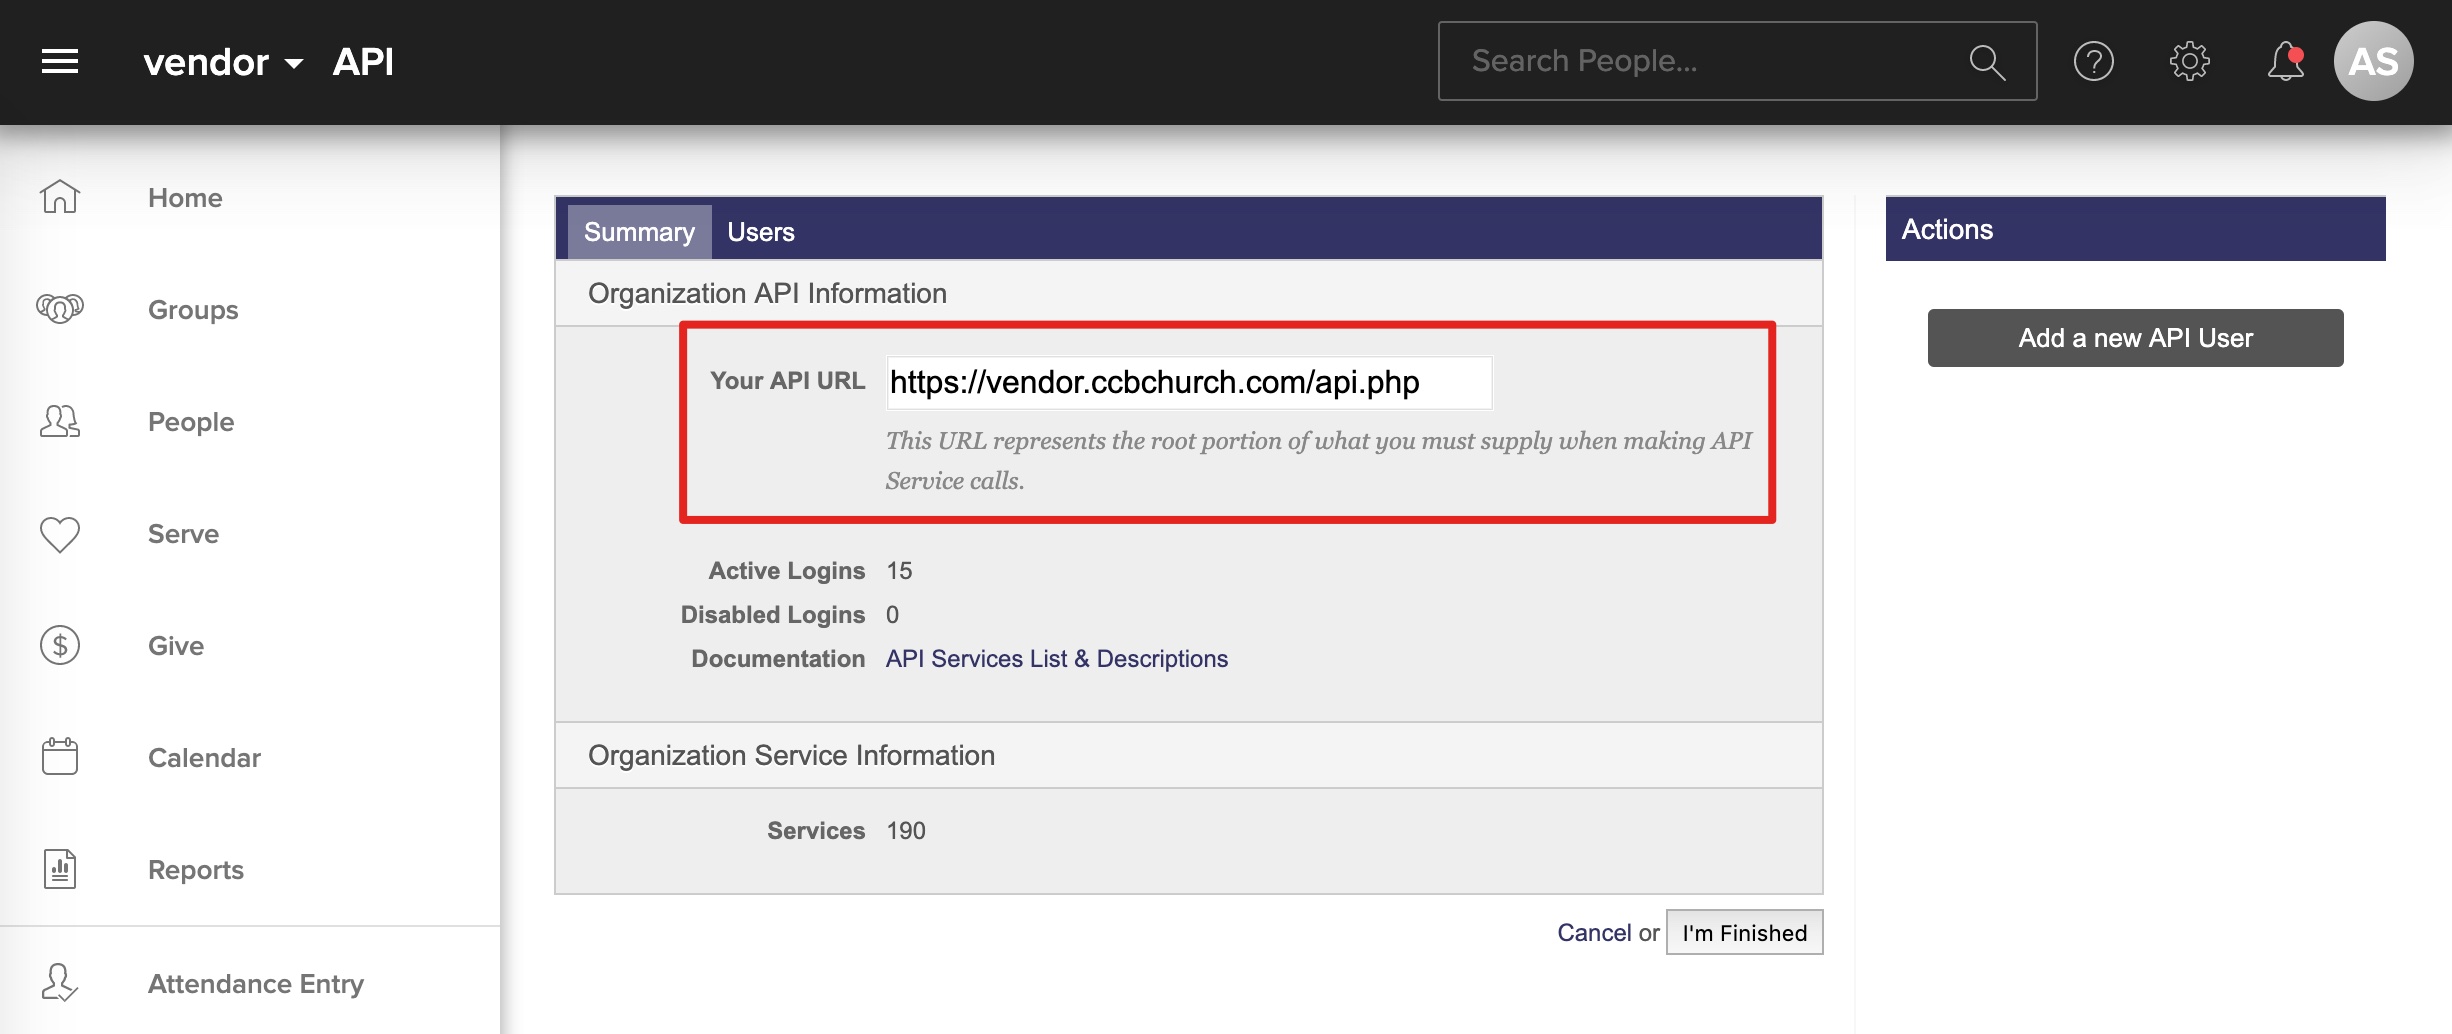 (Figure 1: API URL)
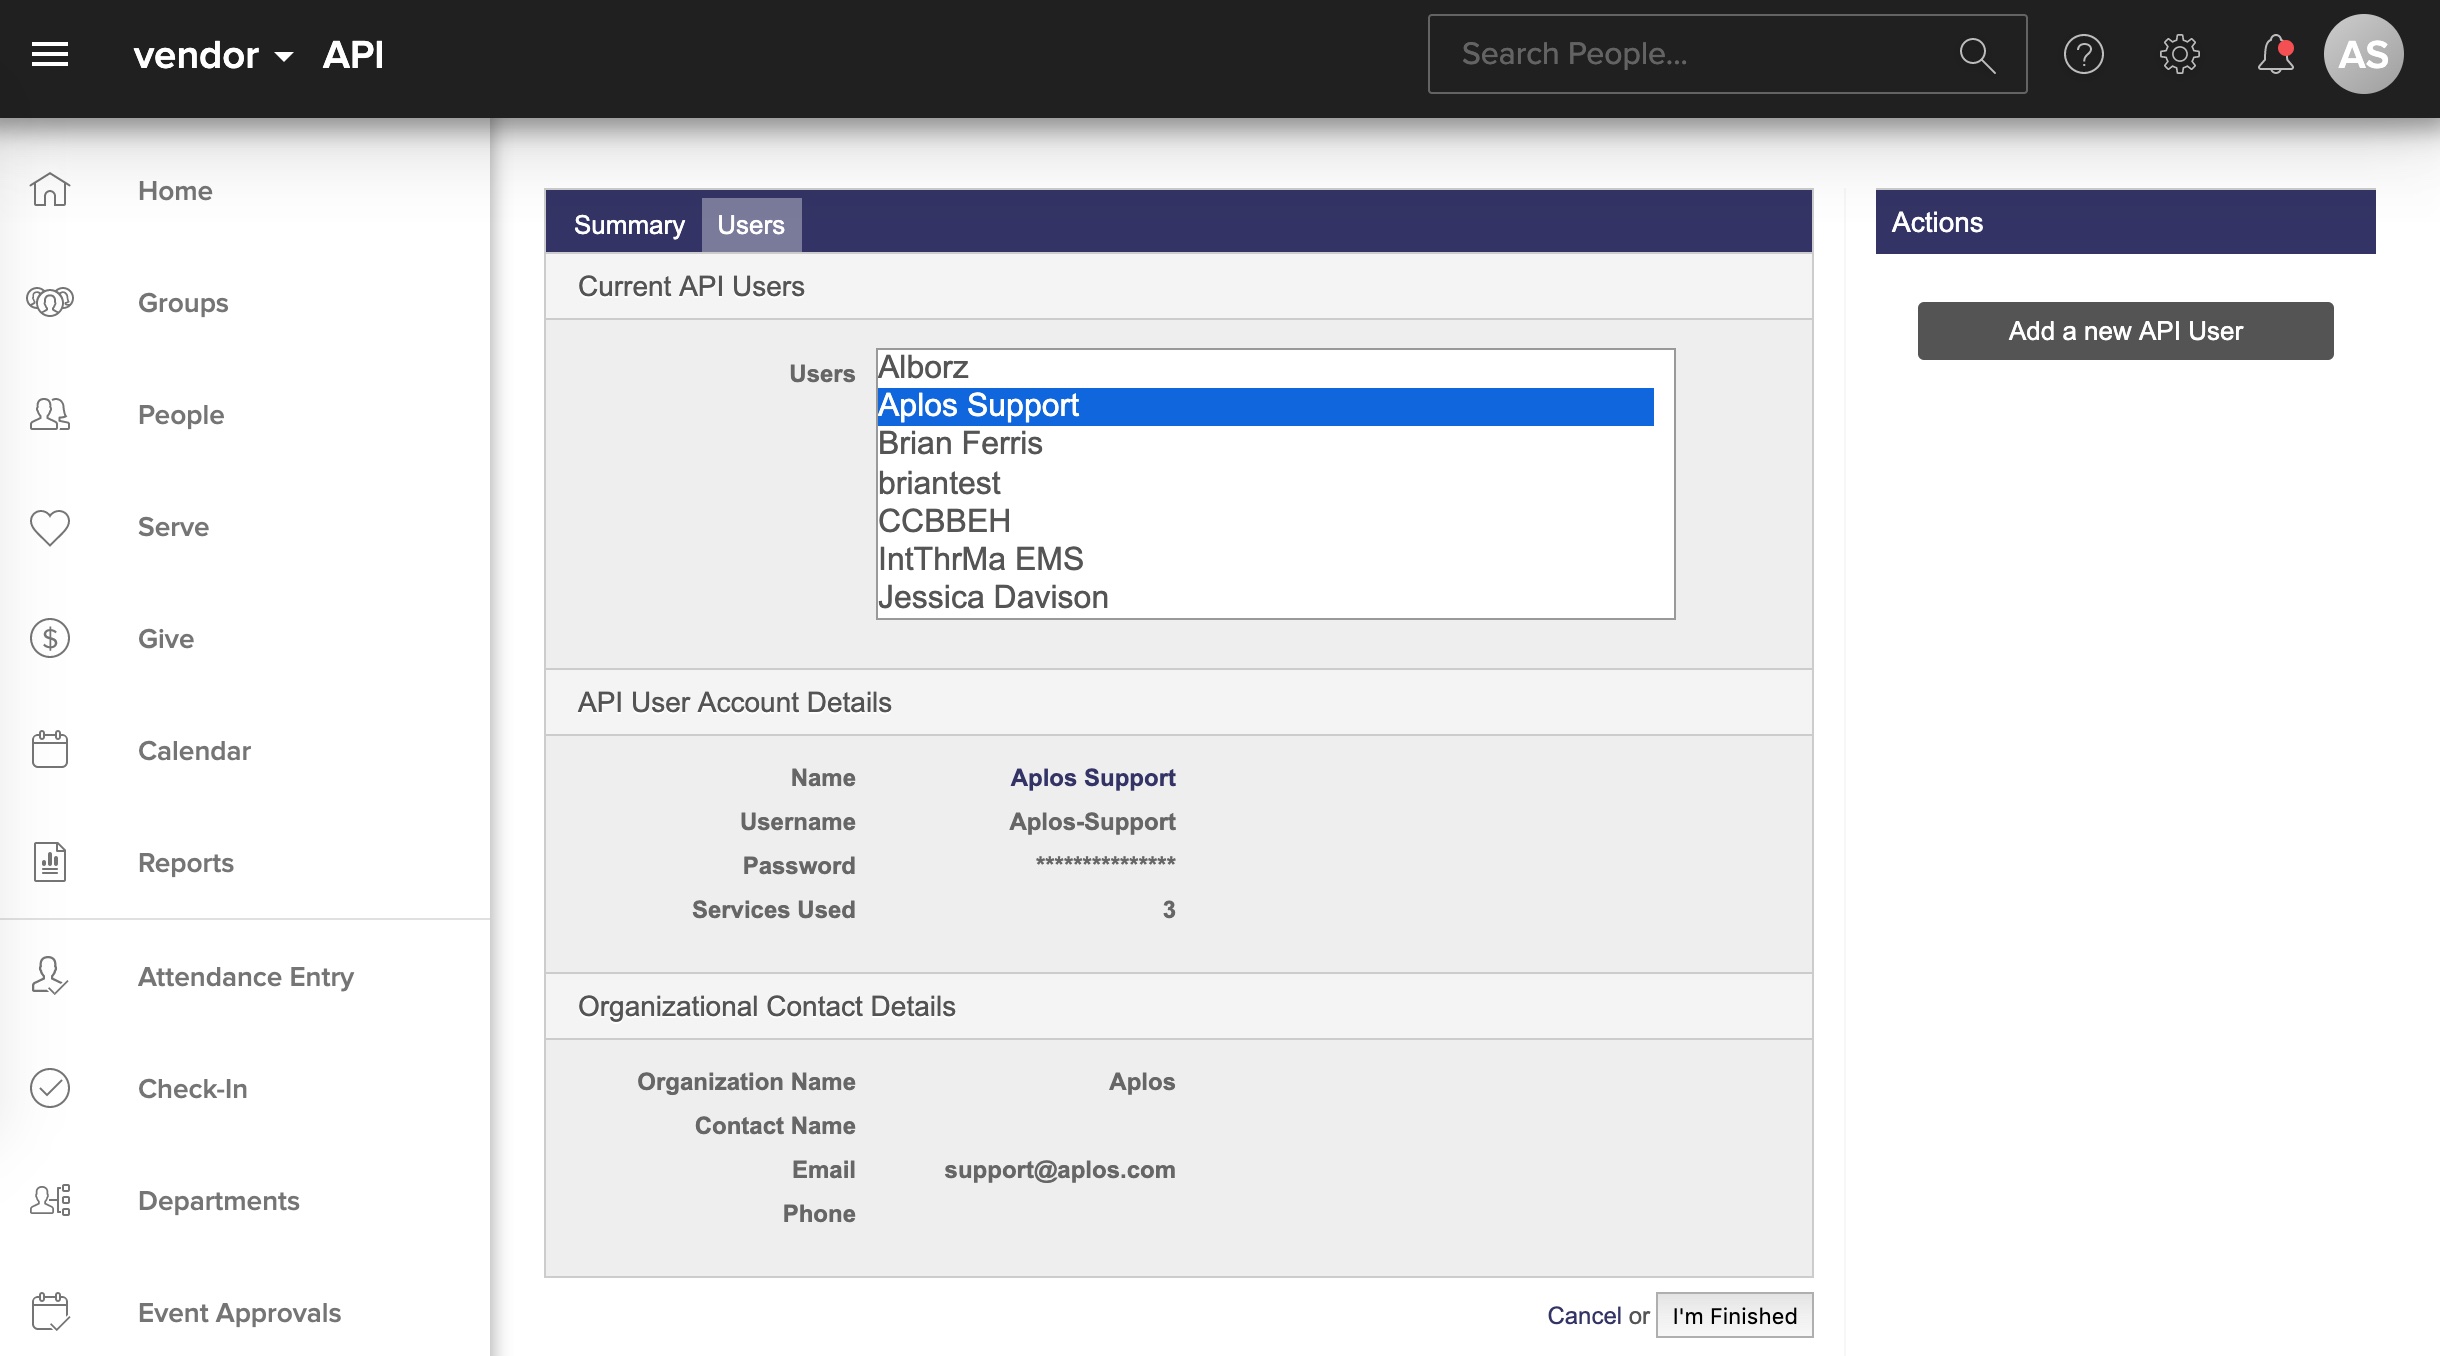
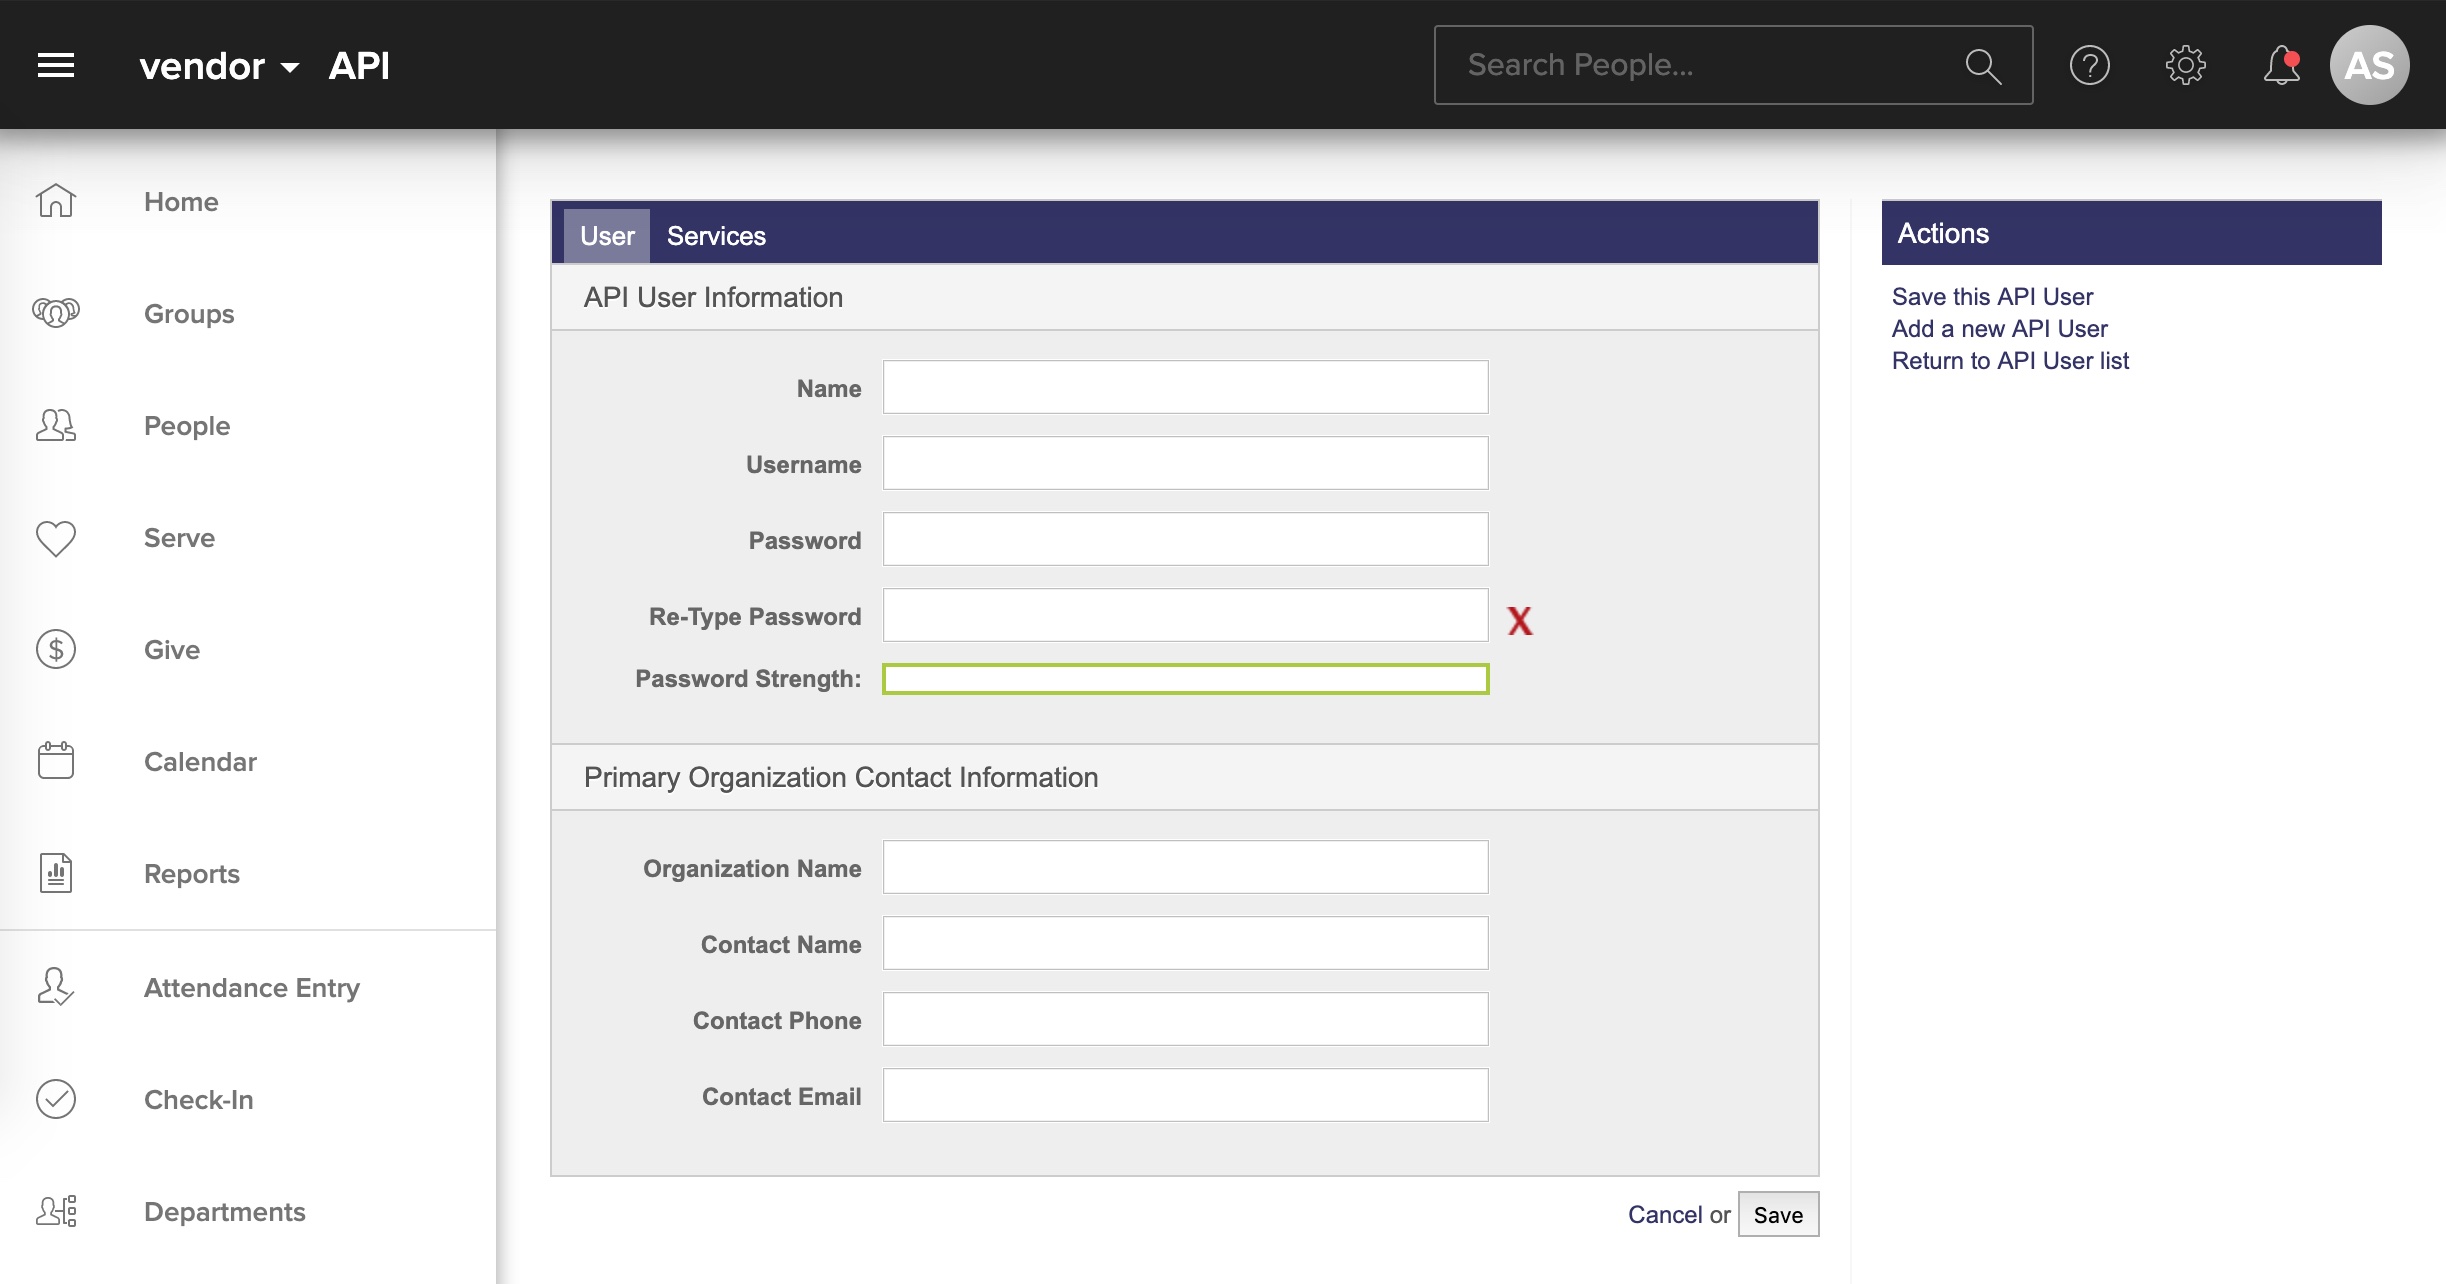
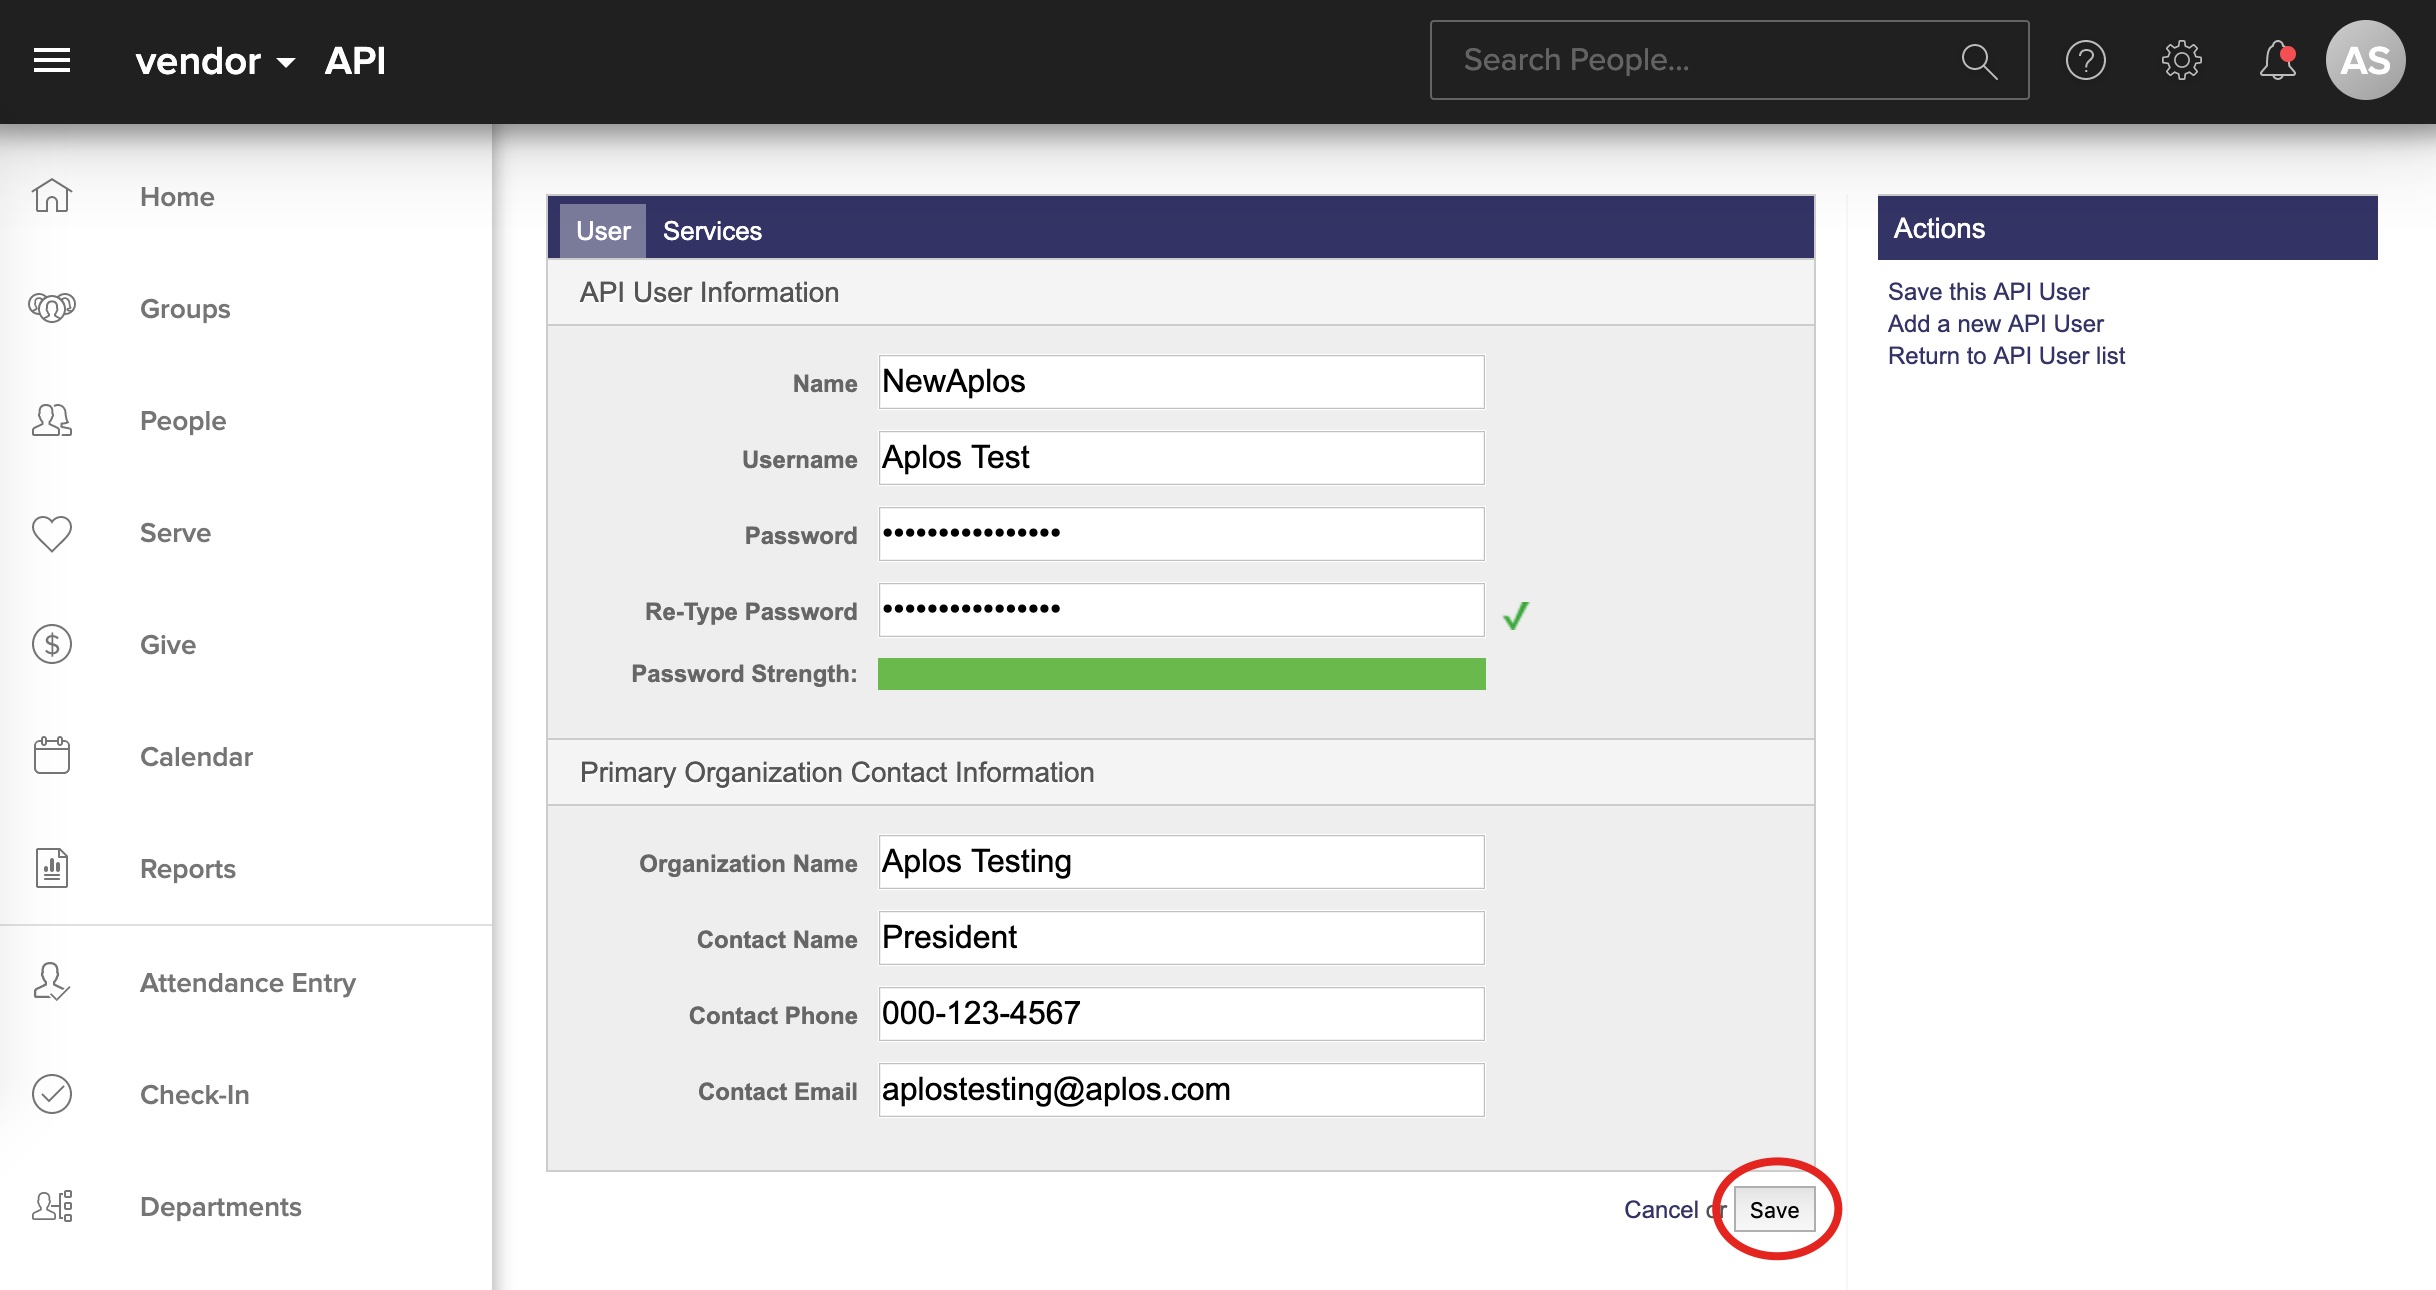
(Figure 2: API User)
If you haven’t previously set-up a API username in your Church Community Builder account please follow the steps below. If you already have an API user skip down to Step 3.
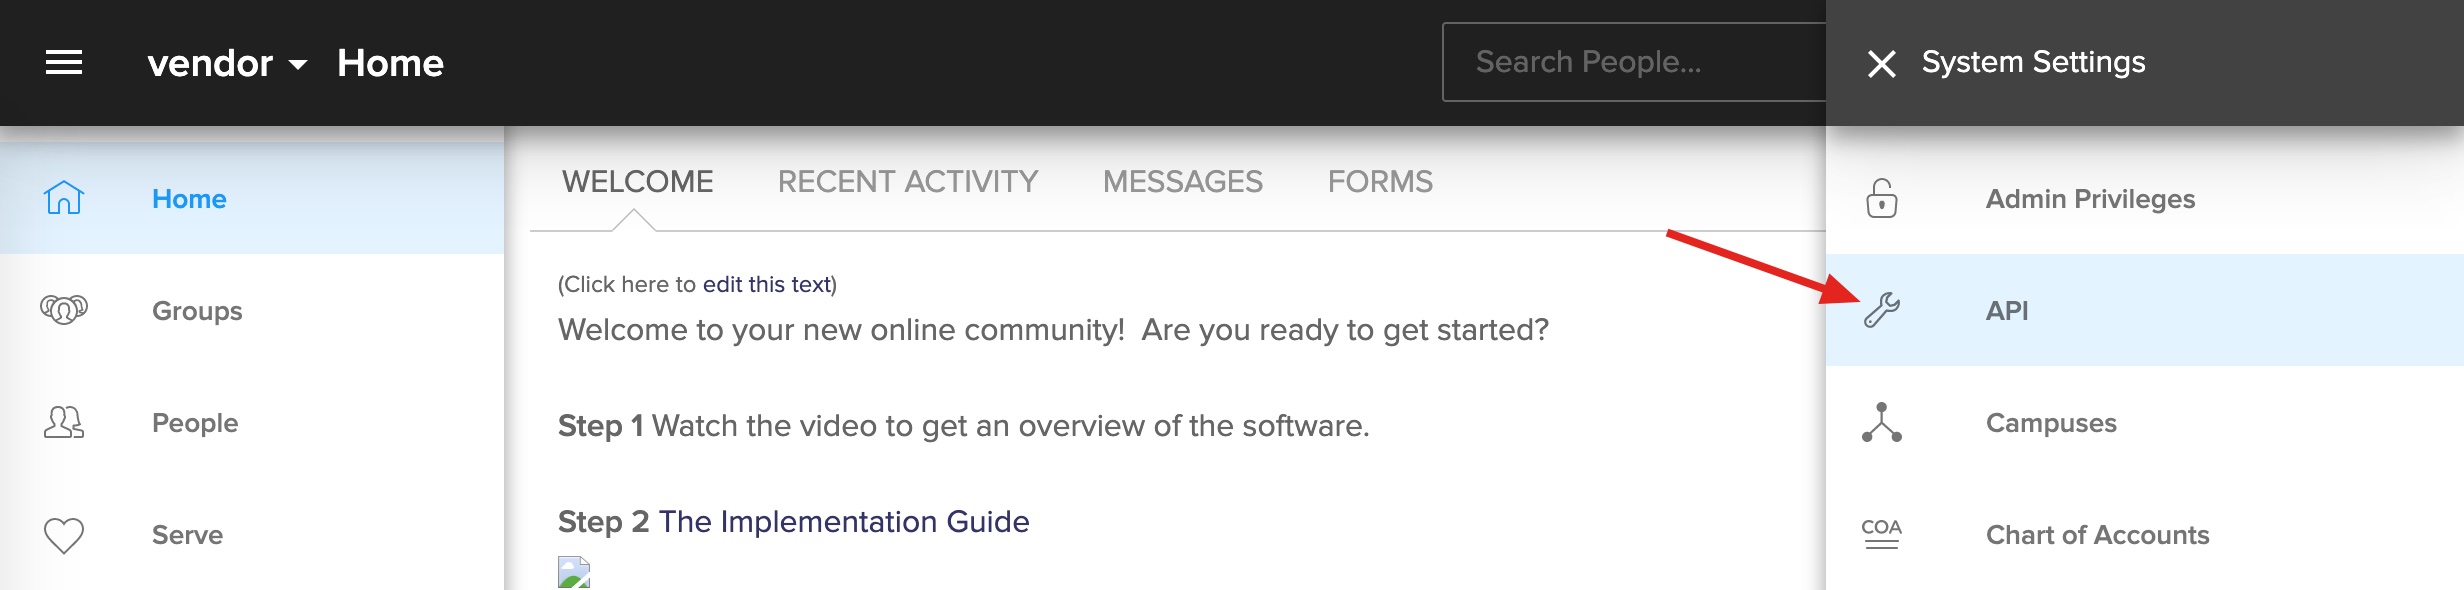
- From your Church Community Builder Account go to Settings and select the API option.
- Next, click “Add a New API User.” Complete all of the applicable fields: Name, Username, and Password.
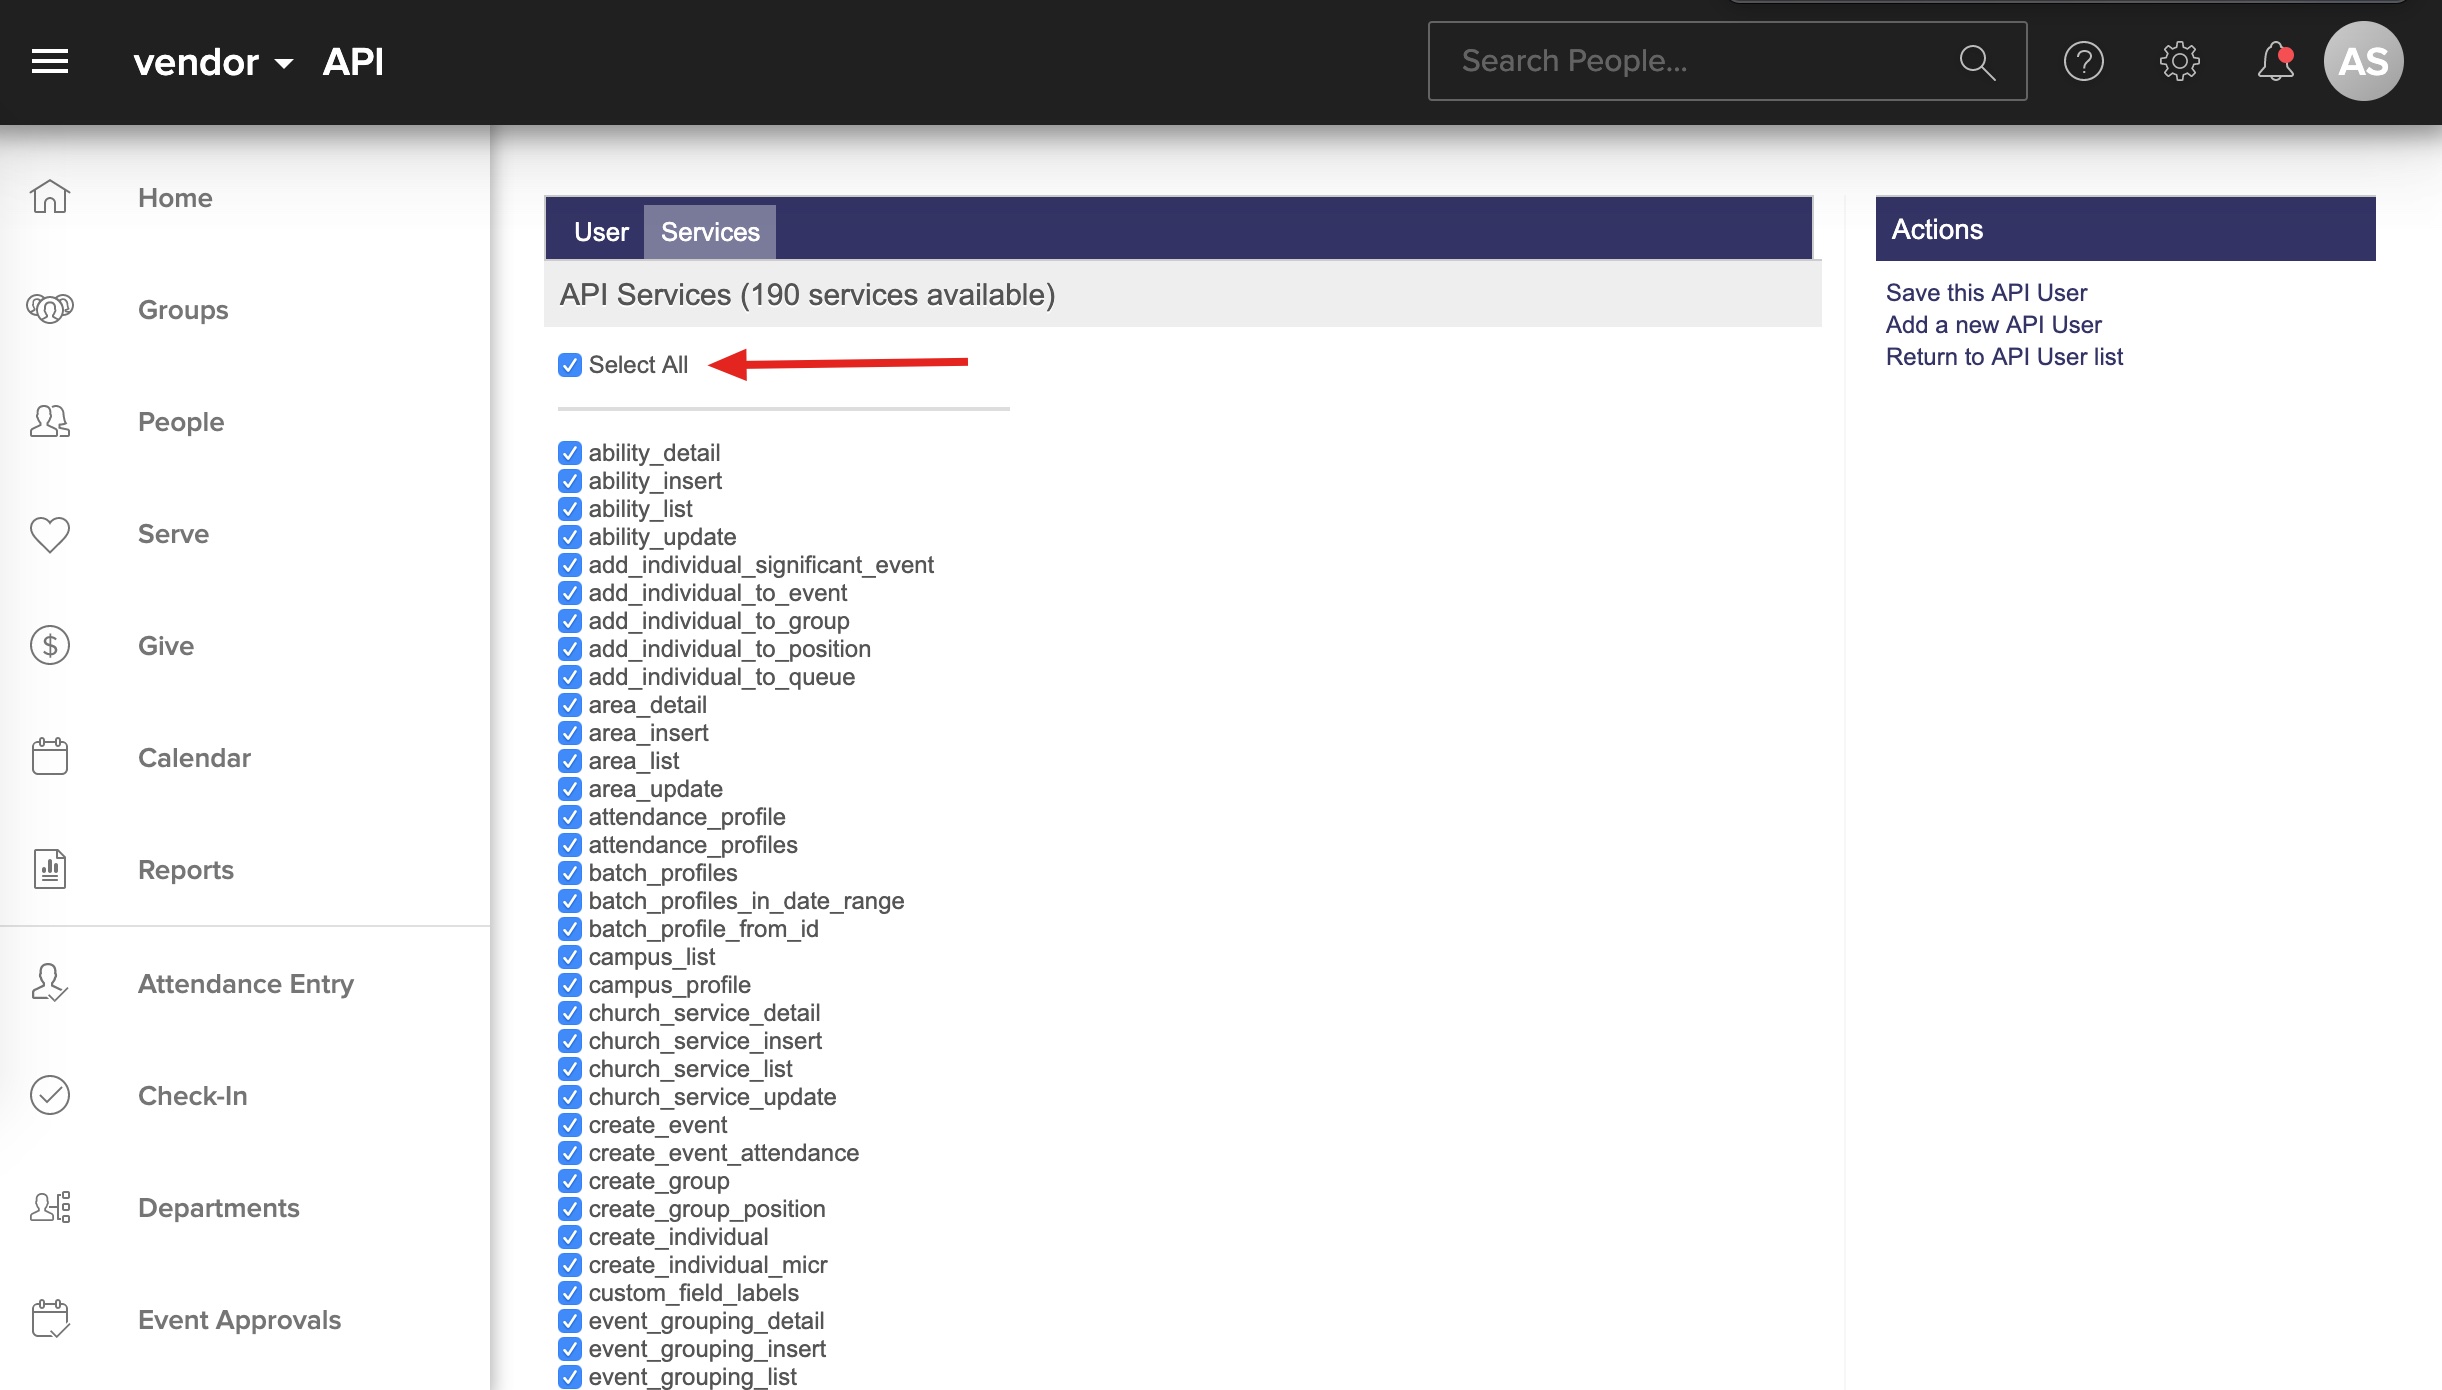
- Now, before you press save, make sure you move to the services tab and “select all” so that you give your new user permission to grant access to outside applications. Click back to the “Users Tab” and NOW press save. You’re ready to place your new API username and password into your Aplos Integration set-up for Church Community Builder.
Step 3: You’ll also need to choose a starting date, meaning the date of transactions that will begin being brought into Aplos. i.e. if you choose January 1, 2018 the integration will not bring in past transactions you have entered in your Church Community Builder account.
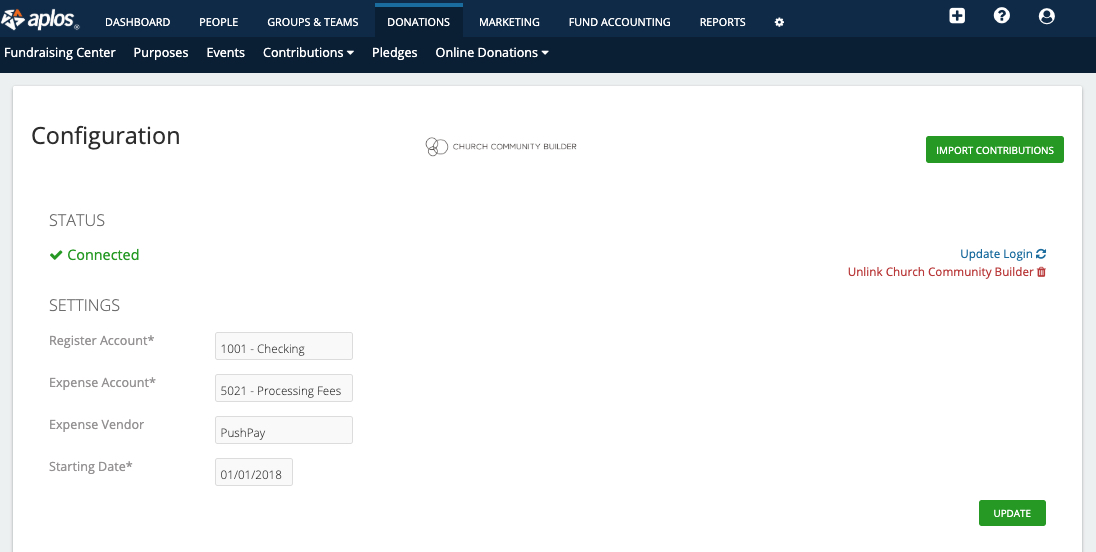
Step 4: With the Church Community Builder application enabled you’ll be able to pass your Church Community Builder donation record into Aplos Accounting. To proceed in the set-up you’ll need to select how you’d like this information to be tracked.
◦From your Aplos Chart of Accounts, select the “Register Account” where you would like transactions to be deposited.
◦Next, select the “Expense Account” where you would like to track any fees.
◦Finally, choose an “Expense Vendor”; this is where you would assign the vendor for these incoming transaction fees.
Step 5: Click Import Contributions. Once Aplos has has gathered your transactions you will see a message stating you have Unlinked Purposes. Click the message and proceed to map your partner purposes to the correct accounts and funds. For more information on partner purposes Click here!
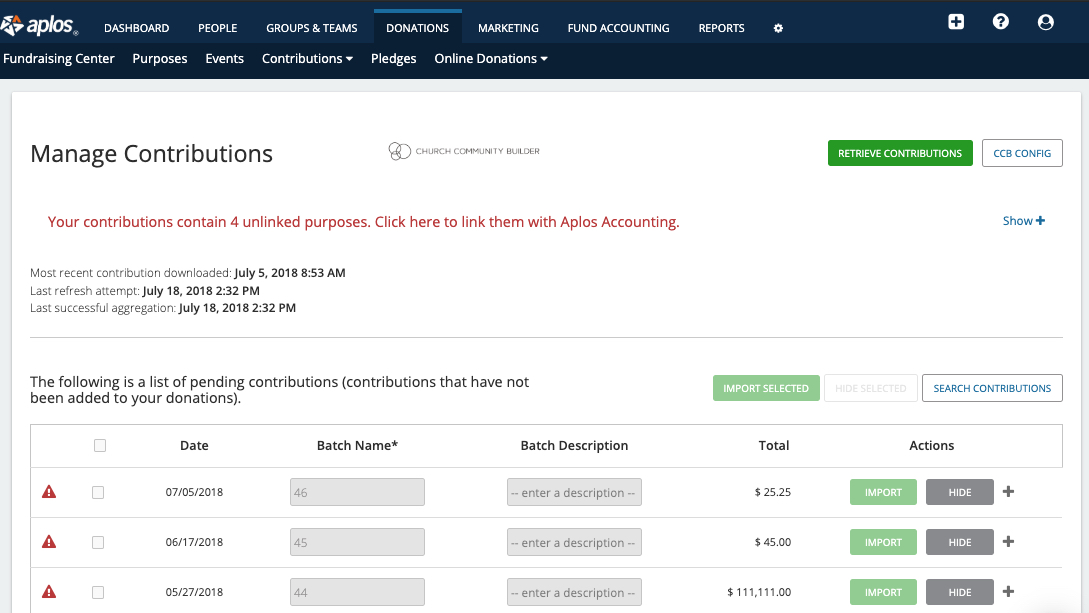
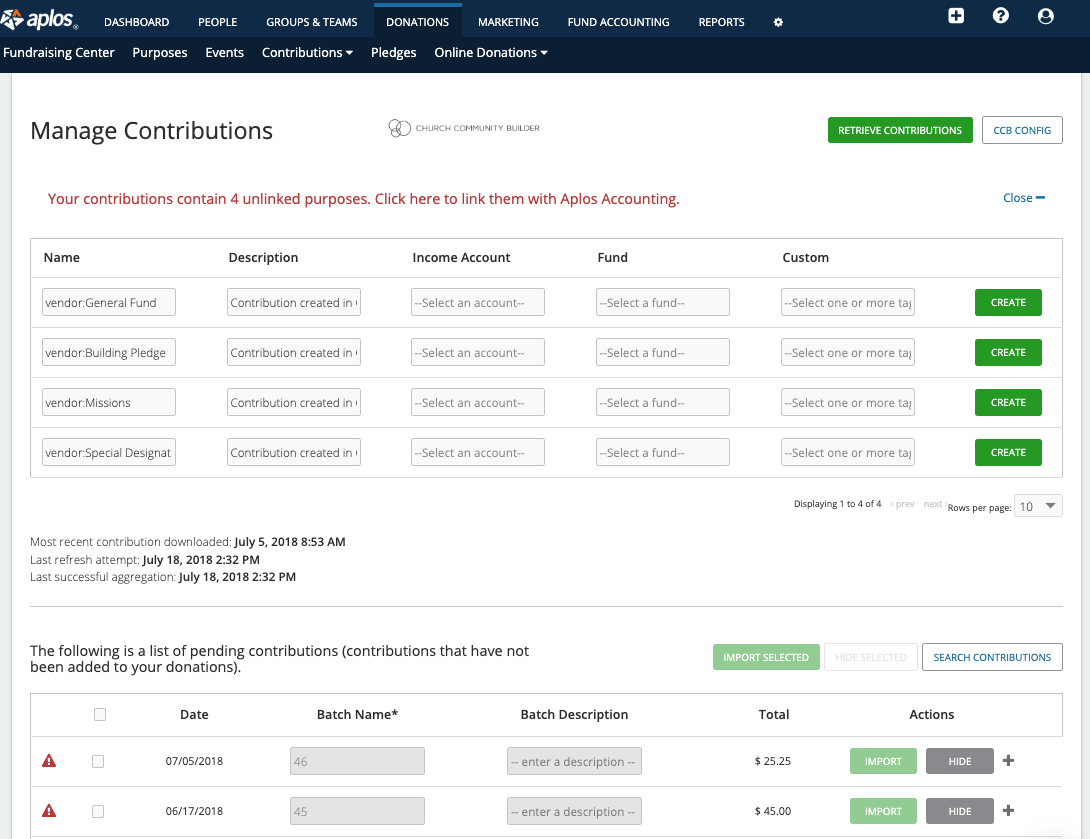
Once you have appropriately mapped your purposes to the correct funds and income accounts you’ll need to check the box by the transactions available on the bottom of the screen and click “Import Selected.” Your transactions will now flow into the appropriately designated accounts within your Aplos Accounting.
Anytime you need to retrieve transactions you can visit the contributions screen or transaction screen and click “Retrieve transactions.” Note, that any modifications you make to transactions within your Church Community builder account will be picked up by the system in the next Aplos retrieval.
You’re all finished! If you need any assistance, contact the Aplos Support Team.