Create Event Volunteer Positions
This article will show you how to add volunteer positions to an event in your group portal. Adding volunteer positions to an event helps your members to easily signup to volunteer and allows you and members to see where gaps are in event coverage.
- Click Events icon on the navigation menu on the left.
2. Click the title for the event where volunteer positions are needed.

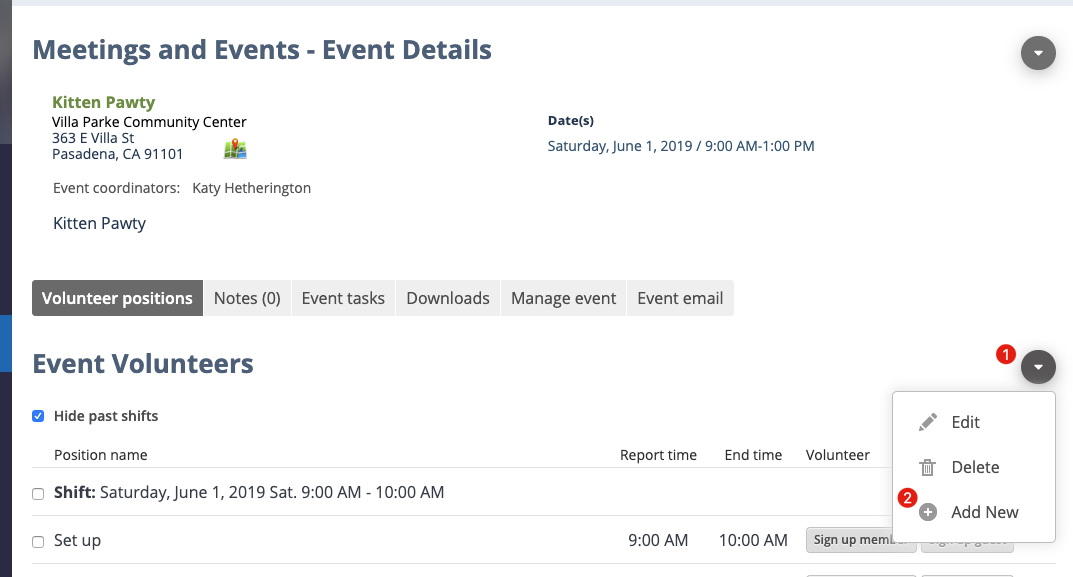
3. Go to the Volunteer Positions tab, click the Action Button icon and select Add New from the list.
4. In the Pick event date text box, select a date by clicking the calendar icon to the right.

5. Select a Report time or time that the volunteer will start his or her shift by clicking the clock icon and selecting the shift start time.
6. Select an End time by clicking the clock icon and selecting the shift end time.
7. Edit the Position name textbox.
8. To select the number of positions needed for that role and time, click the field and type in the number of volunteers needed for that position. Then click Save

Edit Event Volunteer Positions
This article will explain how to edit existing volunteer positions for any event. You will be able to edit the date and time of the shift for the volunteer position, the name of the position, and whether or not you would like for the volunteer to be notified by email regarding the information about the volunteer position or any subsequent changes
.
- Click the Events icon on the navigation menu on the left.
2. Locate any event that requires volunteers then click the dots to the right and click the Signup button. If the event has volunteer positions, the Signup button and the number of volunteers will show.

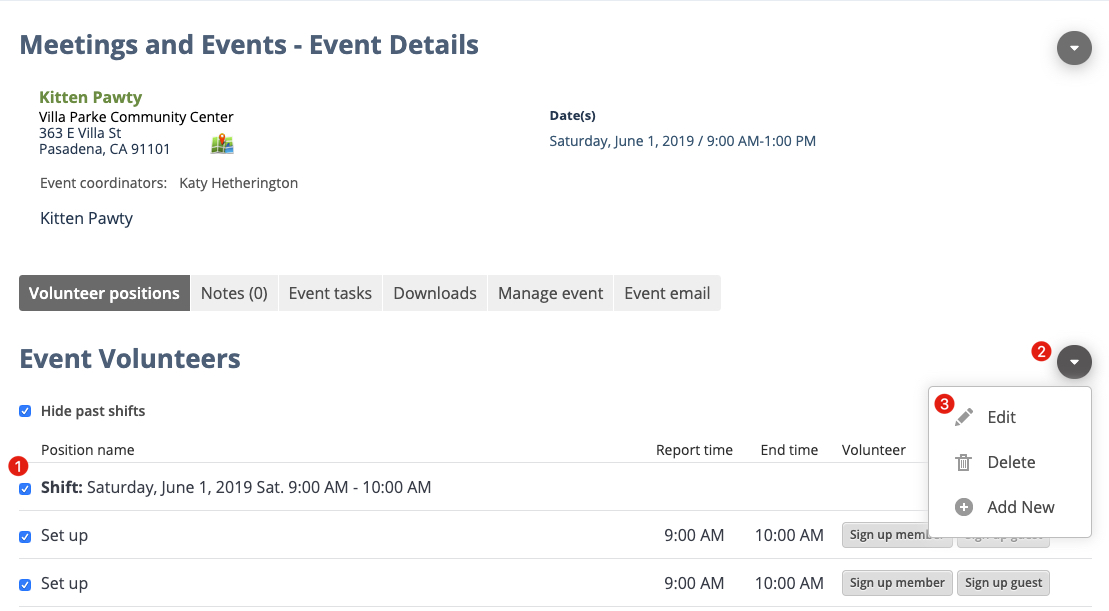
3. Mark the checkbox of any position name that you wish to edit, click the red Administration icon and click the Edit button.
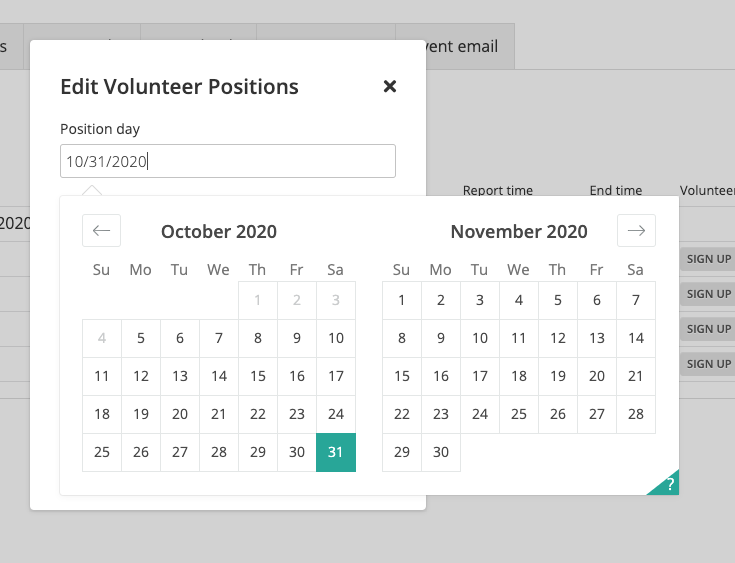
4. Click into to Position Day field to type in a new date or select it from the calendar widget
5. Click the clock icon to the right of the Report time to select the time for the volunteer to report for their shift.
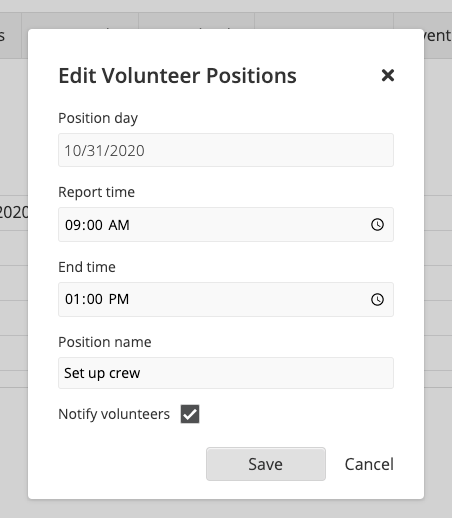
6. Click the clock icon to the right of the End time to select the end time for the shift.
7. Change Position Name by typing the name of the volunteer position in the text box.8. Mark the Display in public website if you want the volunteer position to be displayed on the public website so members and non-members can sign up.
8. Mark the Notify volunteers box if you would like volunteers that have already signed up to receive an email regarding the change to the volunteer position.
9. Click Save. The updated position will show in the Event Volunteers grid.
Delete Event Volunteer Positions
Remove any event volunteer positions.
- Click the Events icon on the navigation menu on the left.
2. Locate any event that requires volunteers then click the dots to the right and click the Sign up button. If the event has volunteer positions, the Sign up button and the number of volunteers will show.

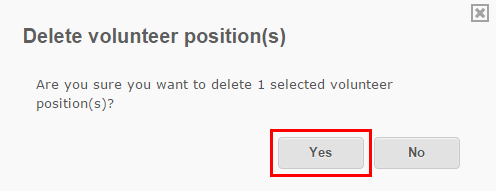
3. Mark the checkbox of any volunteer position that you wish to delete, click the red Administration icon and click Delete.

4. Click the Yes button in the Delete volunteer position(s) window to delete. The deleted position will no longer show in the grid on the Event details page.