The Aplos Check-In tool can be used to track individual attendance, provide a check-in and check-out system for children’s programs, and other activities that might require a name tag.
Your check-in events can be viewed and managed from the Check-In screen, which you’ll find under the People tab in the top navigation.
How to Create a New Check-In Event
You can click on the green “+” in the upper right to create a new check-in event.

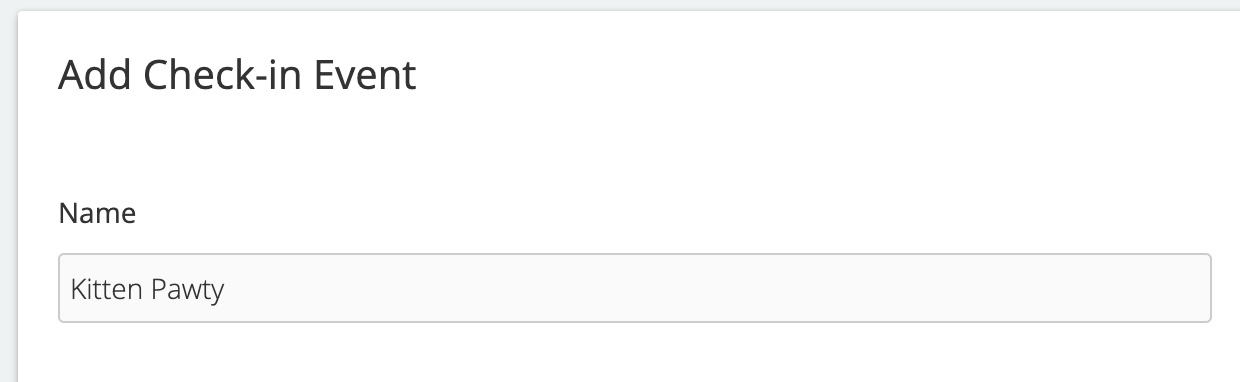
Here you’ll be able to set up the details of your check-in event, starting with the name of your event.
How to Set a Location for a Check-In Event

Then you’ll select the location for the event. You can either choose an existing location, which you would have set up on the Locations page:
You can also create a new location on the spot. As you type in the name of a new location you’ll see the option to create a new location:

*You can click HERE for more details about managing Locations in Aplos*
Setting a Check-In Date and Time
Next, you’ll set up the date and times for the event. You’ll see that there are two sets of start and end times that you’ll need to set.
Event Time: The first will be the start and end time of the event itself.
Check-In Window: The second will indicate when check-in for the event will be available. *Most likely you’ll want to make this start time is a bit earlier than the actual start time of the event.*

How To Control How Many People Check-In

Once you’ve set up the times, you can indicate whether the check-in kiosk will stop check-ins once the capacity of a room is reached, and also whether you will allow for guests (i.e., people who do not currently exist in your contact list) to check in.
Allow Check-In To A Class and Room
Finally, you will add the room(s) that will be available for check-in. The room(s) you choose will be based on what has been created for the location you’ve selected for the event. Click the “add new” link to set up a room for the event.

This will bring up a window with the options for adding a room to the event.
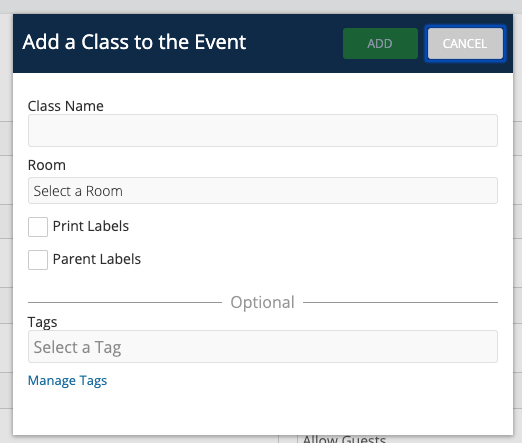
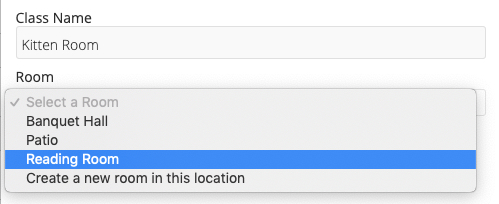
The “Class Name” is how the room is referred to in the context of this event. For example, our event needs to have a Kitten Room. This will be located in the Reading Room of my location. So, I would enter “Kitten Room” as the class name and select “Reading Room” as the room.
Set Up Printing Name Tags for Parents and Children
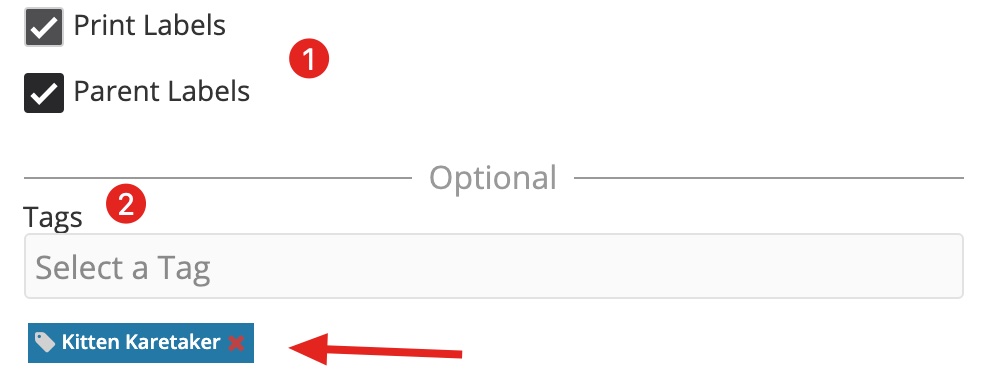
Finally, you can choose whether you need to print labels and/or parent labels for this room (1) and apply any contact tags (2). Any selected tags will be displayed in blue under the field. *For more details regarding Contact Tags click HERE*
Once you have all of the details for the room set up, you’ll click the green “add” button at the top of the window to finish adding the room to the event.
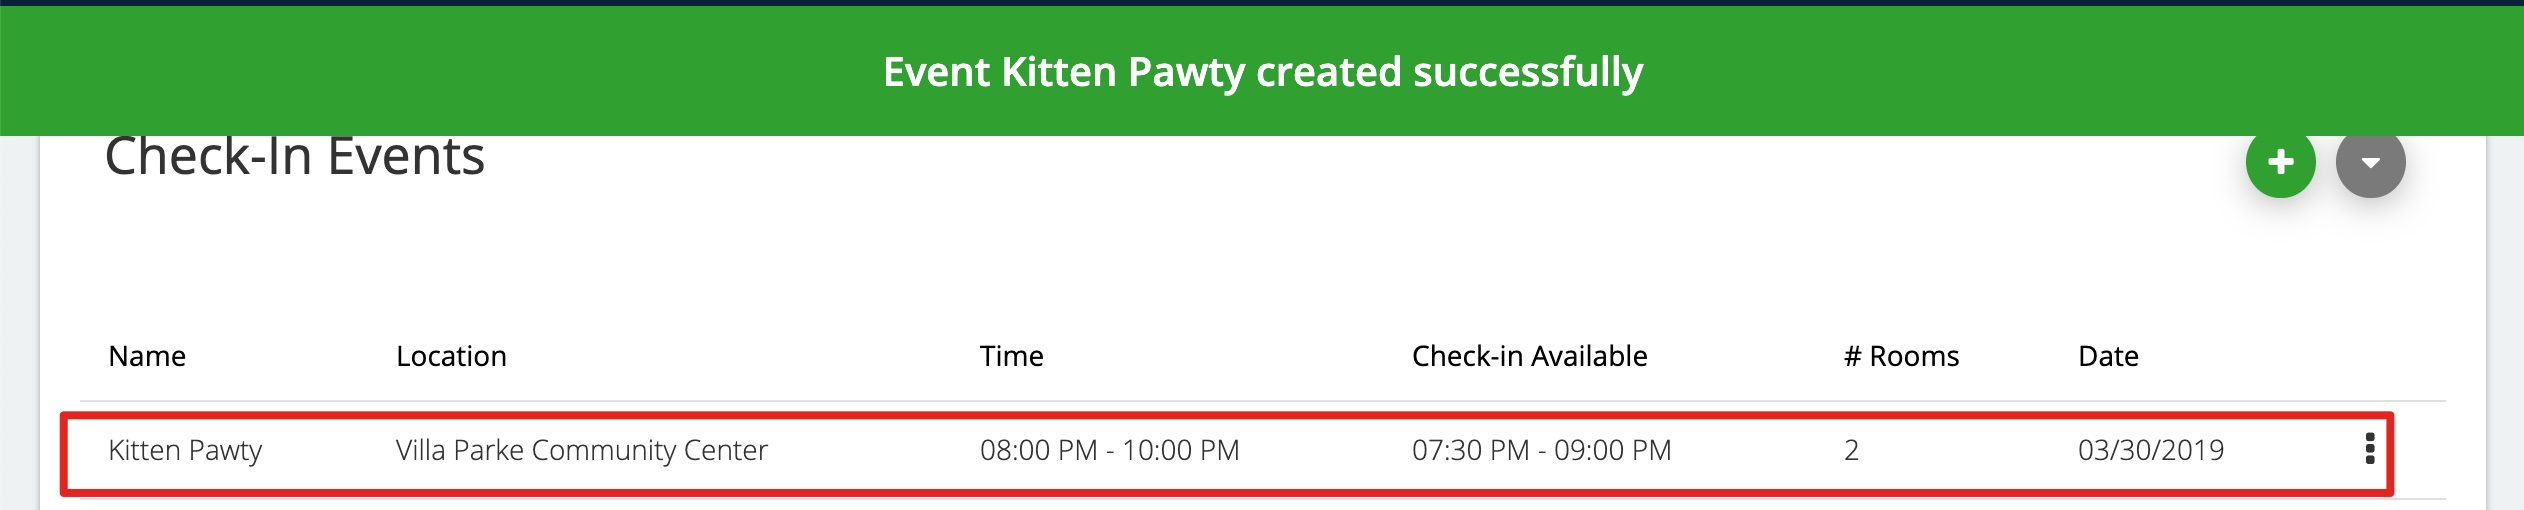
You can repeat this process until you have all of the necessary rooms added to the event. When you’re completely finished setting up all of the details of the event, you’ll click “save,” which will direct you back to the main Check-In Events page.
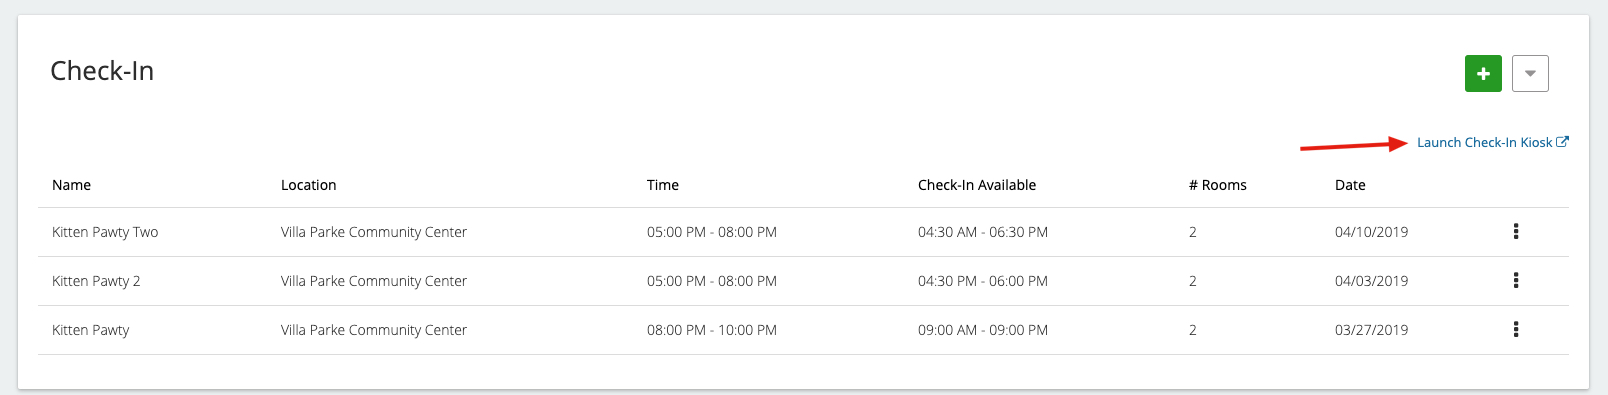
Now that you’ve created your event you’re ready to launch the check-in kiosk. You’ll see the option to do so at the bottom of this screen.
*You can click HERE for more details about using the check-in kiosk*