Aplos has teamed up with Stripe to power the payment processing in AplosPay. Your Stripe account will equip your organization with the following benefits:
- Simplified Payments Within Aplos – Payments can be managed within AplosPay without having to log in to a separate platform.
- Best-In-Class Fraud Detection – Stripe includes best-in-class fraud monitoring using sophisticated machine learning from its global presence to protect your organization.
- Maximized Payment Acceptance – From adaptive acceptance to automatic card updates, Stripe optimizes processing so your donors are more successful when giving to your organization.
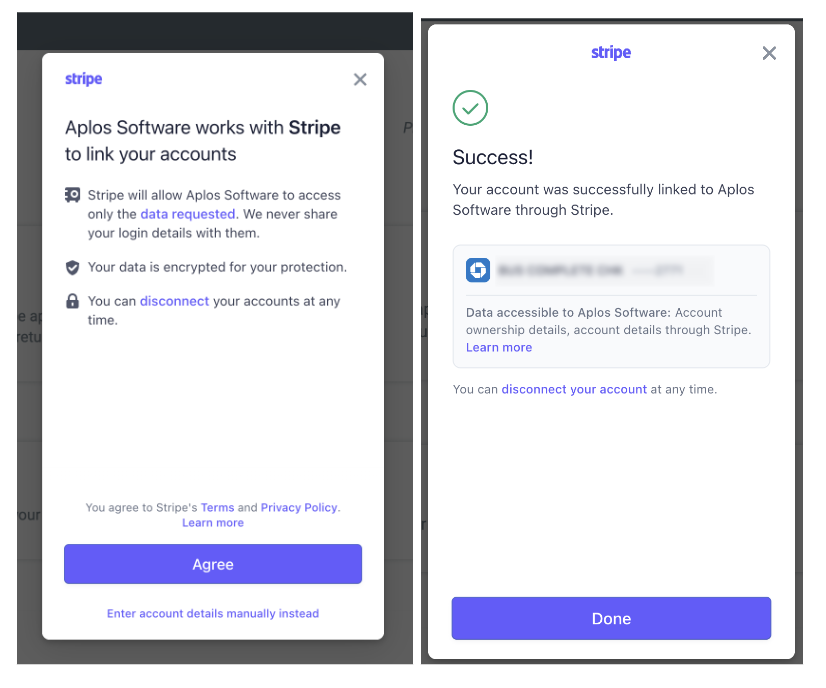
To get started, your organization will enroll with Stripe to verify your account and user. This will create a Stripe merchant account where you can configure your donation processing preferences and connect to your bank account. This process should be completed by the person responsible for the payment account and takes about five minutes. It will walk you through your required “KYC” (Know Your Customer) data that will verify your organization and the person responsible, and then it will connect to your bank.
Application Requirements
To accept payments in Aplos, your organization’s operations and payout bank must be based in the U.S or Canada.
To complete the enrollment form, the user must be an Administrator in Aplos and be an authorized representative for your organization. An authorized representative is someone who has the legal authority to control and manage the organization, such as the Executive Director, Pastor, CEO, President, or CFO, based on the articles of incorporation, bylaws, or founding documents. This individual will be required to provide identification confirming their identity and their authority to represent the organization.
Update Organization Information In Aplos Settings
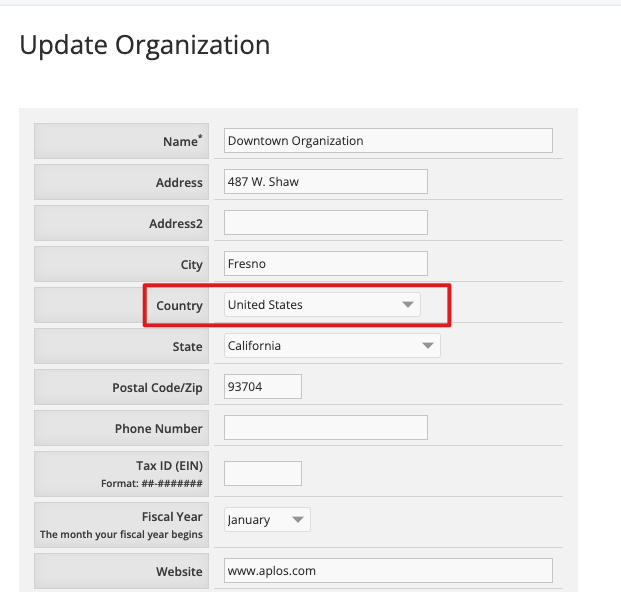
Before applying for your Stripe account, ensure that your Org Information on the Settings page of your Aplos account is complete and accurate, using your entity’s legal name, address, and country.
How To Create A Merchant Account
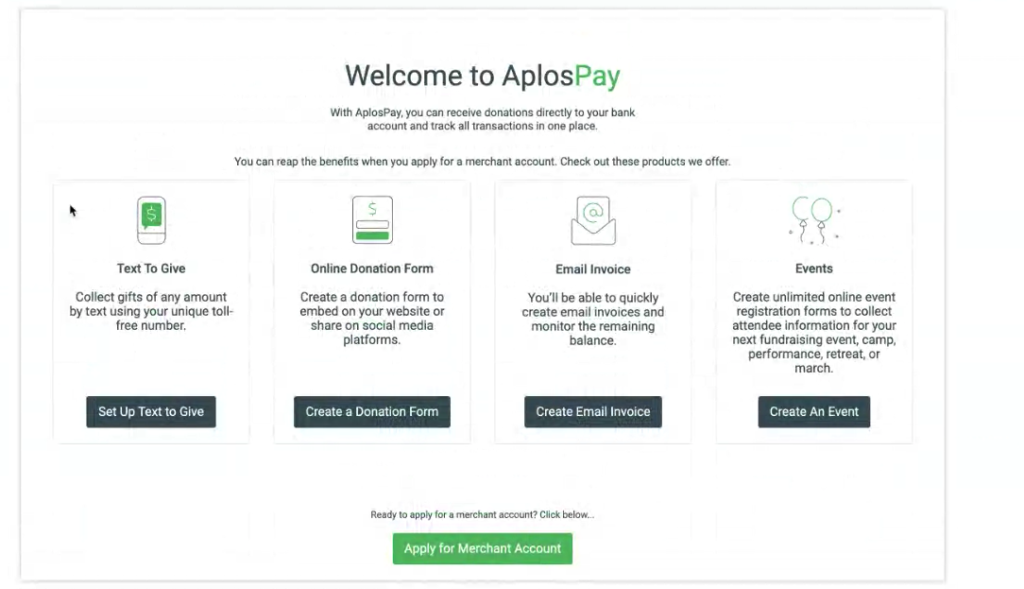
Your merchant account can be created from any of the Aplos tools that process payments or directly from the AplosPay dashboard. You can locate the AplosPay dashboard by clicking the Donations tab and selecting “Merchant Center.” From the dashboard, you’ll see the Apply for Merchant Account button, and you can click that to get started.
This will prompt the setup wizard within the payment processor to complete your profile. In this secure portal, you will confirm your organization’s information and your information to verify your identity and reduce fraud.
This will prompt the process to verify your organization and user information to confirm you are eligible to receive payments through AplosPay.
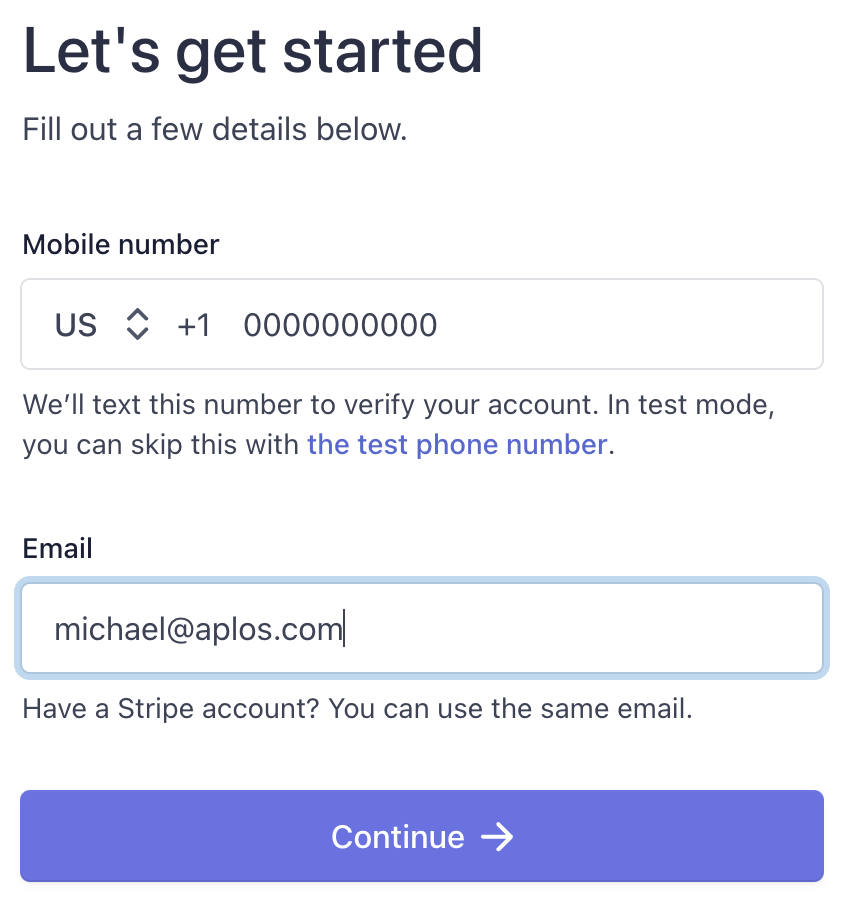
Step 1: Verify Your Mobile Number And Email
Provide the primary merchant information that will be used to create the Stripe account. Some users may be asked to validate their phone number or email address. Enter a valid mobile number and email, and then click “Continue.” Stripe will send a verification code to the mobile number to verify the number.
What To Do If You Don’t Receive A Verification Text From Stripe
If you do not receive a text, click “Resend message” on the bottom of the screen to resend the verification text. If you still do not receive a text, contact us for further assistance.
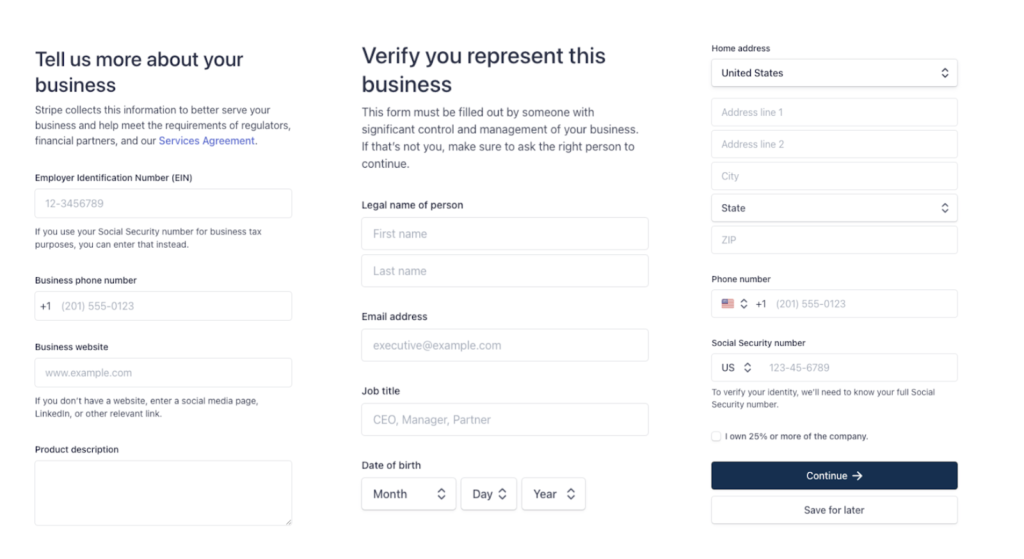
Step 2: Verify Your Organization Details
Once you enter the verification code, follow the setup wizard in Stripe to complete your profile. In this secure portal, you will confirm your organization’s information and your information to verify your identity and reduce fraud. This information may include:
- Your Organization Name
- Organization EIN or Tax ID
- Industry
Note: Common industries include:- Charities or Social Services
- Religious Organizations
- Elementary or Secondary Schools
- Civic, Fraternal, or Social Organizations
- Physical Address and Phone Number
- Website URL or description
If your EIN, Tax ID, or organization name don’t match IRS records, you may be asked to upload IRS Letter 147C or similar, and you will need to revise your entry to make sure they match.
Step 3: Verify Personal Details For The Responsible User
Personal details required for the responsible user may include:
- Name, Title, and Contact Information
- Address (must be a physical address)
- Your SSN or other form of ID
- Date of Birth
You may be asked to upload an image of an official ID to verify your identity and/or provide a document that shows who is authorized to act on behalf of the organization.
Why does Stripe need your Social Security Number?
Stripe verifies the identity of each user of the Stripe service to manage risk and comply with anti-money-laundering laws. If you are acting on behalf of an entity with an EIN, Stripe requires your SSN to verify who you are and know that you are authorized to act on behalf of the entity.
Step 4: Confirm All Details & Accept The Terms Of Service
On the last screen of your application, click on each area of your application to review the provided details, correct any errors, and complete any missing fields. The summary view does not always show errors or missing values, so this is an important step. Once reviewed, accept the terms of service and submit your application. Once submitted, you will be redirected to the Merchant Center to add your bank account for payouts.
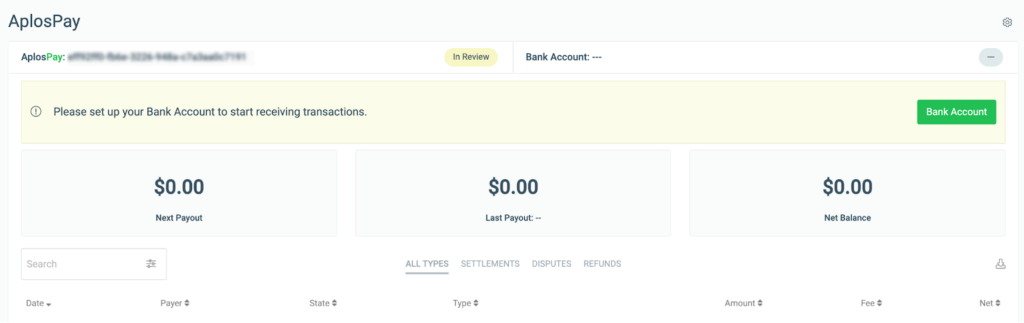
Verify Your Bank Account For Payouts
How To Verify A U.S. Bank For Payouts
To complete your onboarding process for AplosPay, you are required to verify your preferred bank account where payments will be deposited, known as a “Payout.” The linked bank account will be verified to ensure that it is held under the same name as the organization.
To verify your bank, you must log in using online banking credentials or complete an alternate process using your bank account and routing details. Click “Bank Account” to begin.

This will prompt the Stripe process to link your bank account. From there, you will log in with your bank credentials and select the account you wish to link to Aplos.
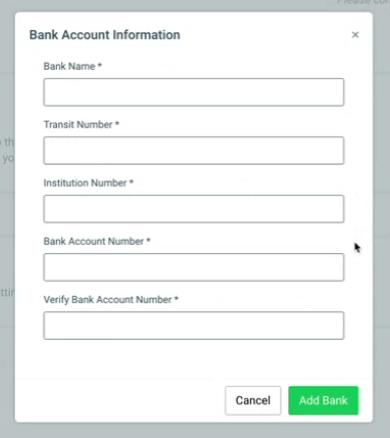
How To Verify A Canadian Bank
To complete your onboarding process for AplosPay, you are required to verify your preferred bank account where payments will be deposited, known as a “Payout.” The linked bank account will be verified to ensure that it is held under the same name as the organization.
To verify your Canadian bank, you must enter your bank account and routing details. Click “Bank Account” to begin.
This will prompt the process to link your bank account. From there, you will enter your organization’s bank account information. When completed, click “Add Bank.” This will prompt an “In Review” status until your bank account is approved by Aplos.
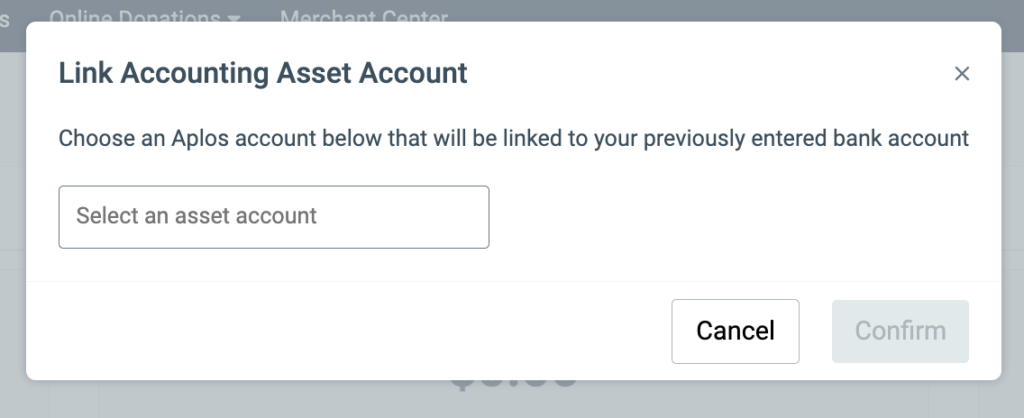
Linking To Your Accounting
After verifying your bank account, you will be prompted to link your bank account to the Asset account within your Chart of Accounts. Click within the search box to display a list of your asset accounts and select the preferred account. Click “Confirm” to save your changes. Once complete, your bank account status will be approved.
NOTE: It is a best practice to link to the asset account that represents your bank.
Updating Your Stripe Application
When applying for a Stripe merchant account, you can choose to save your place in the onboarding and return at a later date to update or provide additional information.
You will see different actions depending on where you are in the Stripe creation process. Below are explanations of what you may see:
- Apply For Merchant Account – This is available if you have not yet started creating your Stripe account.
- Continue Application – This is available at any point after the application is started but not all steps are completed.
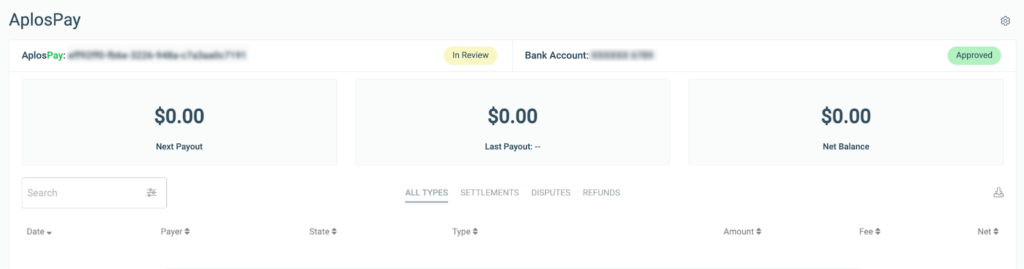
- In Review – The application has been approved by Stripe and is awaiting approval by Aplos.
- Approved – The application has been approved by Stripe and Aplos.
- Denied – The application has been rejected.
Completion Of Stripe Application
To ensure the organization is set to start processing payments electronically and depositing funds, review the Merchant Center and verify that the statuses for both the Stripe account and bank account are approved. This will ensure that the organization has successfully set up the Merchant Center. If you need any assistance, contact our Support team.