What is a Register?
The register is used to track income and expense transactions for a specific asset or liability account, typically a checking or savings account. This is a simpler way to post these transactions than using journal entries and should look similar to the view of your bank statement. To view the Account Register, go to Fund Accounting > Transactions > Registers.
From the top of the register, you can click to change which account register you wish to view.
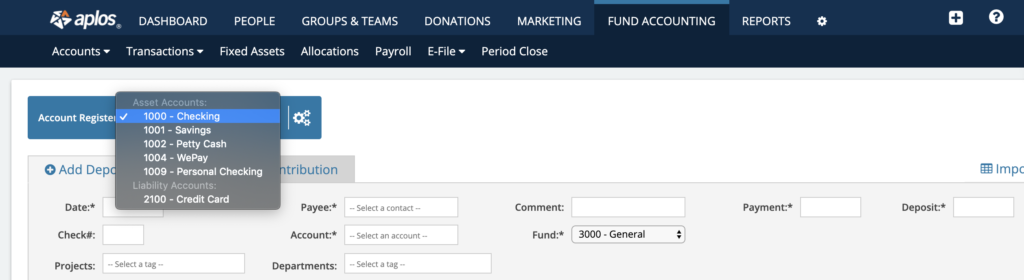
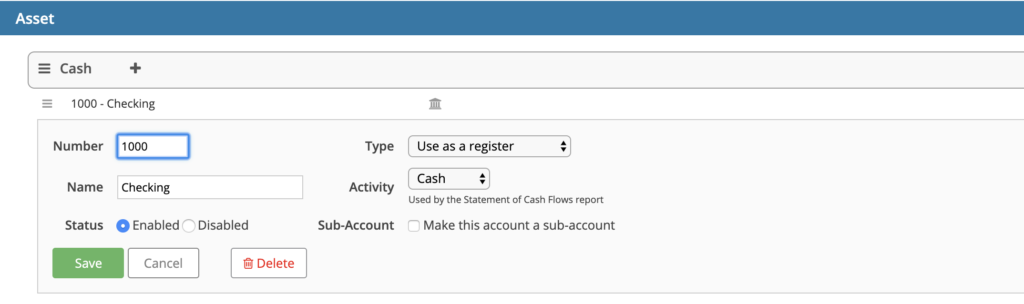
If you have an asset or liability account that you wish to show in a register, you can change the account type to “Use as a register” for the account in the Account List.
Entering Transactions in the Register
How to Track an Expense
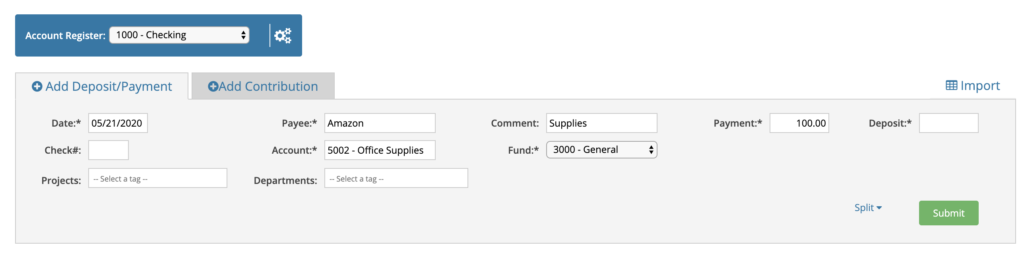
When entering an expense in your register, you must complete these required fields:
- Date: Date of the transaction – you can enter numbers in the format of MM/DD/YYYY and press your Tab key to proceed, or click in the box and select the date on the calendar that is shown
- Payee: Name of the Vendor – Typing the name will suggest existing contacts in your database. If you wish to search for the name, you can press the spacebar to expand the contact list. If it is a new contact, you can enter the name and the contact will be added to your contact list when the transaction is entered.
- Payment: Amount of the expense
- Account: Select the relevant expense account
- Fund: Select the fund for the expense
Optional fields for your expense transaction include:
- Check#: This is your check number if you paid the expense using a check
- Comment: Provide additional details of the expense so it is easier to identify later
- Tags (if enabled): Assign a tag such as 990 Tag, Fundraiser, Department, Project to be able to produce filtered reports
How to Track Income
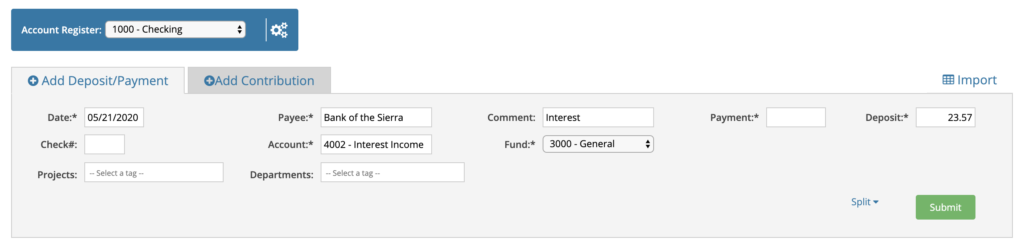
There are two primary types of income that you may wish to track. Donations income that you wish to also track for contribution statements for donors and other income. When you are entering income for your account that you do NOT wish to track as a donation for contribution statements, you can do this in a similar way as you entered an expense. You must complete these required fields:
- Date: Date of the transaction – you can enter numbers in the format of MM/DD/YYYY and press enter or click in the box and select the date on the calendar that is shown
- Payee: Name of the Contact – Typing the name will suggest existing contacts in your database. If you wish to search for the name, you can press the spacebar to expand the contact list. If it is a new contact, you can enter the name and the contact will be added to your contact list when the transaction is entered.
- Deposit: Amount of the income
- Account: Select the relevant income account
- Fund: Select the fund for the income
Optional fields for your income transaction include:
- Comment: Provide additional details of the expense so it is easier to identify later
- Tags (if enabled): Assign a tag such as 990 Tag, Fundraiser, Department, Project to be able to produce filtered reports
How to Track Contribution Income in the Register
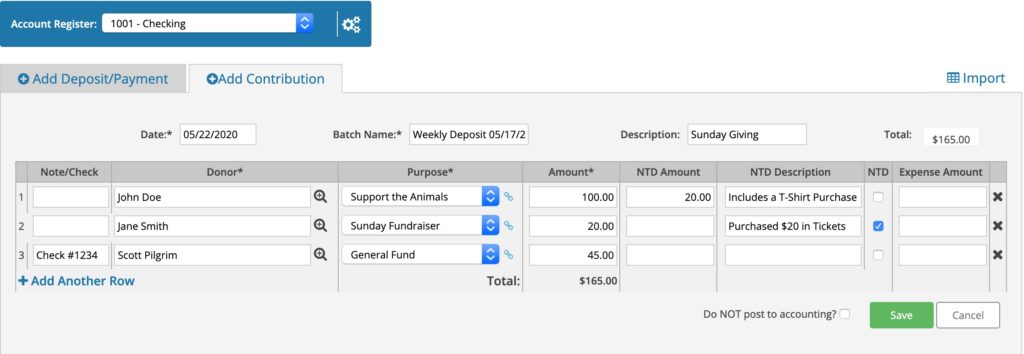
If you wish a deposit to also be tracked by donor in order to appear on contribution statements, then you will want to either enter it in the Contributions section of the software or you can select the Contributions tab within the register. For more in-depth details you can see our guide on Contributions & Deposits. A batch of contributions includes these required fields:
- Date: Day that the donations were deposited
- Batch Name: General Description of the deposit – such as Weekly Deposit for DD/MM/YYYY
- Donor: Name of the donor. You can select the magnifying glass to look up contacts to avoid accidentally creating duplicates. If it is a new donor, enter their name and it will add the contact to the database
- Amount: Total amount of the donation
- Purpose: This is the designation of the gift for a specific purpose. See the Purposes Guide for details.
Optional Fields for Contributions:
- Batch Description: Any additional information needed
- Note/Check: Any details provided in the memo line of the check
- NTD Amount: This field is available if any portion of the overall donation amount is non-tax deductible (NTD). You may need to use this if a portion of a payment was the purchase of a good, or service
- NTD Description: If desired, provide detail about the value of the NTD amount
- NTD: Check the box only if the entire Amount entered needs to be considered NTD.
- Expense Amount: If you are recording an online donation you may have a processing fee from your merchant, which you can record as an expense.
- Total: This field will automatically be calculated based on the items listed in the batch
How to Manage Transactions in the Register
How to Duplicate a Transaction
If you click on a previously entered transaction, you can click the gear in the upper right corner and click the “duplicate” button to start a new transaction using those details. You will just need to change the date and any other details you need, and then submit. If you wish to duplicate transactions on a recurring schedule, see the Recurring Transaction feature.

How to Move a Transaction to a Different Register
If you accidentally posted a transaction to an incorrect register, you can click on the transaction, then click the gear icon in the upper right corner and select “Move.” This will open an option to select a new register where the transaction should be assigned. This option is not available if you have already cleared the transaction through bank reconciliation.
How to Void a Transaction
You can void a transaction that you’ve previously entered from the Check Register. To do this, click on the transaction to expand it and then click the “more” gear icon in the upper right corner. From that list you will be able to select void and then click the green submit button.
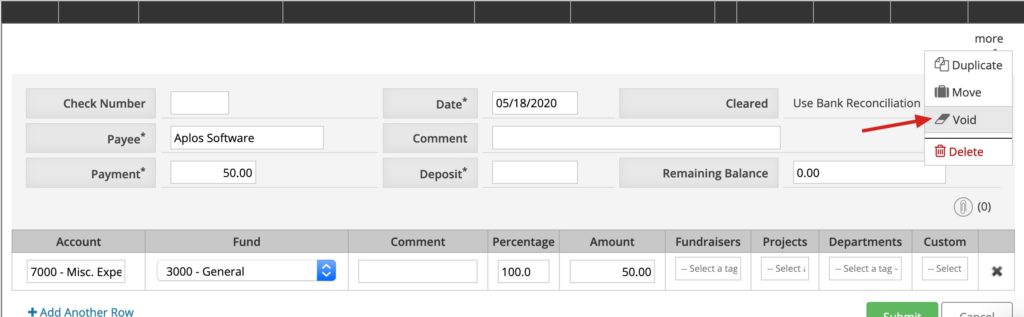
This process will change the amount of the transaction to $0.00.
Keep in mind that if you have cleared this transaction using Bank Reconciliation, or if this transaction is included in a closed period, it cannot be voided/deleted unless you re-open the reconciliation or period. If this transaction is tied to an Accounts Payable or Accounts Receivable entry, you will need to first delete the payment altogether, and then re-enter this directly from the Register (instead of the AP/AR module). Once re-entered, you can follow the above steps to finish voiding the entry.
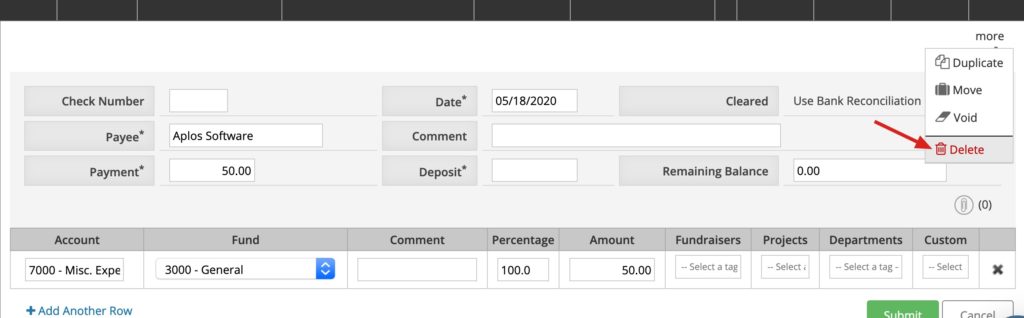
How to Delete a Transaction
You can delete a transaction from the Register by either clicking on the trashcan icon on the far right of the transaction:

Or if you click on the transaction, you can click the “more” icon in the upper right and select delete:
How to Attach a File or Receipt to a Transaction
When recording a transaction in your Register, you may need to attach an image, such as a receipt, for future reference. This is easy to do from any posted transaction.
Once a transaction is posted, you can click on it to expand to the detail view. In the bottom right you’ll see the paperclip icon that will bring up the upload screen to attach the document to the transaction:

Once you click this icon, you will see the option to attach a file. Click “Choose File” to search for the image of your receipt, or select a file that you’ve previously imported to your File Box. Once your file is chosen, click Attach.

You now have the image attached to your transaction!
How to Search for Transactions in the Register
If you are in the Registers tab, and decide to use the Search function to find certain accounts in your list, you may decide to use filters to show specific registers that you are looking for. Perhaps you are looking for transactions within a certain date range, or transactions from a specific fund, or maybe you would like to see all of the transactions with the same tag. You can narrow down to these options when using the Search function.

If you finish your search and would like to reset the list to include all transactions and not just the filtered results, click on the ‘Reset Filters’ button on the righthand side, below the ‘Search’ button (shown above).
You will need to click this button to reset the filters, as merely refreshing the page or leaving the page and coming back will not reset them.
You might also notice this filtering on your register when drilling down to a transaction from a report. From a report, you can click on the amount of a transaction to open that transaction to view it or make changes. When you’re done, be sure to click Reset Filters. If you do not, you might land on the filtered register during your session.