Course Content
-
Overview
-
Prepare Your Contact Database
-
Prepare Your Contribution Statements
-
Other Contribution Statement Options
Creating Mailing Labels In Aplos
Mailing labels are an essential step if you choose to mail your contribution statements or campaign letters. These can easily be printed by individual or household, and they include the names and addresses of your recipients from any contact list.
In this lesson, we will guide you through creating, formatting, and printing mailing labels for mailing donors’ contribution statements.
For best results, log in to your account in a separate window and follow along. Don’t have an account yet? Start a free trial.
Topics we will cover in this lesson include:
- Creating Labels [0:20]
Learn a quick and easy way to generate mailing labels from an existing list of contacts from the Lists screen. You can choose between a preset Avery 5160 format or download labels to Excel for custom formatting. Go to Lists in Aplos. View the resource for generating labels from lists. - Creating Smart Lists [2:04]
Generate Smart Lists through Aplos’ List Designer tool. Use various rules to create a dynamic list of contacts. This will allow you to segment your contact database to produce mailing labels for certain contacts.
Hint: If you need to create a list for your donors to match your contribution statements, you will want to start with these rules:
- Any donation
- Between
- Start Date and End Date (select the date range of your statements)
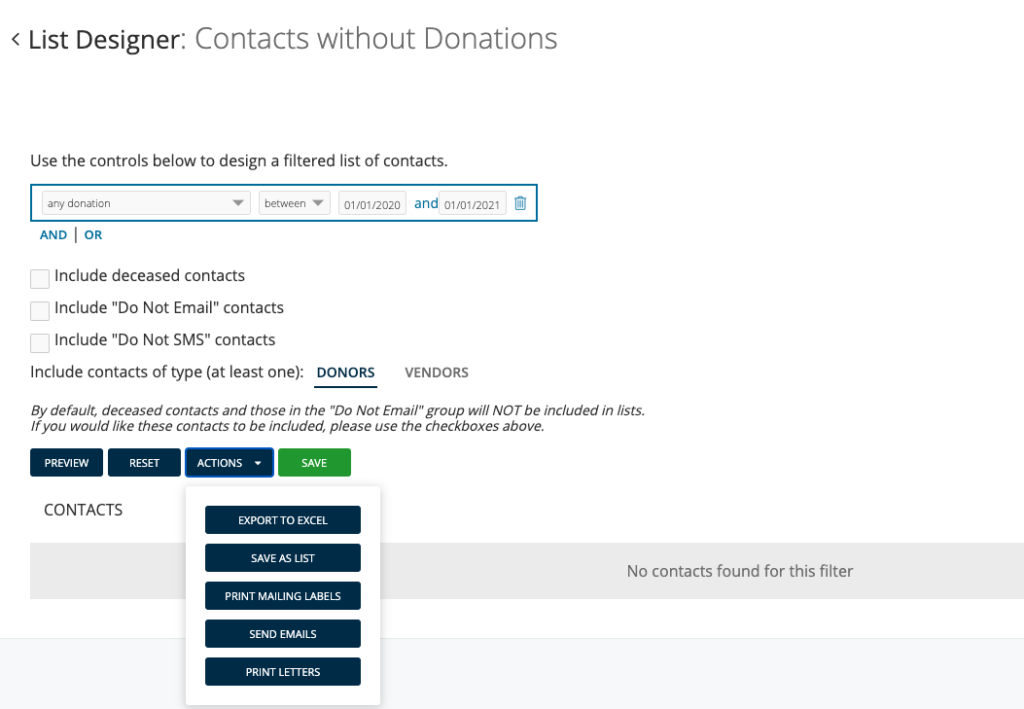
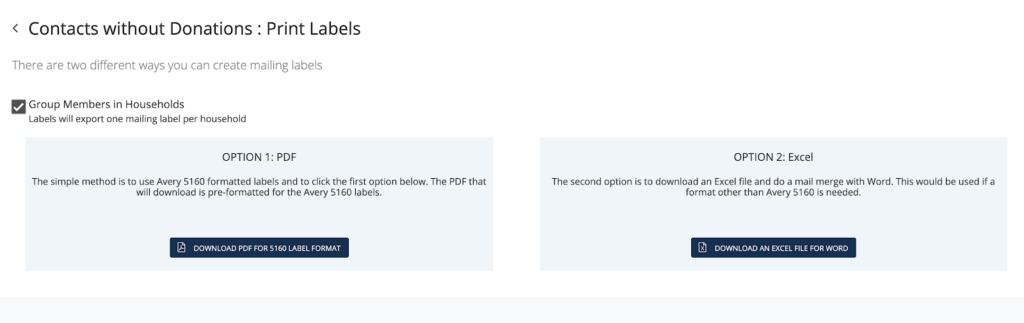
You can then choose “Save this list” or “Print Mailing Labels” from the Actions dropdown menu. On the next screen, if you created Contribution Statements by Household, select Group Members in Households at the top left so your mailing labels will also be grouped by household. Leave this unchecked if you prepared individual statements.
Go to List Designer in Aplos. View the resource for how to use List Designer.