This guide will help you use Aplos to prepare Form 1099s for vendors at the end of the year and accurately file this IRS-required document. Aplos offers:
- Quick setup for the vendors and account categories you’ll need to monitor for 1099-eligible transactions
- A pre-formatted report that checks for the required threshold of $600 per year
- Easy preparation of IRS 1099 forms from your saved report
What Is a 1099? What Is a Form 1096?
Form 1099 is a required IRS report that discloses the amount paid to a contractor or vendor for services if that amount exceeds $600 in a year. All organizations are required to complete them, regardless of tax-exempt status. There are a variety of 1099 income types. The most commonly used forms are the 1099-MISC and 1099-NEC.
Organizations are required to mail their 1099s to their vendors and a 1096 to the IRS by January 31 each year. Find more information on the IRS 1099 requirements for both 1099-MISC and 1099 NEC. (Use Form 1099-NEC to report non-employee compensation.)
NOTE: E-filing is now required by the IRS if you file 10 or more returns. File your 1099s for free with IRIS, the IRS Information Returns Intake System. Find out more on the IRS website.
Here are instructions to make sure you are all set up and ready to go for 1099 reporting. Questions? Contact our award-winning Support Team.
Track 1099 Vendors and Expenses in Aplos
In Aplos, you use 1099 Tags to help you track payments made to your 1099-eligible Vendors. This makes it easy to prepare your return at the end of the year.
To track 1099s in Aplos, you will want to follow these steps:
- Enable 1099 Tags
- Map eligible expense accounts to the proper 1099 categories
- Add vendor contacts into the 1099 Vendor contact list
Enabling 1099 Tags
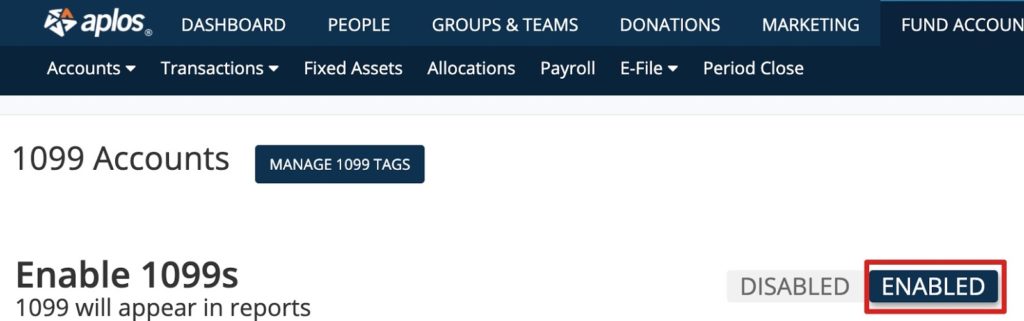
When logged in to Aplos, go to the 1099 screen by selecting in the navigation menu Fund Accounting > Accounts > 1099s. From the 1099 page, select “Enabled” at the top right of the page.
Map Expense Accounts to 1099 Categories
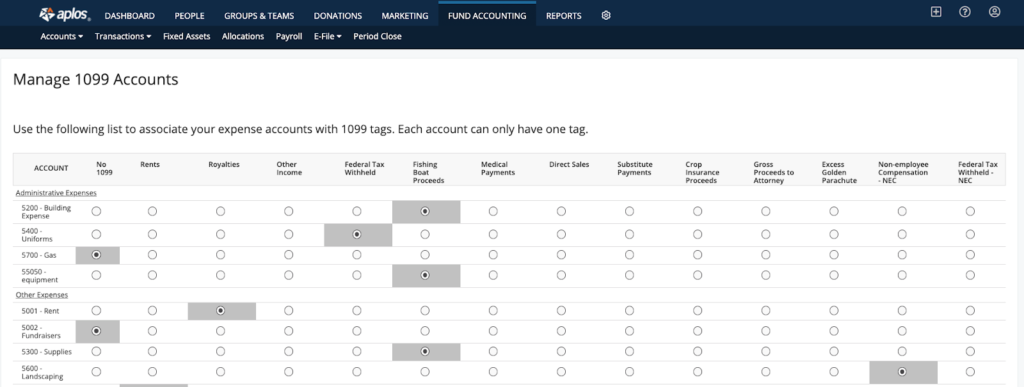
On the same page, click “Manage 1099 Tags” at the top of the screen. This will provide access to the 1099 configuration screen to map your expense accounts to 1099 categories.
This is where you will select which category on the 1099 will be populated when you use certain expense accounts. Go through this, and assign each expense account to a category. Once complete, simply navigate away from this screen and the changes will save automatically. You can always return to this screen later to map new accounts or change your mappings.
Track 1099 Vendors
Not every vendor is considered an independent contractor or eligible 1099 vendor. After assigning your expense accounts with your 1099 tags, you will need to mark which of your contacts will be tracked as a 1099 Vendor by adding them to the built-in list called 1099 Vendors.
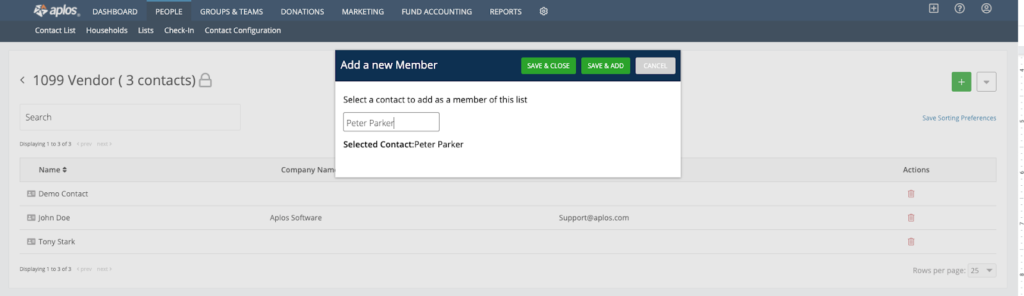
You can locate this list by navigating to People > Lists and select the 1099 Vendor list. To add a new vendor, click the green plus (+) icon at the top right. Search for the name and click on the contact. It will display their name next to “Selected Contact.” Select “Save & Close” or “Save & Add” to add a new vendor to the list.
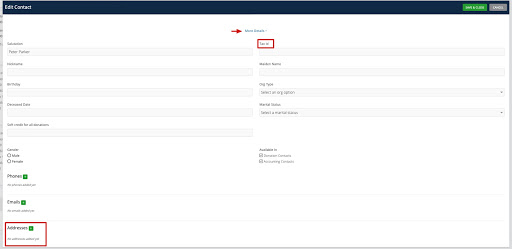
A vendor’s address and Tax-ID are required before generating the 1099 report. Review each vendor in the list by clicking their name to open their contact profile. Then check their details tab to ensure the address and Tax ID are entered.
If you need to add their address and/or Tax ID, click “Edit Information” on their contact profile. Select “More Details” to display more contact fields. Locate the Tax ID field and input their Tax ID. Scroll down to locate the Addresses field and input their information. Once completed, click “Save & Close.”
Tracking 1099 Expenses
Once your vendors are in the 1099 list and your expense accounts are mapped, any transaction that combines the mapped expense account and a 1099 vendor will automatically be tracked for 1099s.
How To Prepare A 1099-MISC, 1099-NEC, And A 1096
Your 1099s and 1096s must be mailed each year by January 31 and use an IRS-compliant form. Here are the basic steps you need to prepare your forms in Aplos:
- Order your IRS forms (1099-MISC and 1099-NEC)
- Review your 1099 report
- Print on the 1099s and 1096 forms
Step 1: Order Your IRS Forms
If you are planning ahead, you can purchase the 1099 and 1096 forms from our preferred partner. You can also find the forms on the IRS website or at your local office supply store.
Step 2: Review Your Form 1099 Report
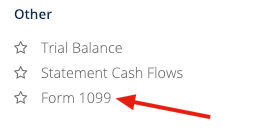
Once configured, Aplos tracks all your 1099 expenses accounts and 1099 vendors, and displays them on your Form 1099 report. Navigate to the Reports screen, and click the Form 1099 report near the bottom of the page.
Here you can see all 1099-eligible vendors and their transactions. This report automatically filters out any vendors that have not met the $600 threshold or did not have expenses in an account mapped to a 1099 category.
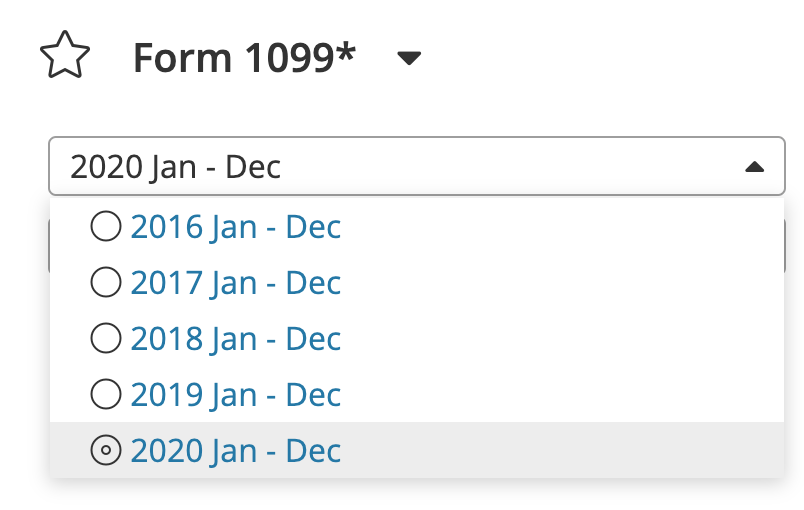
The report will default to the date range of the current year, which you can change within your date filters. Choose the date range that best fits the timeframe you need to pull vendor history for.
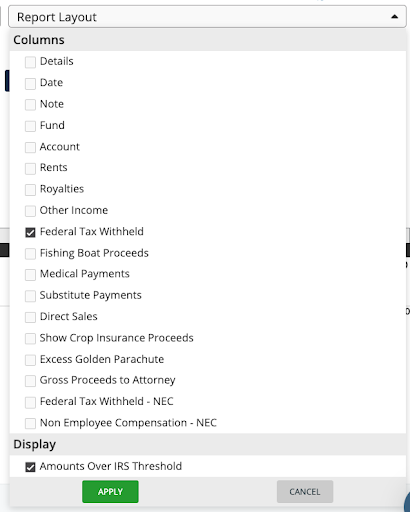
You’ll also find Report Layout options. The report will default to show a summary of each vendor. You can utilize Report Layout to customize your report to display more information for each vendor. Click each checkbox you wish to display and click “Apply.”
Once you have your filters all set, you can share the report by email, save it to your Saved Reports to access at a later time, print it, or download it.
NOTE* To print 1099 and 1096 forms, ensure the filter Amounts Over IRS Threshold is enabled
This report also shows any other missing information for a vendor. You’ll notice the vendor’s address and Tax ID are required before generating the 1099 report. Enter any needed information on the contact screen, and then navigate back to the 1099 report. Learn more about how to track 1099 Vendors.
Before downloading and printing your forms, ensure that your organization information is also up to date since this will be displayed on all forms. You can enter or update this information on the Org Info page. The administrator of your Aplos account can do this by going to Settings and selecting the Org Info tab. Check out our resource on updating Org Info.
Step 3: Print Your Form 1099s and 1096s
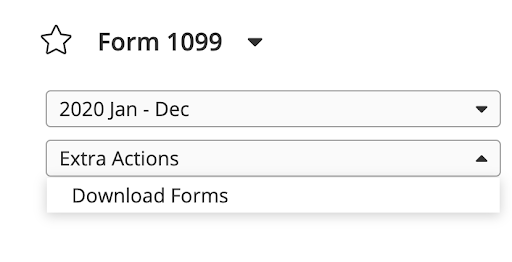
After entering the necessary information, go to “Extra Actions” and click “Download Forms.” For the Form 1096, provide the Name, Number, and Email for whoever is filing the form. Once finished, this will begin the process of downloading a zip files with Form 1099-MISC and Form 1099-NEC for each eligible vendor, as well as Form 1096 to be sent to the IRS. When you open the zip file, the data will be exported as a PDF and formatted to fit in the appropriate boxes and spaces on all three forms.
Tip: Test print the 1099 on a blank piece of paper first to ensure your printer is configured correctly and the values fit into the boxes. If everything looks good, load your form into your printer for the final print.
How To Troubleshoot 1099s
Having trouble generating a 1099 for one of your vendors, or seeing incorrect amounts listed on the 1099 report? Below are a couple of suggestions as to what could be causing these issues.
Why isn’t one of my vendors showing up on my 1099 form?
It is possible that the eligible expenses did not meet the amount threshold for the 1099 category and have been filtered from the report. On the Form 1099 report, under Report Layout, uncheck the box for “Amounts Over IRS Threshold” to see all tagged expenses for all vendors.
If you are still missing a vendor on your 1099 report, it is possible you did not yet add them to the 1099 Vendor list. Click on the “People” tab and go to “Lists.” Within the Lists section, click the “1099 Vendor” list.

The following page will show a list of any contacts that have already been added to this list. If you do not see your 1099 vendor on the list, click the green plus (+) button to add a contact. Enter the contact’s name. Then click “Save & Close” if that is the only contact you need to add, or click “Save & Add” if you have more contacts to add to the list.

The incorrect amount is showing on a 1099 for one of my vendors.
If the incorrect amount is appearing for one of your 1099 vendors, the most likely problem is that expense accounts are incorrectly mapped out in the 1099 tag setting. To fix this, start by going to the Fund Accounting Section within Aplos. Click on “Accounts” and then “1099s.”

At the top of the screen, click on “Manage 1099 Tags.”

From here, you can map out each of your expense accounts to a specific 1099 tag. Once mapped, every time you use this account to record a transaction to a payee that is on your 1099 Vendor list, the transaction will be added to their 1099 report. Below is an example of what this page looks like.
Cross-reference this page with the “Expense by Payee” report for your organization to verify whether the accounts properly match the 1099 tags.
How to Generate 1099s If You Switch to Aplos Midyear
If you switched to Aplos mid-calendar year without bringing in the full year’s worth of transactions, your 1099s will be incomplete in Aplos. You will need to backfill those vendor transactions to produce a full 1099 for the calendar year. This is a multi-step process and will require a little setup before getting started.
First, make sure to complete the basic setup steps for 1099s in Aplos.
Second, create an asset account in your chart of accounts. Learn how to create an asset account.
- Account Number = whatever you’d like
- Account Name = “1099 Historical Transactions”
- Type = Use as a register
- Activity = Cash

Once created, go to this account in your register and click “Import” on the righthand side.

Download the template here, which is what you will use for the historical transactions. Fill in this template with all of the missing calendar year transactions for each vendor. Then enter a reversing transaction that uses the same date, account, fund, and amount as what you’ve recorded for each vendor.
Attached is the template file with an example of how this should look. You’ll see that Alex was paid $1,000 for a speaking engagement. The line with red text below essentially reverses it but does not use Alex’s name. Using the different vendor will count the expense against the applicable vendor while the reversal adjusts the accounting side without affecting the vendor history. When this is done for all of the transactions, upload this file into the newly created register account from above.
Now you should have a full record of the vendor transactions, with reversals that use a different contact. The net effect on the register should be $0, and each vendor should see all of the transaction history on their 1099.