Tags allow you to further categorize your transactions in order to see more detailed information on your Reports. You may also have heard these referred to as classes in other programs. This guide will explain Tags—what they are, how to set them up and how to generate helpful reports.
Tags are used in addition to true fund accounting. Fund Accounting allows you to track all types of accounts for a particular purpose, whereas Tags only apply to income and expenses. For example, let’s say your organization is hosting a series of fundraisers for your Building Fund. Although all money raised will end up in your Building Fund, you may still want to track the income and expense for each of the fundraisers separately to evaluate how profitable each one was. You can easily do this by creating a Tag for each fundraiser (e.g. “Winter Building Fundraiser”). You can choose the proper fundraiser’s Tag each time you enter a transaction for that fundraiser. Once the fundraiser is complete, you can generate a transaction list or income statement by Tag.
Enabling and using Tags happens in 3 main steps:
1. Enabling and managing Tags
2. Entering Transactions
3. Generating an Income Statement for a Custom Tag
Enabling and Managing Tags
When logged into Aplos, go to Fund Accounting > Accounts > Tags. Here you will see 5 types of tags: Fundraisers, Projects, Departments, Custom, and 990. If the tag layer is not enabled, you will see a link to enable it and add it to your subscription if you have administrator permissions for your account.
NOTE: The functionality of all tag types is generally the same, with the exception of 990 Tags which are a little more involved. For specific guidance on 990 Tags, please click here.
Creating Tag Groups
When on this screen, your tag categories will function just like your accounts. You have Tag Groups, which have Tags within them, and those Tags can have Sub-Tags if needed. On reports Sub-Tags roll up in to their parent Tag, which then can be subtotaled by Group.
To add a new Tag Group, click the green + icon to the right.

How to Create a New Tag in a Tag Group
You can also add a Tag or Sub-Tag by clicking on that same icon, or use the black + button in the Tag Group.

Multiple Tag or a Single Tag Entry for Transactions
Once you have the Tags you want created, you have a choice as to whether you want to be able to choose multiple Tags from this type per transaction or only one.
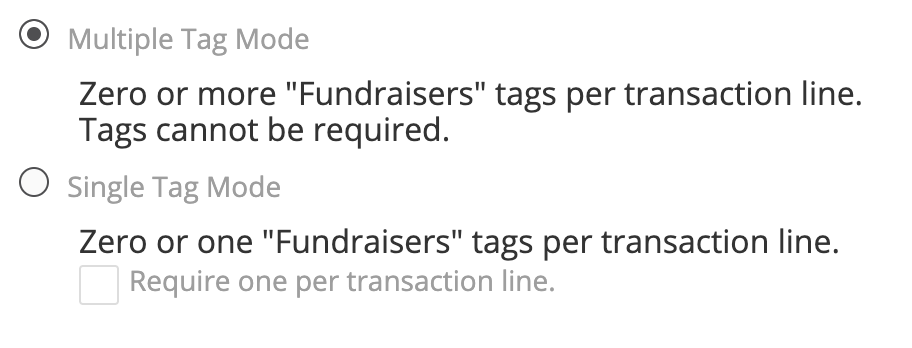
Example, let’s say you have $10 that is applicable to multiple departments. You have departments set up as Tags, so you want to select two or more departments for the same $10. For this you would make sure the Tag type (i.e. Fundraiser, Custom, etc.) has “Multiple Tag Mode” selected. Otherwise, if you only want to be able to choose one at a time, you would make sure the Tag type has “Single Tag Mode” selected.
You can also select to require a Tag if using Single Tag Mode.
How to Rename Tag Layers
The first four Tag types listed are titled this way by default; however, you are able to rename these types if desired.
To accomplish this, select the Tag type you want, click on the downward-arrow on the far, right-hand side, and then choose the Rename Category option.

From there, enter the new title you’d like to use, and then click the green, Rename button.

Entering Transactions with Tags
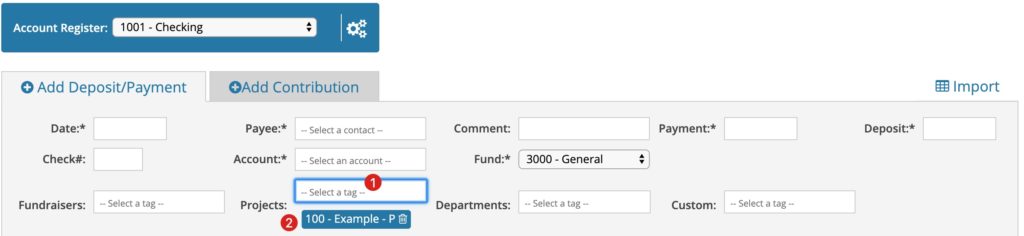
Tag Transactions in a Register
Now that Tags have been enabled you will notice a new field when entering transactions that says “Select a Tag”. This is an optional field, in which you can select one of the Tags you have set up. Once selected, you’ll see the assigned tag listed underneath the Tag field in blue. You can choose to add additional tags to the transaction if you’d like.
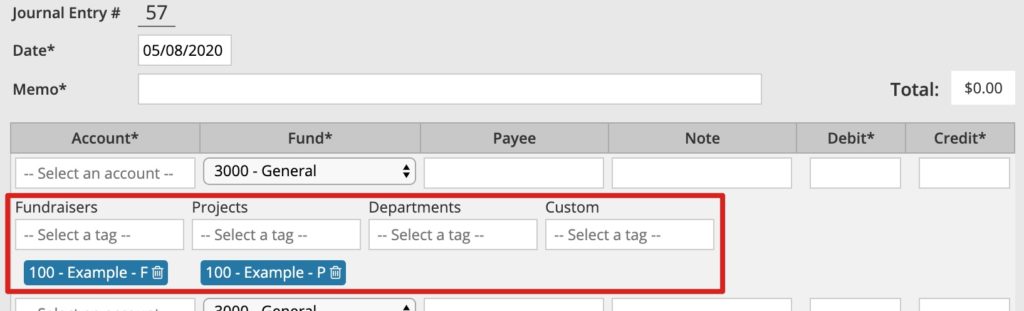
Tag Transactions in a Journal Entry
Edit Transaction to Add Tags
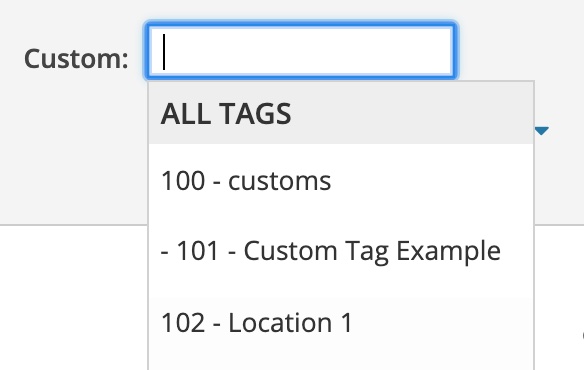
If you post a transaction before assigning a tag you can simply click on the transaction listed in your Transaction History, select the Tag and then click “submit” to update and save the transaction. Also, if the list of Tags is not appearing when you click into the field, press the spacebar and the list should appear.
Assigning Tags to a Donation Purpose
You can also assign Tags to the Purposes that are used in Donations so that the linked Accounting transactions have a tag applied. This will be done in the same area where you assign the income account and fund to a Purpose that should be used to track in Accounting.
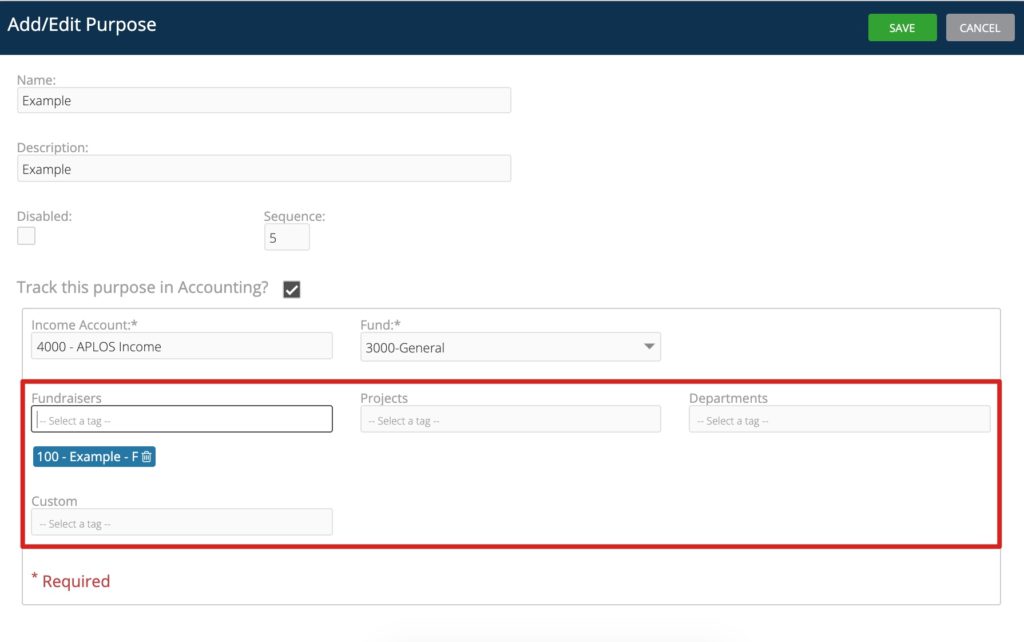
You can assign more than one tag if needed, and all tags will be listed underneath the Tag field in blue.
Generating Reports for a Tag
For each Tag type you have three reports:
Tag Statement
This report shows you the overall net income, expense, and potentially budget amounts for each Tag within the type you chose. You can then click on an amount to drill down to the income statement by Tag.
Income Statement by Tag
This report shows you the total income, expense, and net income for the Tag type you chose. You can filter down to specific Tags, and drill down to a transaction list for that account / Tag by clicking on the amounts shown.
Transaction List by Tag
This report shows all transactions entered for the Tag type you chose. You can filter down to specific Tags, and drill down to transactions by clicking on the amounts shown.
You have now successfully added, entered, and reported on Tags! If you have any questions about Tags, or anything else Aplos, please don’t hesitate to reach out.
Note: Enabling any Tag Dimension will automatically update your subscription price. For further review on the cost of enabling Tags, please view your Subscription Page.