With Aplos’ Allocations feature you can create cost drivers to split income or expense across multiple funds, departments, projects, or locations.
A few examples of allocations are:
- Splitting donations across multiple funds
- Splitting the expense of an electricity bill by square footage across multiple locations
- Splitting the cost of printing costs evenly across multiple departments
These three examples can easily be accomplished using the Allocations tool.
Creating a Cost Driver
The first step in this process will be to create your cost driver. The cost driver will be the trigger which changes the overall dispersal of income or expense. From the Cost Drivers tab, click Create New Cost Driver. 
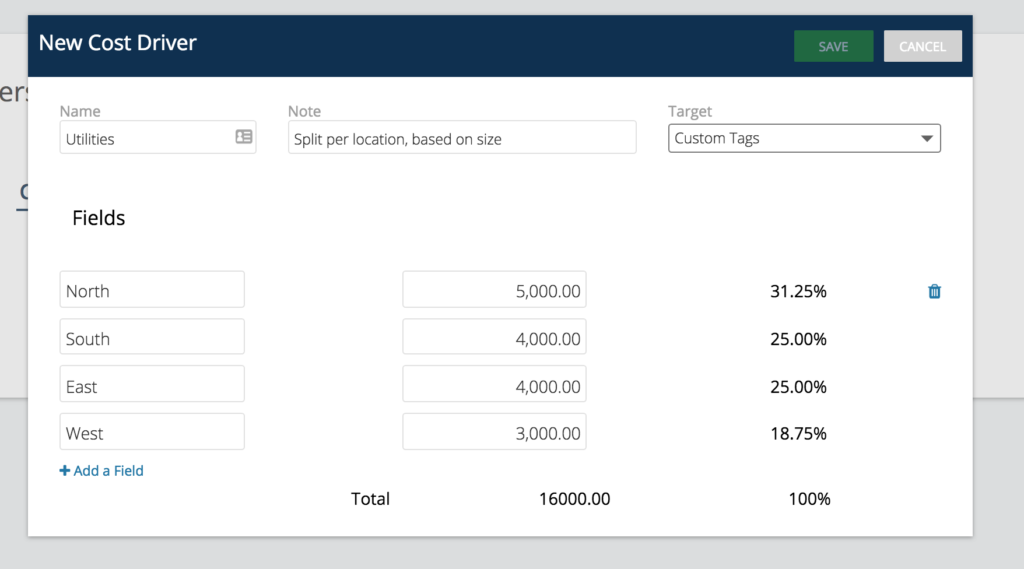
After clicking Create New Cost Driver, you will complete the Name, Note, Target and Field sections. The Target will allow you to choose to split between multiple funds, or tags. The example below, is a cost driver using the previous example of splitting the expense of an electricity bill by square footage across multiple locations. In the Fields section, the first column is a list of different locations, the second column is the square footage of each location, and the third column will automatically calculate the percentage of the whole.
Allocating Transactions
After you have created your cost driver, you can now record a transaction, which you will allocate after posting. You will see that the software has automatically created an Allocate fund, and an Allocate tag for each of your different tag options. You will use either the Allocate fund or Allocate tag when recording your transaction. This will act as a holding place for that transaction until you go in an post the actual allocation.
Record your transaction for your electricity bill as normal, with the exception of using the Allocation tag for Locations. This will trigger the software to add that transaction to your Allocations page.

Posting the Allocation
After you’ve posted your transaction, you can now go to your Allocations page to post your allocation. This process will distribute the total of the transaction across multiple funds or tags, depending on your cost driver.
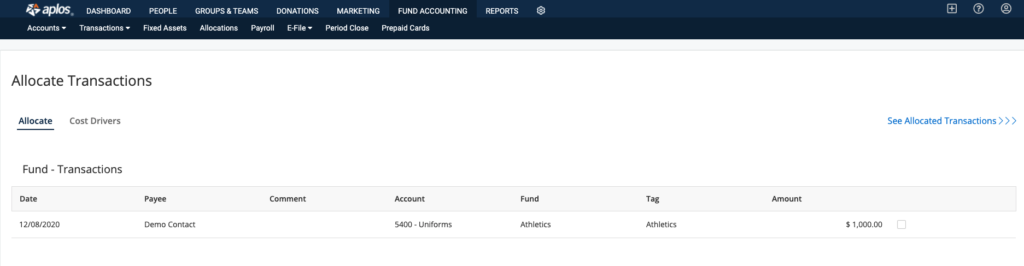
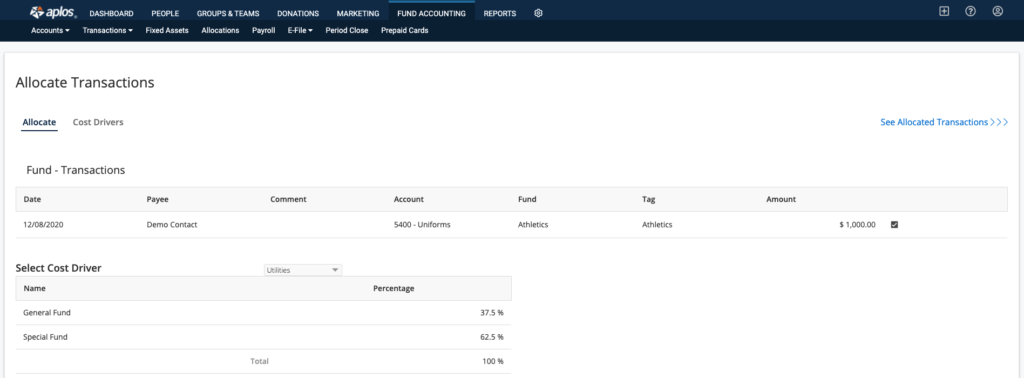
Choose the allocation that you’d like to post by checking the box to the left of the date. You will then choose the cost driver, which will show the breakdown of the allocation. Click Submit to post. This will post a transaction to allocate the split to the specified location tags.
The software will continue to track what transactions can be allocated, so keep an eye on your Allocations page and submit those when necessary.
How to Unallocate Transactions
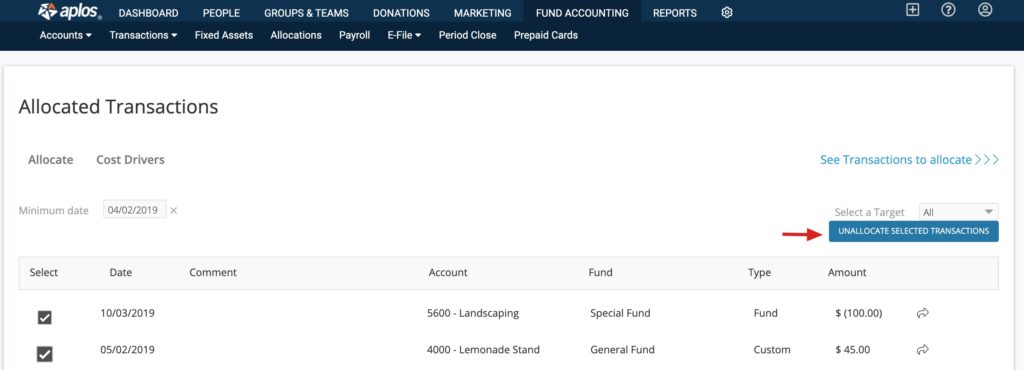
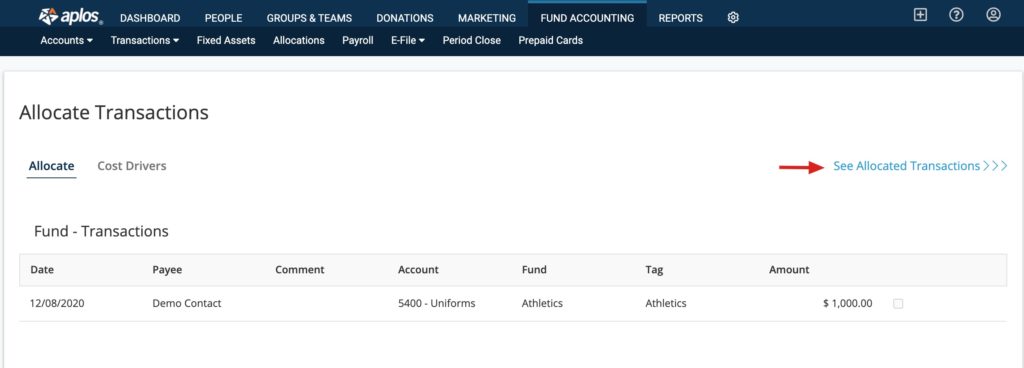
Any transaction that has been allocated through the Allocations module can be edited and unallocated. To begin, navigate to the Allocations module under Fund Accounting > Allocations. Click, See Allocated Transactions on the right side of your screen.
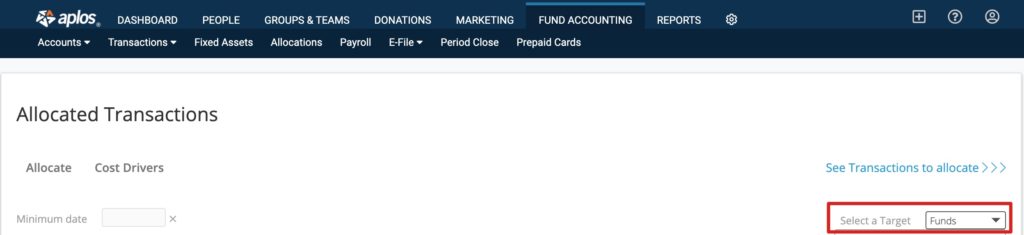
Once here, locate the transaction(s) you wish to edit, you may need to toggle between your funds and tags depending on how you categorized your allocated transaction. To do so, click Select a Target on the right side and choose between your Funds, Tags or All. Each target will present any transaction(s) that was allocated to their respective fund or tag. You can also search by date by selecting the earliest date a transaction may appear in the Minimum Date box.
After locating the appropriate transaction(s), click the check box to the left of the screen. After check marking each transaction you wish to edit, select Unallocate Selected Transactions. A confirmation box will appear to review the actions. Once reviewed click Confirm and you successfully unallocated your transaction(s)