With Advanced Budgeting, you can build a budget for each of your advanced tag layers and, subsequently, each tag, which means you can create a single budget and filter between each tag. Tags are used in addition to fund accounting and allow you to further categorize transactions for more detailed information.
For example, a multisite organization can now have an independent budget for each campus or location. The budget you create for an advanced tag is separate from the overall budget for your fiscal year.
NOTE: Advanced Budgeting and at least 1 Tag Layer must be enabled.
For more information on how to create and use tags, see our Accounting Tag Guide.
Create And Edit A Budget By Tag
Creating A Budget By Tag
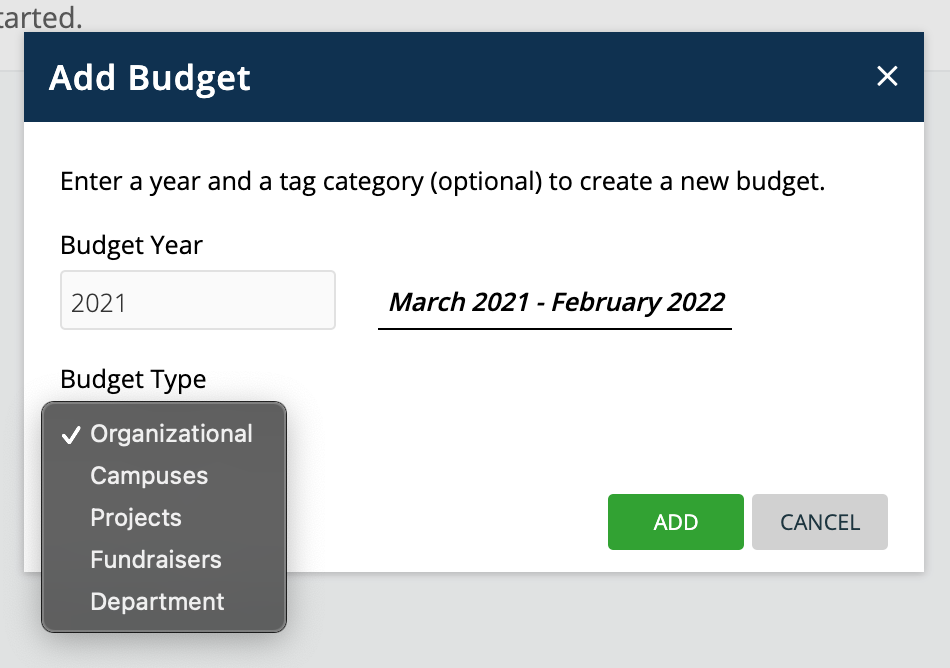
To begin creating your budget by tag, navigate to the Budgeting screen: Fund Accounting > Accounts > Budgeting. Click the plus (+) icon to start a new budget.

Enter the preferred year in the Budget Year box. Next, click the dropdown under Budget Type and select the preferred tag layer. Then click “Add.”
Once you’re in the budget year you want to work on from the Budgeting screen, you will have two options to budget by tag. The first allows you to add a budget for income and expense accounts for a particular tag. The second allows you to enter a budgeted amount for your income or expense accounts, but the total will be split between multiple tags at once.
Option 1: Set Up A Budget For One Tag
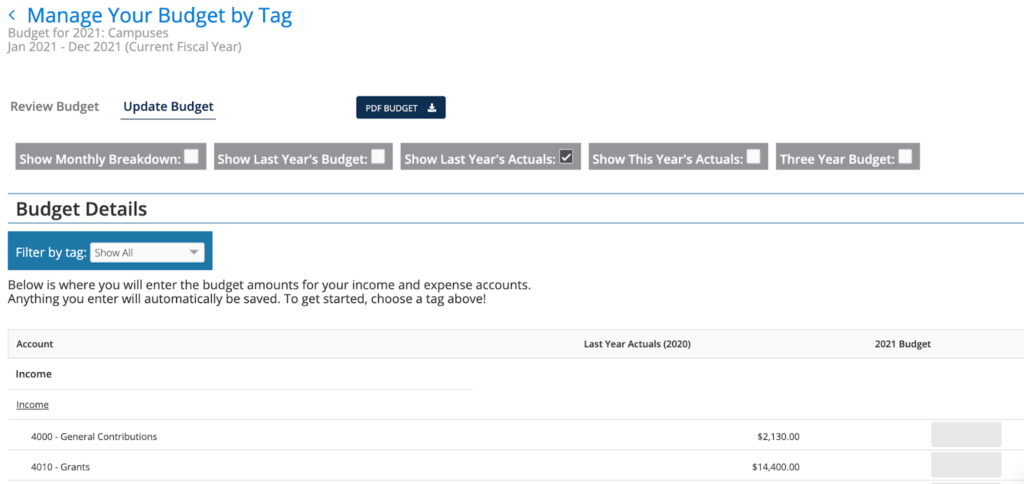
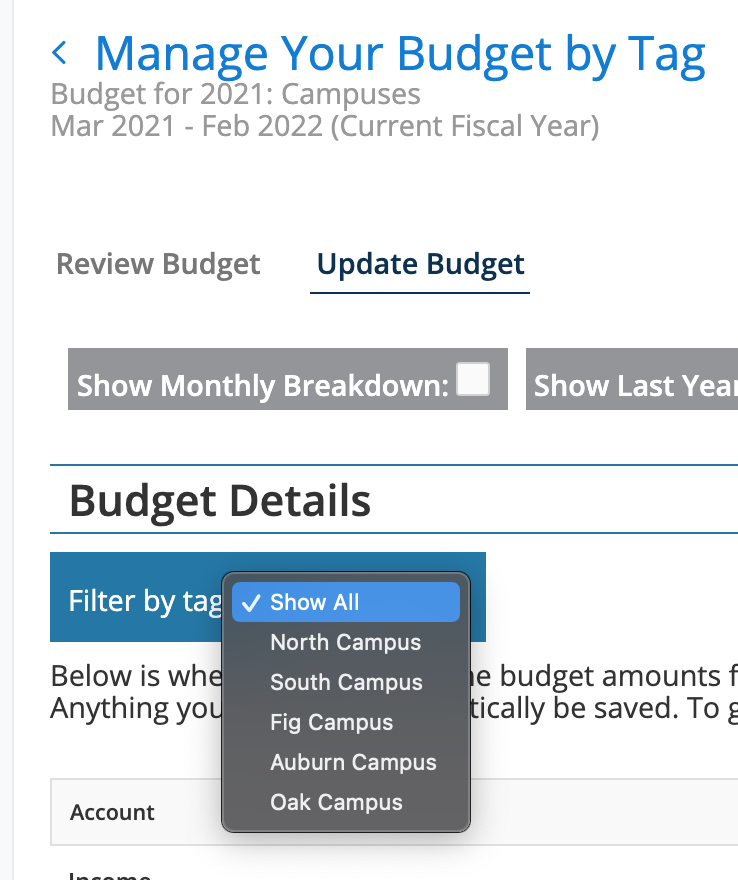
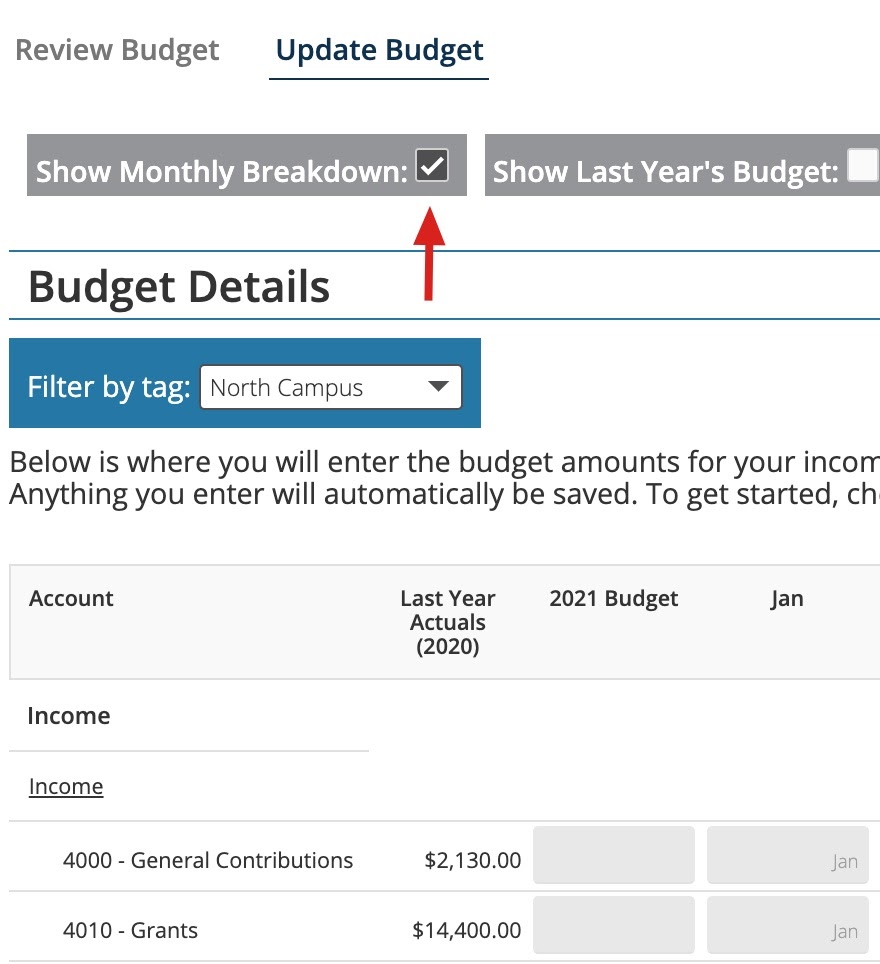
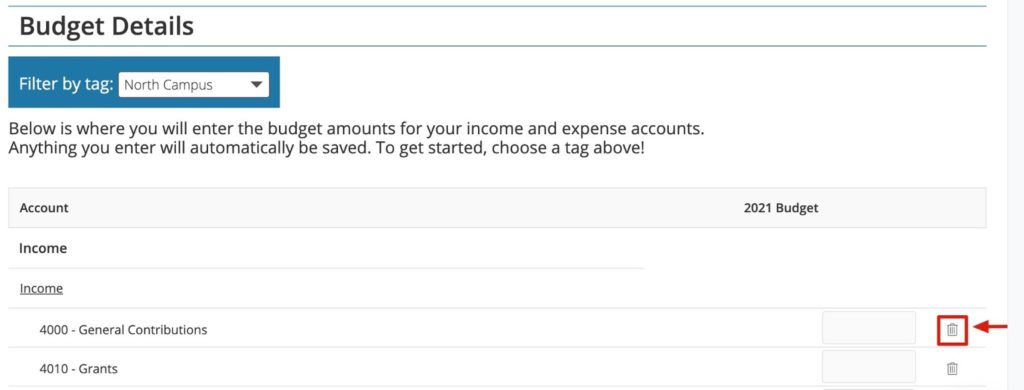
At the top of the screen you will see a box that says “Filter by tag.” To set up a budget for a specific tag for income and expense accounts, choose the tag in the dropdown menu.
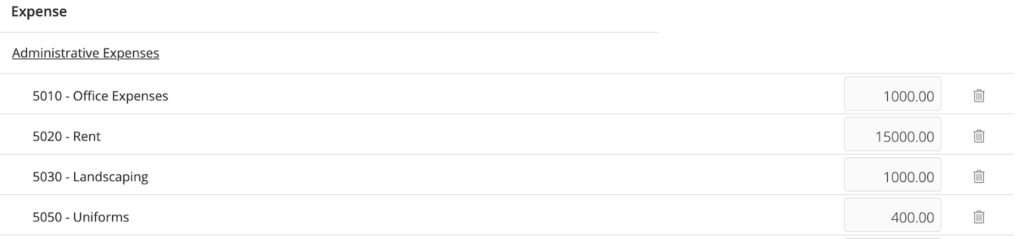
Enter the budget amount for each appropriate income or expense account for that specific tag. You may not need to enter a budget amount for all income or expense accounts; you only need to enter those pertaining to that specific tag.
For example, you might be budgeting for one of your departments. If you have budgeted an amount that the department can spend on office expenses, you will enter that amount on that budget line item.
If you need to do a monthly breakdown, select “Show Monthly Breakdown” to split your budget across 12 months.
The software will automatically save your progress as you enter your budget information. The trashcan icon to the right will clear the budget amount for that line.
Once you’re done, you can choose the Show All option in the Filter by Tag dropdown to view a roll-up of the total budget.
Option 2: Set Up A Budget For All Tags
To set up budget amounts for all income and expense accounts across all tags at once, click on the account name from the list to see a detailed view. See the example below.
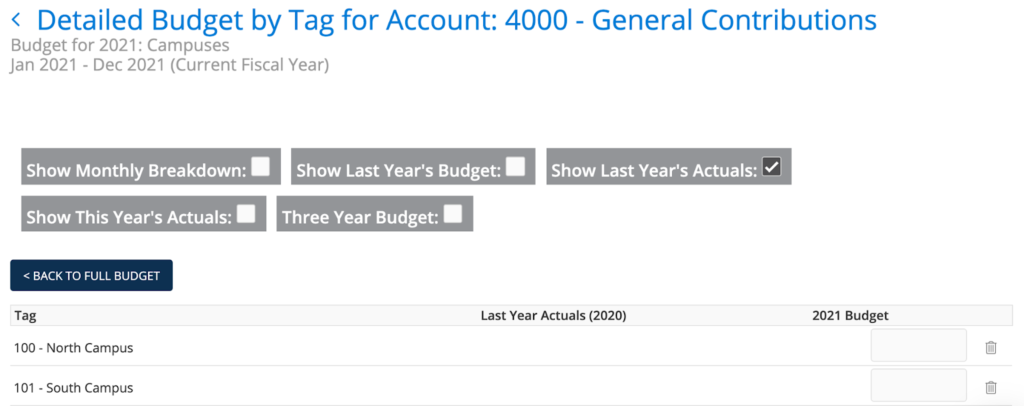
Once you’ve set all the budget amounts for that account, you can click “Back To Full Budget” to return to the full list of accounts.
How To Import A Budget By Tag
If you prefer to import a budget instead of building one within Aplos, you can upload an Excel file of your budget through the main Budgeting screen. This will require you to use the dimensional budgeting template and the steps involved to import your file. You can review our Dimensional Budgeting Guide to ensure a successful import.
Editing Your Budget By Tag
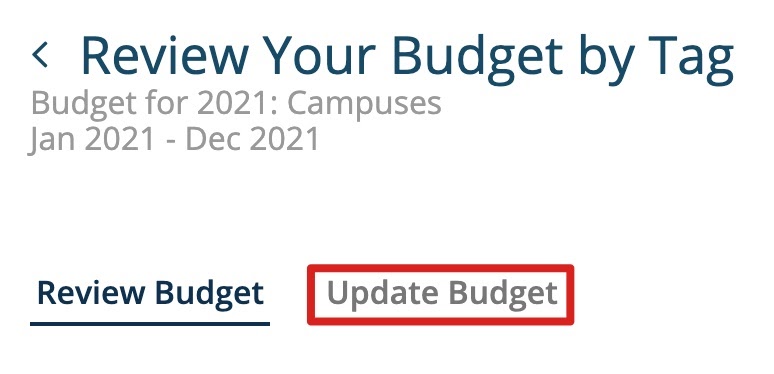
If you need to edit your budget amounts, you can do so within the budget module. To begin, navigate to the Budgeting screen: Fund Accounting > Accounts > Budgeting. Click the budget you wish to edit and click “Update Budget” on the Review Your Budget screen. Then choose the tag you wish to edit and begin entering the budget amount for each appropriate income or expense account for that specific tag.
Creating Budget Reports
Budget To Actual Reports
On the Reports page, under Tag Based Reports, you’ll be able to run reports on your tag budgets to show your budget and actuals for various date ranges.
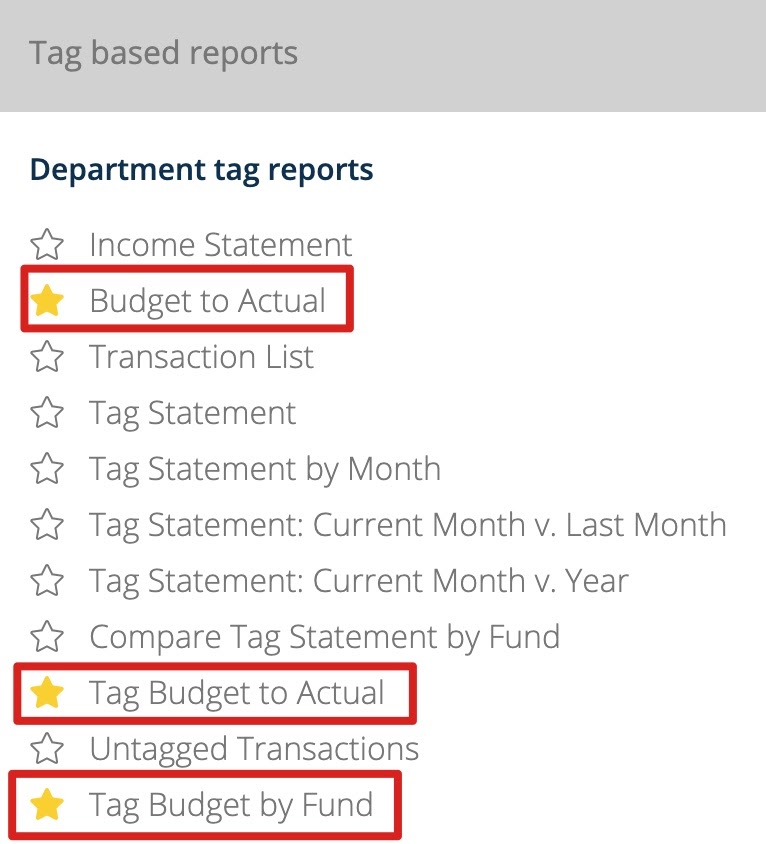
- The Budget to Actual report compares your income, expenses, and net income to your budget for each specific tag.
- The Tag Budget to Actual report compares all tag amounts to your budget on a single report.
- The Tag Budget by Fund report compares tag amounts to your budget by fund if you created a dimensional budget.
The Comparative Budget to Actual report under “Other Budgeting Reports” allows you to track your progress for your fiscal year by “Year to Date,” “Current Month vs. Last Month,” or “Current Month vs. Year.” Utilizing the report filters will allow you to filter by funds, accounts, and tags.
Understanding Budget Reports
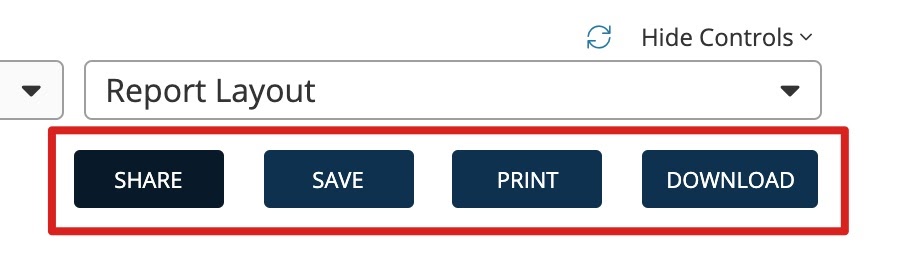
When running any of the reports, you can use the Report Layout menu to adjust the information included.
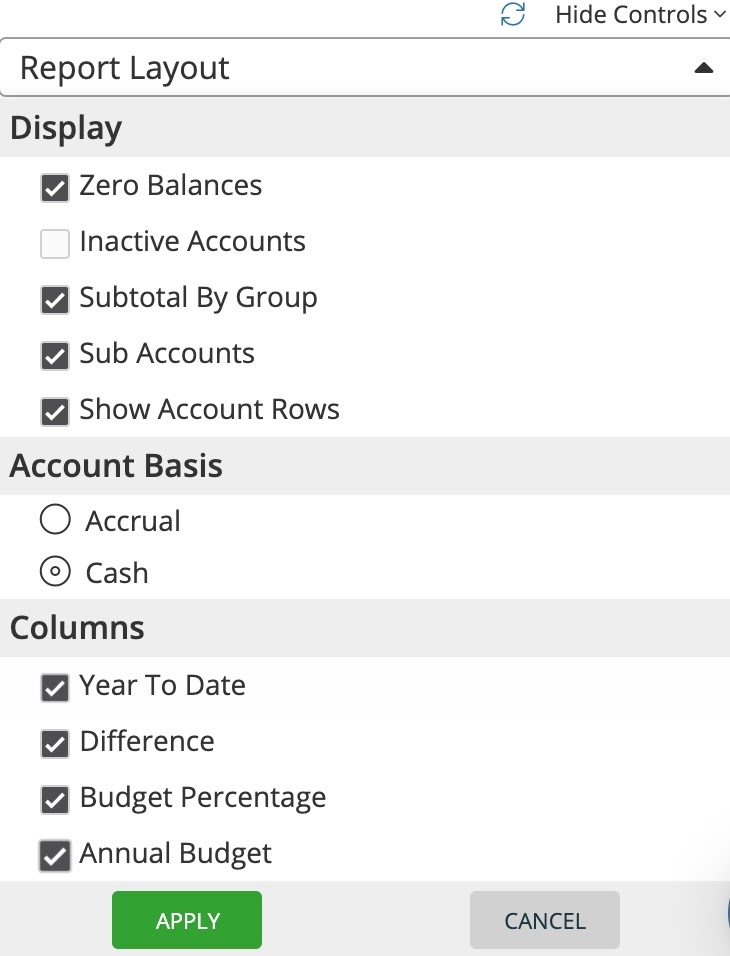
Calculations for each column are as follows:
Actual: Actual refers to any income or expenses that you have recorded in the software within the date range selected on the report.
Year To Date: This is the projected amount that should have been used within the date range selected. It is the amount you’ve projected to spend according to your date range. For example, if you’ve budgeted $100 per month for one of your accounts, and you’re running your budget report for 1/1/21-5/31/21, you’ll have completed 4 months, which means this budget amount will be $400.
Difference: The difference is calculated by subtracting the overall budget from the year-to-date budget.
Budget Percentage: The budget percentage is your actual income and expenses divided by the year-to-date budget.
Annual Budget: This is the overall budget amount set within the budget module.
You can share your budget reports by email or download your report as an Excel file or PDF. Also, if you have certain filters or layout selections you wish to keep, you can save a report and locate it under the Saved Reports section on the Reports page.