Event Fields For Event Registration And Ticketing
If you are using Event Registration for your next event and need to collect data for your event attendees, you can add custom fields to your registration form in the Tickets section. When editing ticket options, you can add custom fields to each type of ticket, which will customize each ticket type to display different fields when registrants complete their checkout. For more information on creating event forms, review our guide Creating Event Registration Forms.
Event custom fields are an included feature in Advanced Event Registration. You can upgrade to Advanced Event Registration to create Event Fields from the subscription page.
Below is the process for creating a custom field, setting it up on the event registration form for your event, and tracking data in that field.
Creating And Editing Event Custom Fields
You must create your event fields before adding them to an event form. The same fields can be added to multiple events. The event form fields you create are unique to event reports and will not be visible in the contact record in Aplos.
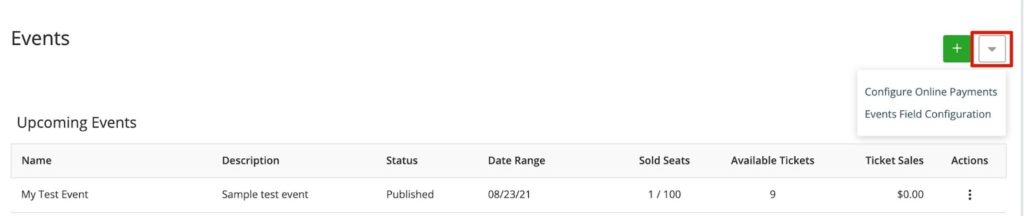
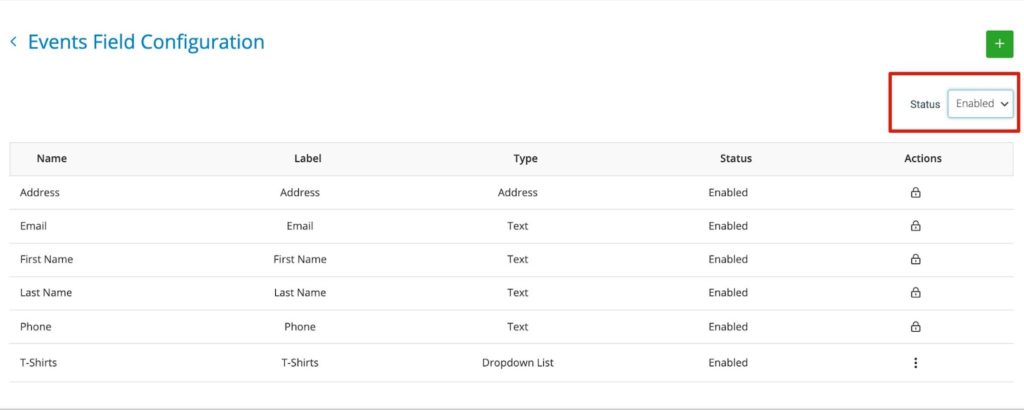
To create a new event registration field, navigate to the screen for Event Custom Fields by going to the Donations section in Aplos and clicking on the Events tab. Next, select the down arrow on the right side of your screen and click “Events Field Configuration.”
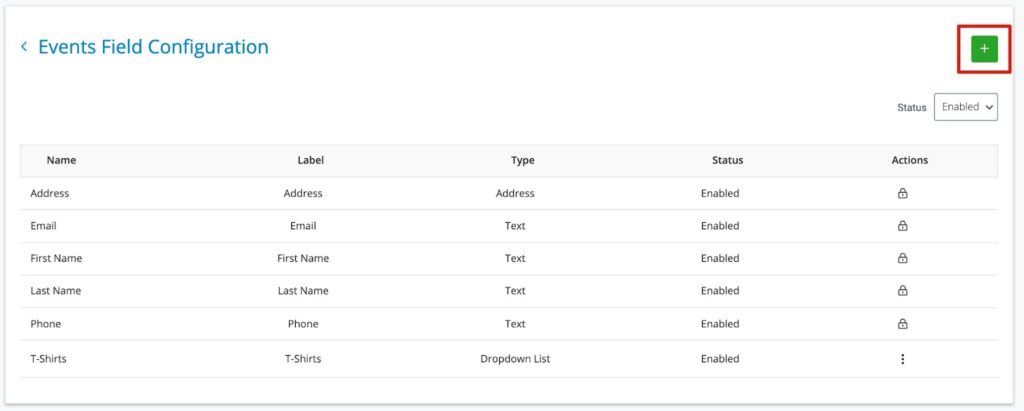
From this page, you can create customized fields beyond the basic fields included in Event Registration. This will allow you to track information about your event attendees, such as food preferences, membership ID, t-shirt size, etc. To create a new custom field, click the green plus (+) icon.
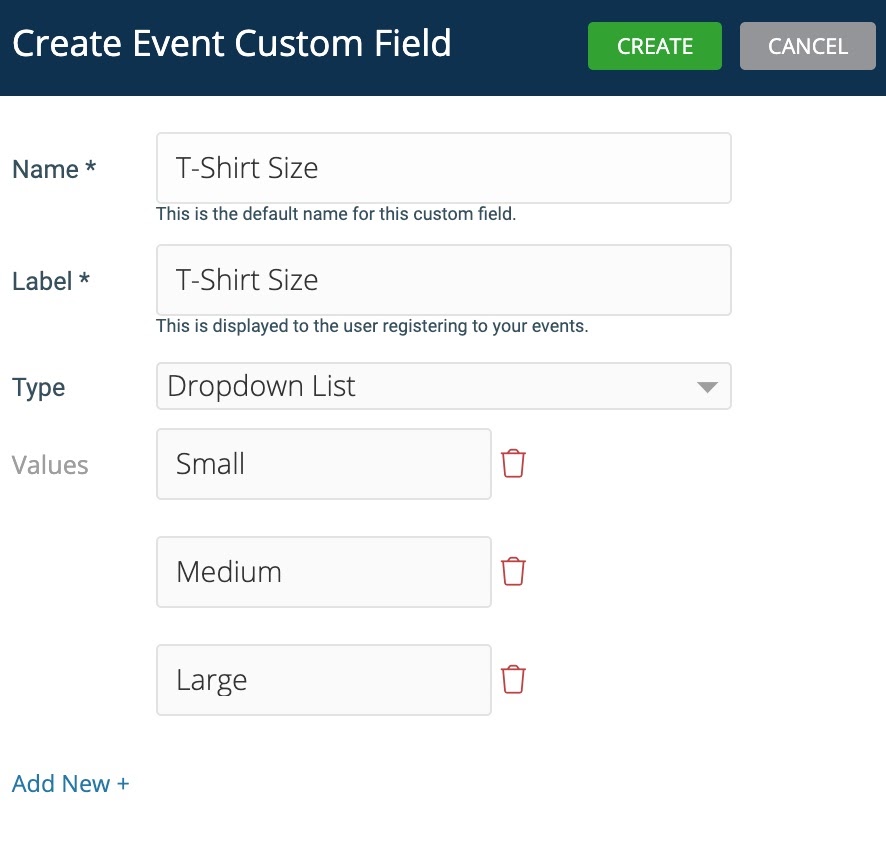
Field Name: The Name of the field is for internal use and must be unique.
Field Label: The label can differ from the name field and will be displayed to the registrant when registering for your event.
*Note: Maximum 200 characters. You cannot include hyperlinks.
Field Type: Available field types for custom fields:
- Text – accepts characters and numbers
- Decimal Number – accepts numbers and decimals
- Whole Number – accepts numbers only
- Date – accepts dates in format mm/dd/yyyy
- Dropdown – displays a dropdown with values alphabetically sorted ascending
Select “Create” to create the field.
How To Find And Filter Event Fields
You can manage Event Fields from the Event Field Configuration screen. You can filter the Event Fields by clicking the dropdown on the right side of the screen and selecting the preferred option “All,” “Enabled,” or “Disabled.”
Editing Event Registration Custom Fields
On the Event Field Configuration screen, you can edit a custom field by selecting the three dots under the Actions column of your preferred field and clicking “Edit Event Field.” From here, you can make changes to the custom field. Once complete, click “Save.” The ability to edit an existing event field Name, Label, or Type will remain available even if the field is used in an upcoming event or on any ticket purchases. If the event field is a dropdown type, you can edit, add, or remove values on the field.

How To Delete Or Disable Event Custom Fields
If you need to delete or disable an Event Custom Field, select the three dots under the Actions column for your field. Then select your preferred action.
Disable: If you disable an event field, you can re-enable it at a later time. If an event field is disabled but currently on a published form, the field will automatically be removed from the form.
Delete: Deleting an event field will be permanent and cannot be undone. You cannot delete a field if it is currently being used or has been used for past tickets.
Enable: If you wish to re-enable a disabled custom field, select the tab “Disabled” and locate the disabled custom field. Select the three dots under the Actions column and click “Enable Event Field.”
How To Manage Event Registration Custom Fields
Adding Custom Fields To Forms
To add custom fields to your form, select the event desired. Then select the Tickets tab, and the edit icon for the ticket that requires event fields. In the Attendee Info section of your ticket, you’ll see a list of fields. Click “+ Field” and then click in the open field to view the dropdown of available custom fields. Select the desired field, and then select the green check mark to add it to the form.
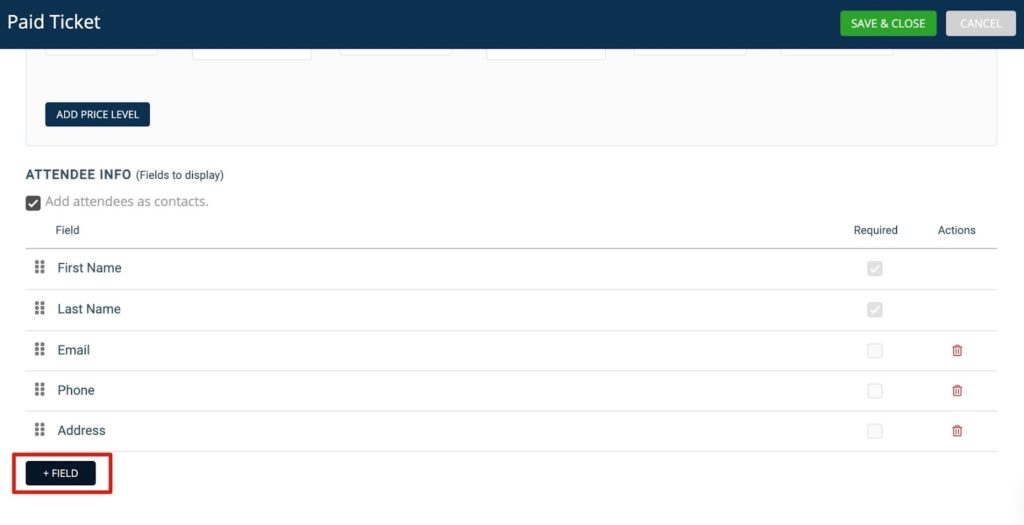
You may make the field required for the attendee by selecting “Required.”
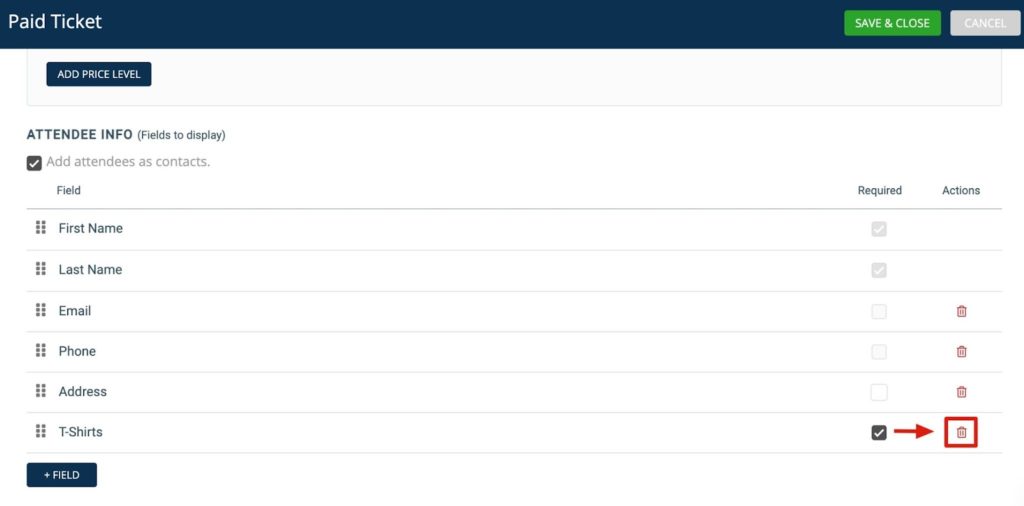
If you wish to remove the field on the form, select the red trash can icon in the row. The field will still be available from the dropdown.
To rearrange the order of the fields displayed on the event registration form, select the icons on the far left of the field row to drag and drop the field in the preferred order.
When you’re finished customizing the ticket, select the green Save & Close button at the top of the screen.
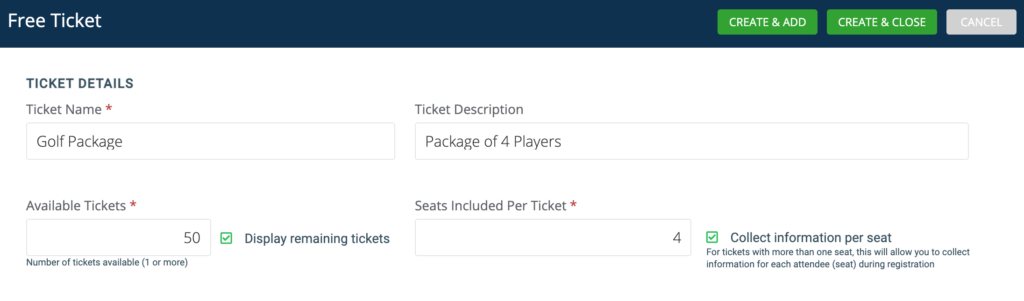
Collect Information Per Seat
The option to collect information per seat allows you to collect information about each attendee during registration. This option is used for tickets with more than one seat. If you have event fields on your registration form, the registrant can complete information about each attendee, including available custom fields. You can enable this option when creating tickets for your event.
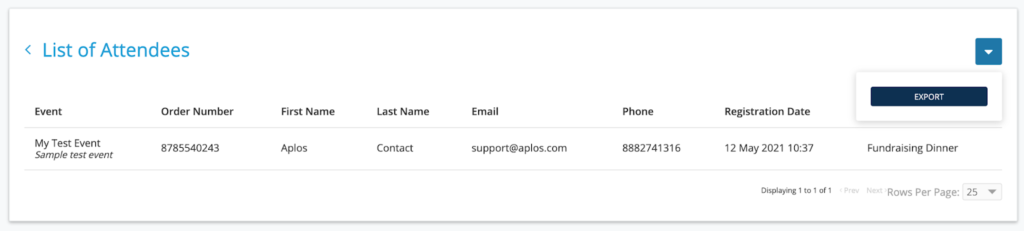
View And Export Event Field Responses
From the Events page, you can select the three dots under the Actions column for your event. Then select “View Attendees” to see ticket information and export a detailed view of the custom field information for any attendees and tickets.

Your Attendee report screen includes anyone who has been assigned a ticket for your event, attendee first and last names, emails and phone numbers, and the ticket types. To view information provided for any enabled event fields, export the attendee list report. To export, select the arrow on the top right and click “Export.”
Note: If a registration has been canceled, the attendee data will no longer be visible in the attendee list or exported file.