Aplos Website builder is a tool to help you quickly and easily create your website in a few simple steps. The builder basically creates a template for your site using options for header colors, home page layout options, pre-made pages, and stock images that you will personalize to fit your organization. Below are the steps to create your site in 5 easy steps.
Step 1 :: Intro
You will access the Website builder by clicking your Marketing tab, then Website, then one of the options in that drop-down menu. When accessing the builder for the first time, you will notice a wizard that will pop-up to walk you through the process of creating your site. The first page of the wizard will give you an intro. Clicking the green “Next” button will take you to the next step of assigning a name to your site.

Step 2 :: Naming your Site
This step allow you to set your Aplos hosted URL for your site. You might consider using your organization’s name for this, but we do recommend that you keep it short and easy to read. If you have a longer organization name, you might use just the acronym of your name.
NOTE: If you have purchased a custom domain through a domain registrar (i.e. Hover or GoDaddy), then you will set that up in the Domain Setup section, which is outside of the builder tool.

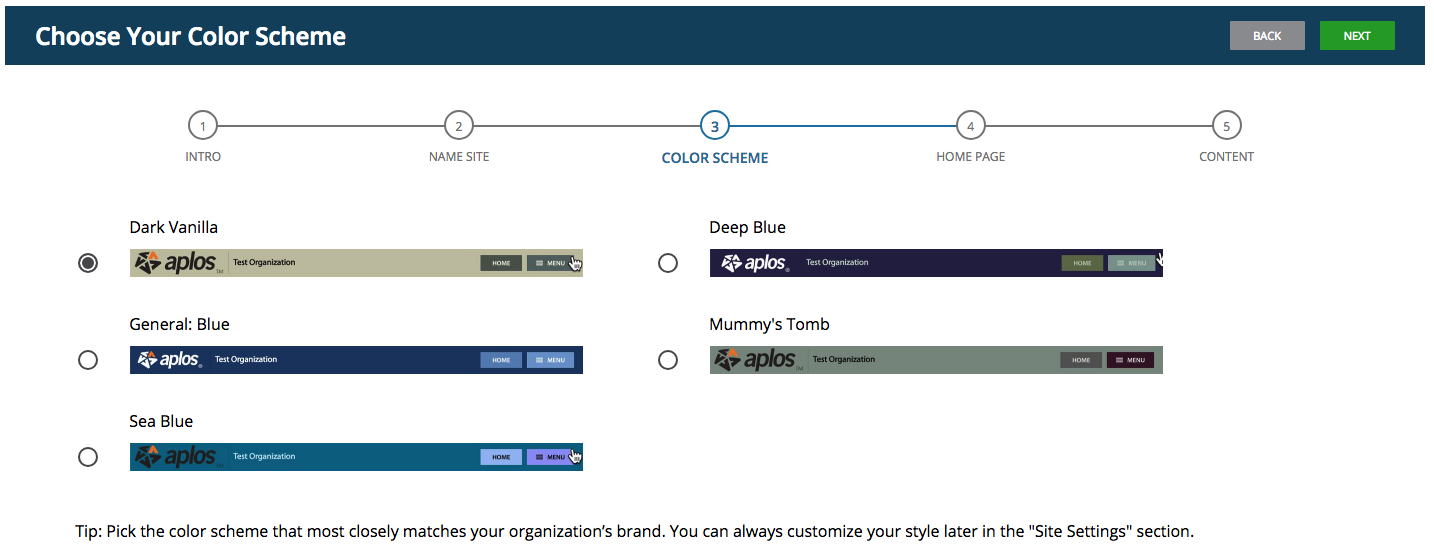
Step 3 :: Choosing your Color Scheme
This step will allow you to set the color scheme for your website. So, each page that people hit when navigating through your site will see the same color scheme from page to page. Choose the option that best fits what you’re looking for by selecting the radio button to the left of the color scheme, then click Next. You will have the option in Site Settings to update these later.
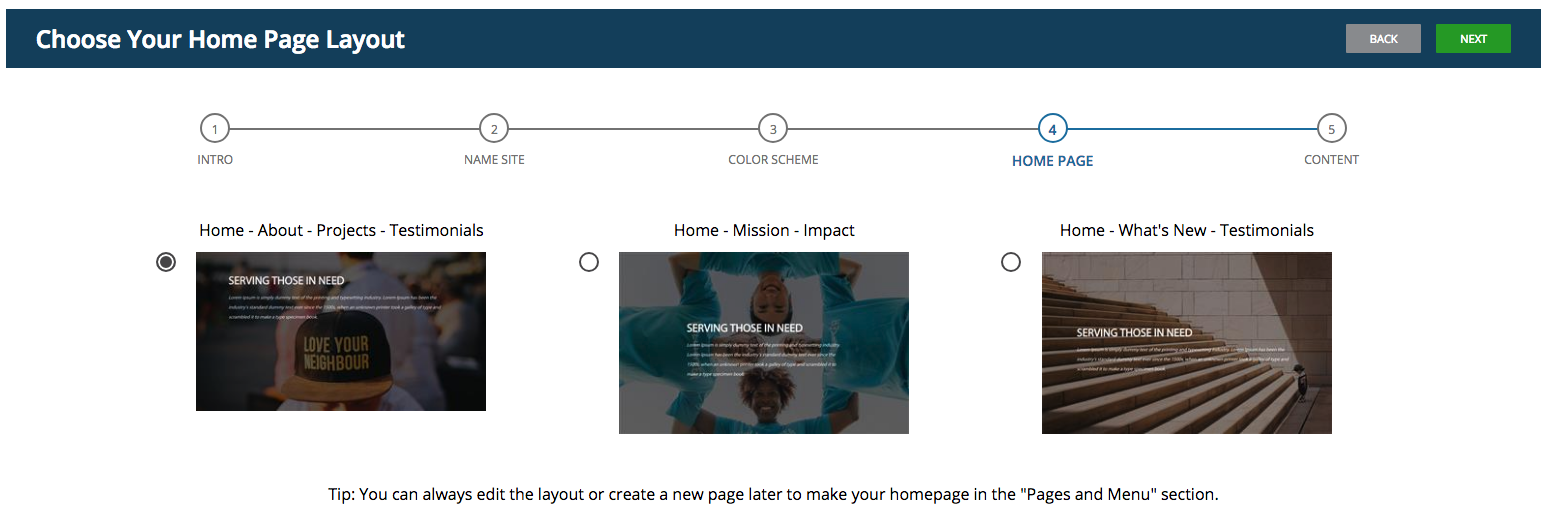
Step 4 :: Choosing your Home Page
You’ll have a lot of options to select from here. This will be the look and feel of your site’s home page. Choose the option that best fits what you’re looking for by selecting the radio button to the left of the thumbnail, then click Next. Keep in mind that you can always edit the layout or create a new page later to make your homepage in the Pages and Menu section.
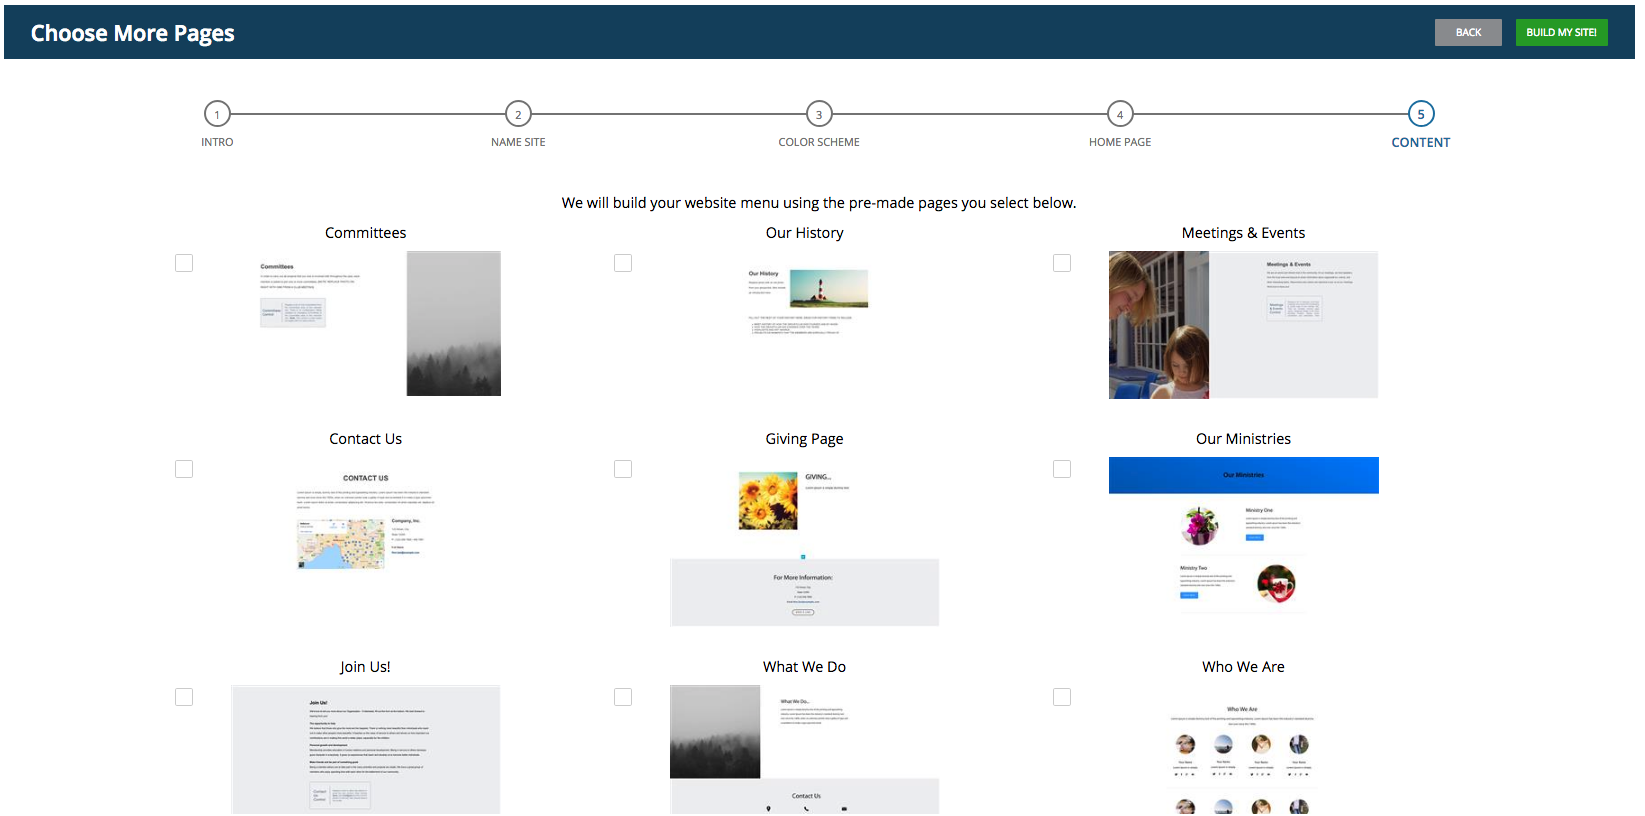
Step 5 :: Choosing your Content
This step will allow you to select the pages that you’d like available in the menu of your website. We will build your website menu using the pre-made pages you select below. Each page is a pre-made layout with sample content to make it quick to edit. You can always add more pages later, or change the order of your pages in the Pages and Menu section. You will have page options such as a page for any upcoming events, a giving page to collect donations, a contact page, staff page, and more. This page allows you to choose multiple page options, all of which will show as individual pages within your website menu. Select any pages that you’d like to add, then click Build My Site!
Congratulations! You’ve successfully built your website. Now it’s time to customize your web pages to add in information about your organization, change images, and make the site your own!
You can view the Website builder in action by watching the video tutorial below:
Other helpful Website builder resources:
Aplos Website Builder :: Pages & Menu
Aplos Website Builder :: Editing Pages
Aplos Website Builder :: Setting up your Custom Domain