
Lists are a helpful way of grouping your contacts together. You can use lists to send email campaigns, generate letters, print mailing labels, or filter reports.
You can access your lists through either the People tab or Marketing tab, and then click “Lists.”
Lists And Smart Lists
On the Lists page you will see two groups: Lists and Smart Lists. Lists are a static group of contacts you assign to the list. Smart Lists are a dynamic selection of contacts based on a set of rules. These lists will contain any contacts that fit the rule criteria at the time the list is used.
You can create a list by manually adding contacts, or you can use the List Designer filters to create a dynamic Smart List.

Locked Lists: 1099 Vendors List And Do Not Email Lists
You may see a lock icon next to some of the default lists on the page. These lists are generated by the system. You can edit the contacts, but not delete or rename the list.
- The Do Not Email list is created/included when a new Aplos account is created. Contacts can be manually added to this list. If you try to send an email campaign to a contact that is on the list, it will not be sent to them.
- An Unsubscribe list is used by the system to manage people who have unsubscribed from email campaigns. This list is created automatically after someone clicks the Unsubscribe link found at the bottom of an email campaign. It will prevent any future email campaigns from being sent to contacts on this list.
- The Do Not SMS list is used by the system to manage people who request not to receive text messages through Bulk Texting.
- 1099 Vendors is a list of contacts that are tracked for 1099 expenses in the accounting. For more information, check out our resource on tracking 1099 expenses in Aplos.
Creating A New List
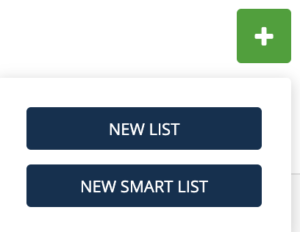
To create a new list, click on the green plus (+) icon at the top right of the page, and then click “New List.”

You will be prompted to name your list, and you can also provide a description (optional). Click the Create button to save the list. This new list will be displayed on the main List page, which is sorted in alphabetical order.

Adding Contacts To A List
Once your list has been created, you can begin to add contacts to it. You can open the list that you want to add contacts to by clicking on its name. Next, click on the plus (+) icon at the top right of the page to begin adding contacts to the list. You will search for the contact you wish to add and click to select that contact. You can then click “Save & Add” to continue searching for and adding contacts, or you can choose “Save & Close” to add the selected contact(s) and return to that list’s page.

Adding Contacts To A List From Contact Profiles
Another way to add contacts to a list is through the Contact Profile. This is best used if you need to add a contact person to a list. Locate the contact in your contacts list, click “Edit Information,” and scroll down to the bottom. Now you can view your lists and check which list(s) you want to add your contact to. When you’re done, click “Save & Close.”

Import Contacts To A List
You can also add contacts to a list when initially importing your contacts. Through our contact importer, you can choose to place your contacts in static lists. For more information about importing contacts, check out our resource on importing and updating contacts.
Creating A Smart List
What Is A Smart List?
Using the List Designer, you can create Smart Lists that use rules to manage a dynamic list of contacts that changes as information changes about your contacts. These lists are created from your organization’s database, and they can be segmented based on the rules you decide. Smart Lists cannot be used to filter reports, but they can be used for email campaigns, letters, mailing labels, and contact exports.
To create a new Smart List, click the green plus (+) icon from the main Lists page, and select “New Smart List.”
List Designer Rules
This will take you to the List Designer page, where you will be able to set up the parameters for the list.

You can add parameters to filter your Smart List with “And/Or” logic to narrow the scope of your List to fit your desired audience. When using “And,” contacts must fit all the requirements you noted to be included in the list. If using “Or,” contacts must fit at least one set of logic. Multiple “And/Or” statements may be added.
The List Designer will first search for the contact data rather than transactional data. For example, if you enter the parameters “Last Donation During This Week” and “Purpose is General,” it does not look for transactions that meet both criteria in the same time period. Rather, it searches for contacts who have any kind of donation recorded this week as well a donation at any point in time that is tied to the General purpose.

Other Smart List Filters
- Include deceased contacts: By leaving this unchecked, your created list will filter out contacts in your database that are set as deceased. If you wish to include deceased contacts, check the box.
- Include “Do Not Email” contacts: Among your lists is the “Do Not Email” list. If you have contacts in your “Do Not Email” list, you can choose to include them in your new list by checking the box.
- Include contacts of type donors/vendors: Here you can select which contacts you wish to include in your list.
List Designer Actions
- Preview: Once you create the rules for your Smart List, you can click “Preview” to view a sample of contacts that are included in the list. These contacts will appear at the bottom of the page.
- Reset: Clicking “Reset” will reset your list and remove any filters you have set so you can start over with new rules.
- Save: This will save the rule logic you created in the List Designer. You can then use this dynamic list at a later time to capture an updated list of contacts without rebuilding the rules.
- Actions: You can use the Actions button to export the list to Excel, save the contacts as a static list, print mailing labels, send emails, or print letters. Some of these options may be disabled if you have not yet saved your list.
List Actions
View Contacts In A List
Click on the name of the list to open it and view a list of members, their companies, and email addresses. From this screen, you can remove contacts from a list by selecting the trash can icon.
Edit Or Rename A List
If you need to rename your list or edit its description, you can do so from the main List page. Click the three dots in the Action column on the far right of the list and select “Edit.” This will bring up a similar window as before. You can click “Update” to save your changes. From this window, you can also set the List Description to identify how you use the list.

Deleting A List
To delete a list, select the three dots in the Action column to the right of the list and choose Delete. This will remove the list, but the contacts will still remain in your database. Once deleted, you cannot undo this action. If a list shows that it is locked, it cannot be deleted because it is a list used by the system for a specific action.
Exporting A List To Excel
When selecting the option to Export To Excel from the Action column, your list will export a file that contains the contact name and primary contact information for contacts that are contained in the list. If you wish to export additional columns for the contacts that are contact fields, visit the Contact List in the Reports section. From here, you can export by a List or Smart List, and add contact fields to the export.
Print Mailing Labels
You can create mailing labels from any of your Lists or Smart Lists. From the main List page, click on the three dots under the Actions column on the right, and select “Print Mailing Labels.” This will export a PDF or Excel file of the Primary Addresses for the contacts in the list. For more details, review our resource on creating mailing labels.
Send Email Campaigns
You can use lists to direct email campaigns to specific groups of donors, volunteers, or other contacts. When selecting recipients for your campaign, you can search for and select a Smart List or List from the search bar under the “Name your recipients” section. The Smart List(s) or List(s) you have selected will be displayed under the corresponding area in the “Selected lists, smart lists, and contacts” section of the page. You will need to verify that you have consent to email the contacts in the list(s). Check out our Email Campaign resource to learn more about sending email campaigns in Aplos.
Print Letters
Your lists can also be used in the Letter Builder. Once you have created your letter and are ready to print, you will be prompted to select a list of contacts. This can be a Smart List or List. The list you select will be used to bring in information to any of the custom fields you have added to the letter. You will be able to preview your letter with the contacts’ information filled in before you download your letters to print them. Check out our Letter Builder resource to learn more about creating letters in Aplos.
Filter Reports
Any report that includes a column for contacts can be filtered by a list. This includes the Donations by Contact, General Ledger, Transaction List, and Expense by Payee reports. To filter a report by a list, you will click on the “Report Filters” dropdown and select “Filter Contacts.” You will use the first search field to search for and select the list(s) you wish to filter by. Once you have made your selections, you will click “apply” to update the report. To learn more, check out our resource about generating reports in Aplos.
*Note: Reports cannot be filtered by a Smart List. You will first need to save the Smart List results as a List, and then you can run reports.