
Creating An Approval Workflow
Bill Pay allows your organization to send bills to approvers for electronic approval. It tracks the status of approvals, and then you can pay the bills once they are approved. This is completed through the Bill Pay Approval Workflows.
*NOTE: Only administrators can create and edit approval workflows.
To create an approval workflow, click the gear icon on the Accounts Payable screen and click “Approval Workflow Configuration.”
Click “Create Approval Flow” to begin the creation process from the Approval Workflow screen.
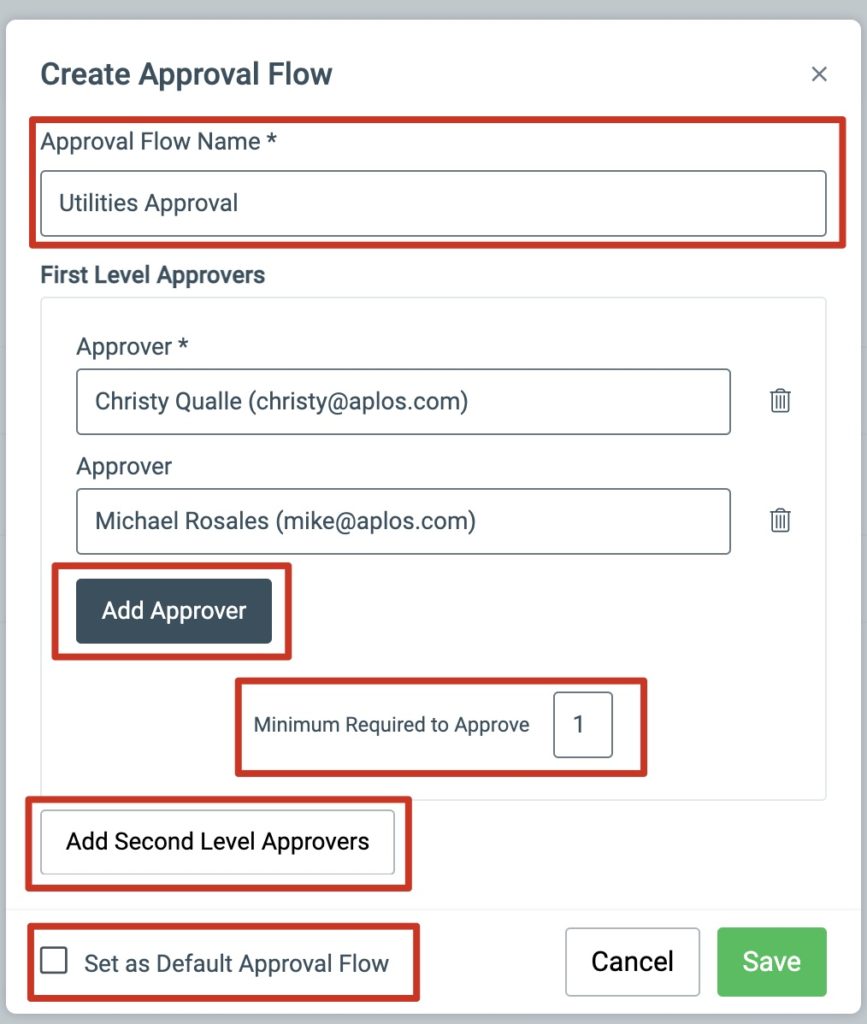
In the Approval Workflow editor, the following details will be included:
- Approval Flow Name: This is the name of the approval flow shown in the approval workflow configuration and bill editor.
- Approvers: This is the total number of approvers for all levels. Up to five approvers are allowed for each level. Approvers must be users on your account and have access to Accounts Payable.
- Levels: This is the number of approval levels for a bill. Enabling the second level of approvers will enhance internal controls and increase oversight. A second level user will be able to approve a bill once the first level of approvals is complete. To add a second level, click “Add Second Level Approvers” and enter the name of the approver(s). *NOTE: Adding Second Level Approvers is optional.
- Minimum Required to Approve: This is the minimum number of approvers required to complete a level of approval.
- Set as Default: Setting this approval workflow as the default will automatically select this workflow when creating new bills.
Once the information is provided for the approval workflow, click “Save” to enable the workflow when assigning bills.
Managing Approval Workflows
From the Approval Workflow Configuration screen, you will be able to manage your workflows, make updates, and adjust bill edit settings.
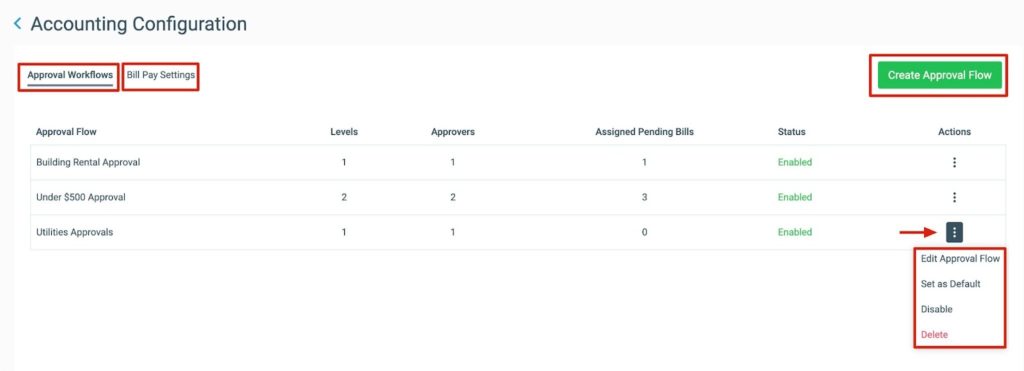
Editing An Approval Flow
Administrators can make changes to an existing workflow by selecting the Actions menu on a workflow and clicking “Edit Approval Flow.” In the Approval Workflow editor, the following details can be updated:
- Approval Flow Name: This is the name of the approval flow shown in the approval workflow configuration and bill editor.
- Approvers: This is the total number of approvers for all levels. Up to five approvers are allowed for each level. Approvers must be users on your account and have access to Approvals within Accounts Payable.
- Levels: This is the number of approval levels for a bill. Enabling the second level of approvers will enhance internal controls and increase oversight. A second level user will be able to approve a bill once the first level of approvals is complete. To add a second level, click “Add Second Level Approvers” and enter the name of the approver(s). *NOTE: Adding Second Level Approvers is optional.
- Minimum Required to Approve: This is the minimum number of approvers required to complete a level of approval.
- Set as Default: Setting this approval workflow as the default will automatically select this approval workflow when creating new bills.
If there are pending bills, saving an edit to the workflow will automatically clear all approvals and restart the approval workflow process. Fully approved bills are not changed.
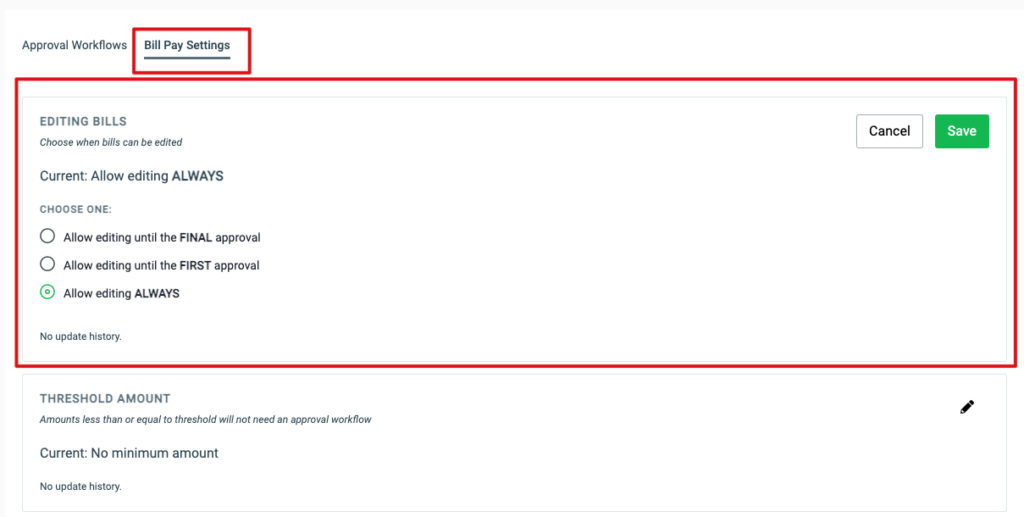
Bill Pay Settings
Administrators can set rules regarding when a bill can be edited. Within the Bill Pay Settings tab are available options to choose from. This setting will be enforced on all approval workflows and cannot be set for individual approval workflows. To select a rule, click on the preferred option and this will update and save automatically.
Options:
- Allow editing until the FINAL approval (default) – The bill can be edited until it has its last approval. If you have multiple levels of approvals, then it will stop being editable once it receives the last approval from the second level.
- Allow editing until the FIRST approval – The bill can be edited until it is approved the first time.
- Allow editing ALWAYS – The bill can always be edited regardless of where it is located in an approval workflow.
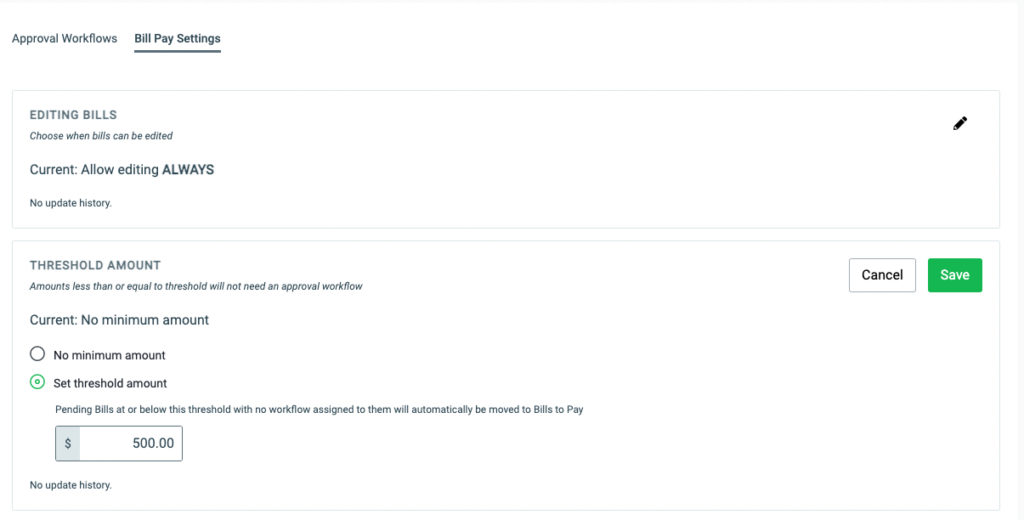
Threshold Amount
As an administrator, setting a threshold amount for the maximum total amount for a bill that will not require completing an approval workflow can help streamline payment processes and save time. This setting ensures that bills below a certain amount can be paid without the need for approval from an approver, which can be particularly useful in situations where there are frequent and routine payments to be made. By setting a threshold, administrators can also reduce the workload for themselves and others by automating the payment process for bills that fall within the specified limit. This setting not only increases efficiency but also helps to ensure that bills are paid on time. Overall, setting a threshold amount for the maximum total amount for a bill can be a valuable tool for administrators looking to simplify and optimize their payment processes.
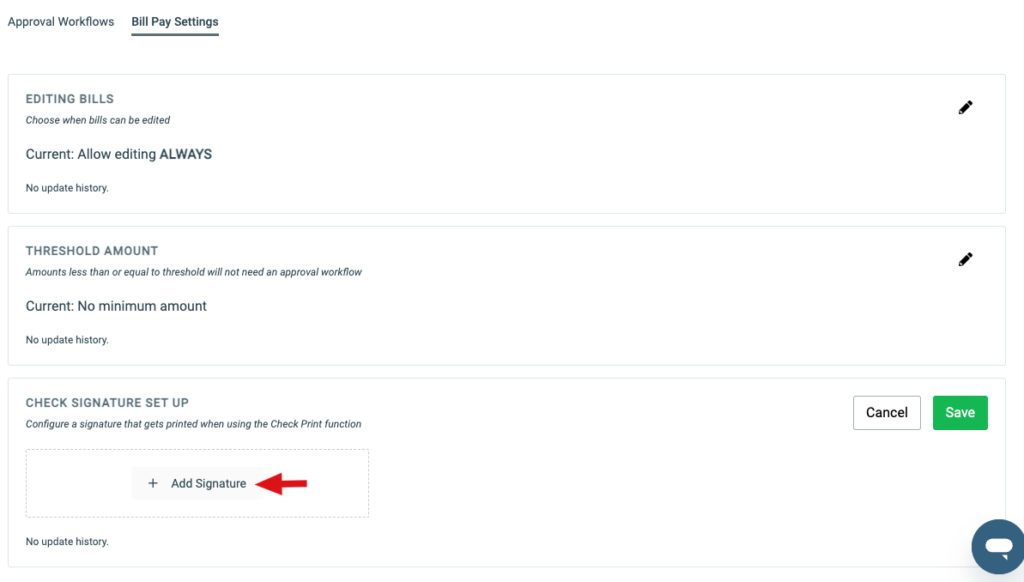
Check E-Signature
One important setting in the Bill Pay is the ability to set an e-signature that will be printed on all checks for payments. Administrators can easily set up an e-signature within the accounts payable system to ensure consistency and professionalism in all outgoing payments. By setting a signature, administrators can ensure that the checks are easily recognizable from the organization, and it also adds an extra layer of security. This setting is especially useful for organizations that issue a high volume of checks, as it saves time and reduces the chances of errors in the printing process. Ultimately, the signature feature in accounts payable is a simple but powerful tool that can help administrators to streamline their payment process and improve their organization’s branding.
Approval Notifications
When a bill is assigned an approval workflow, a notification process is initiated and a series of emails are sent to the corresponding approvers that a bill needs to be reviewed and approved. Each notification is sent as an individual email to a recipient.
First Level
A first level approver will receive a notification email informing them of a pending bill to be reviewed. The email will contain the bill’s details and a link to their My Approval tab to review the pending bill.
Second Level
When a bill has received approval from level one users and the approval flow has a level two, the second level users will then receive an email notification containing the bill’s details and a link to their My Approval tab to review the pending bill.
Reminders
When a bill has been in pending status waiting for approval, all users with a pending bill will receive a reminder notification after their first notification email. This is set weekly and will continue to be sent until a bill is approved or an approver has been changed. The email will contain the bill’s details and a link to their My Approval tab to review the pending bill.
Rejection
If a bill has been rejected by an approver, the creator of the bill and the last editor of the bill (if applicable) will be sent an email displaying the bill’s details, the rejection comment left by the approver, and a link to the Pending Bills tab. This will require an update to the bill to reinitiate the notification and approval process.
Final Approval
After the bill completes the approval cycle, the creator of the bill and the last editor of the bill (if applicable) will be sent an email displaying the bill’s details, along with a link to the Bills To Pay tab to finalize the payment of the bill.