Payable History
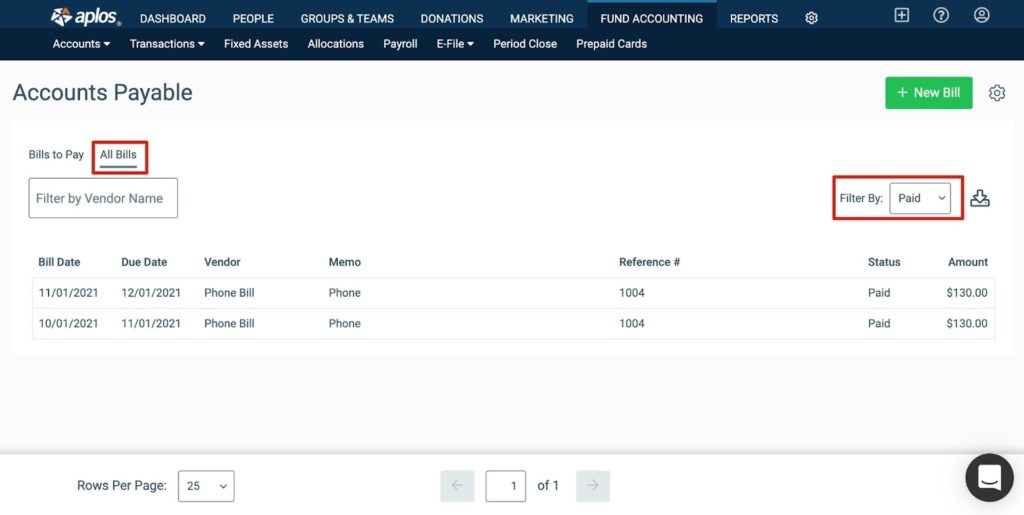
To view a list of Accounts Payable history, you can click the All Bills tab. This will display a list of your organization’s current and past bills. From there, you can view bills using the All, Paid, and Unpaid filters. Any partially paid bills will be categorized as Unpaid.
Use the filter box to filter your bills by the vendor. Next to the Filter By tool is the export function. Click the icon next to the filter list to export the current list displayed as a .xlsx, .xls, .csv, or .pdf file.
Payable Details
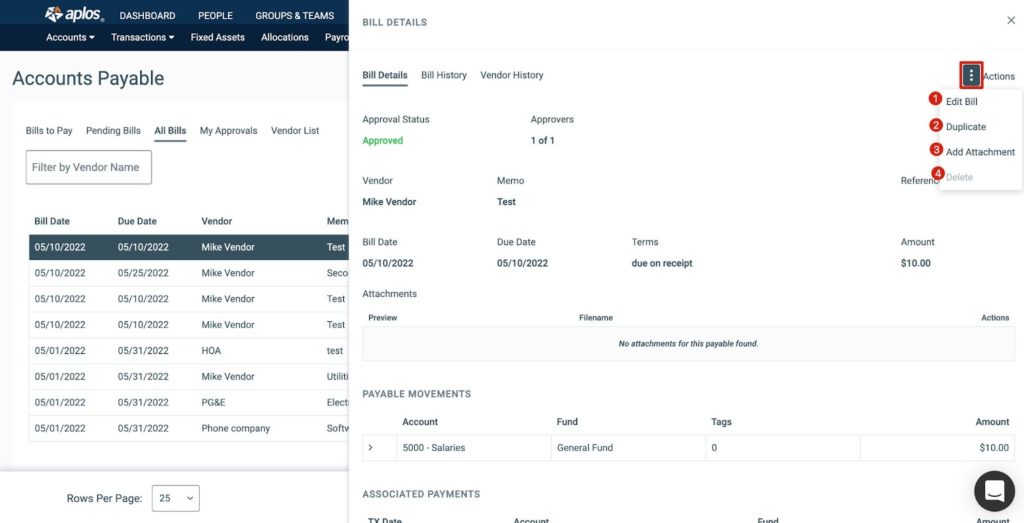
You can further drill down on a specific bill to view more details, edit a bill, duplicate a bill, and add an attachment. Click on the particular bill to display the sidebar. From there, you will get a view of payable details, attachments, movements, and any associated payments. Click on the Actions menu to view further actions.
Editing A Payable
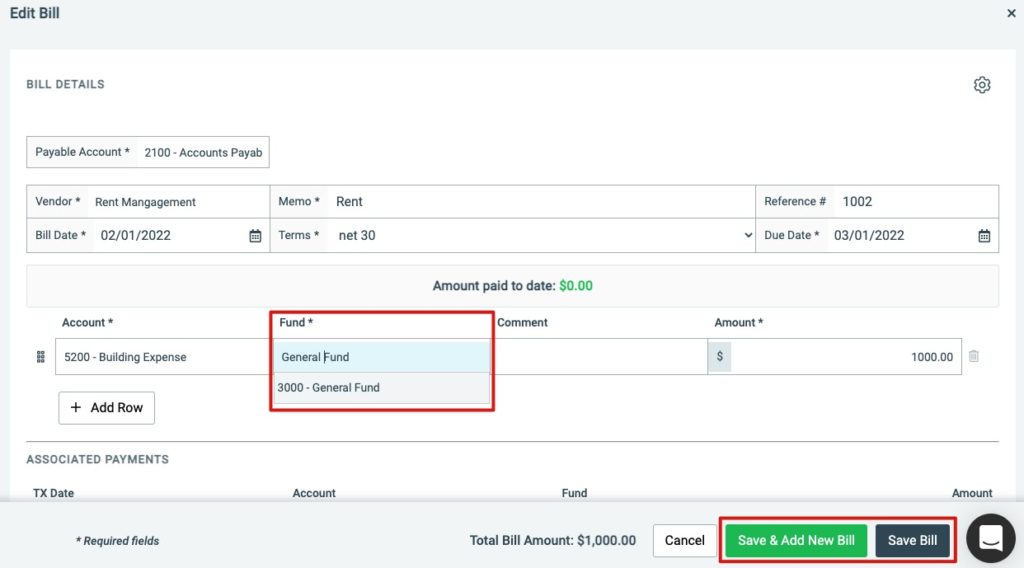
You can edit an open payable by selecting the payable, clicking the Actions menu, and choosing “Edit Bill.” This will display a new page with the existing details of the payable. Make any preferred changes and click “Save Bill” to update the payable.
If your organization has Bill Pay enabled, you may not be able to edit an open or closed payable if the payable has been approved. This is dependent on the Bill Pay configuration. Please reach out to your Administrator to verify the Bill Pay configuration settings. If you cannot edit a payable based on Bill Pay configuration settings, you will need to manually clear approvals. Learn how to clear approvals.

If a payable is fully paid, you are limited to what can be updated. You cannot change the fund that is selected or reduce the amount of the bill. If you need to make those specific changes, you will need to delete the associated payment from the register. Then update any changes and re-record the associated payment to the payable.
Adding An Attachment To An Existing Payable
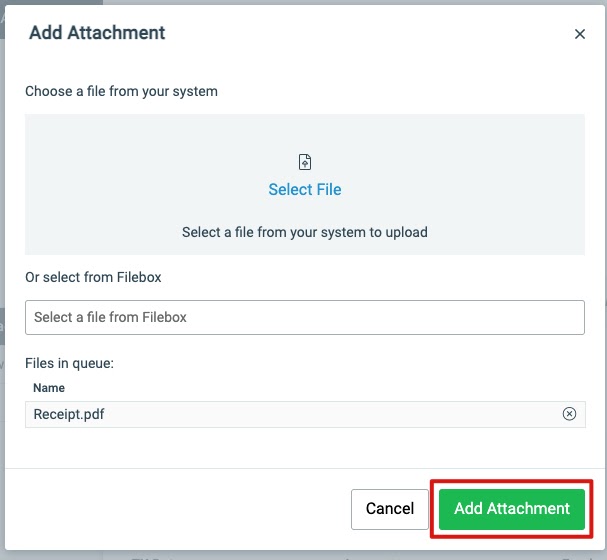
You can upload an attachment to a specific payable for recordkeeping by selecting the payable, clicking the Actions icon, and choosing “Add Attachment.” You can upload a file from your computer or select an existing file within your Filebox. Once the attachment has been uploaded or selected, it will be displayed under Files in Queue. Click “Add Attachment” to attach the file to the preferred payable.
File Requirements:
- Only .jpeg, .jpg, .png, .xlsx, .csv, and .pdf files will be accepted.
- Files must not exceed 100 MB.
For more information on how to enter transactions, check out the Support article on recording and reconciling transactions.