The Vendor List displays a list of vendors with payables associated with them. The Vendor List also displays how a vendor will be paid and allows you to invite a vendor to participate in electronic payments. View the breakdown below on navigating the Vendor List screen.
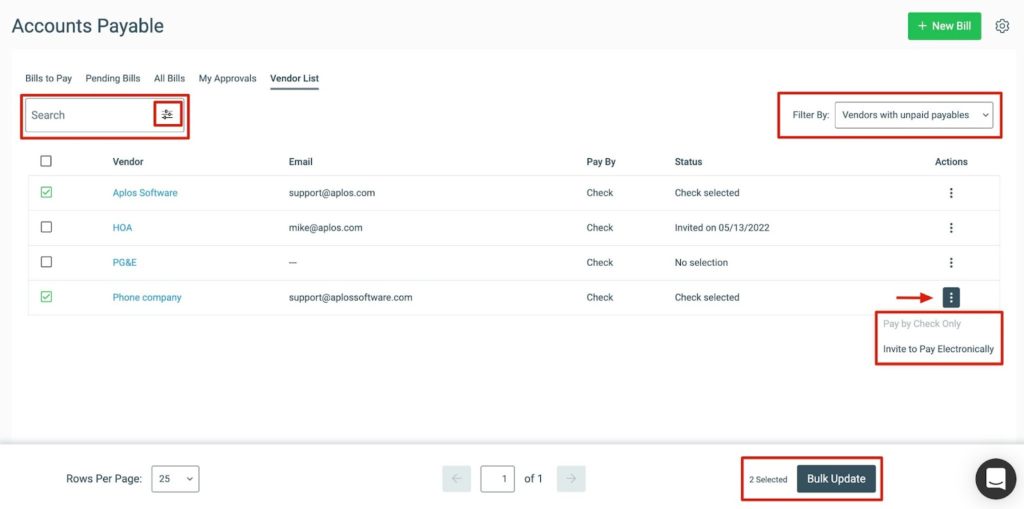
- Vendor: This is the company name or first and last name based on contact type. It includes a link to the contact details.
- Email: This is the vendor’s primary email.
- Pay By: This is the payment method that will be used for future payments to this vendor.
- Status
- No Selection – This vendor will be paid by check.
- Invited on DATE – This is the most recent date the vendor was sent an invitation to pay electronically. This invitation is sent via email.
- Check Selected – The vendor or organization set this vendor to be paid by check.
- Electronic Selected – The vendor has selected to be paid electronically and provided banking information in their My Aplos portal.
- Actions Menu
- Pay by Check – This sets the status to Check Selected. It will override the selection made by the vendor.
- Invite to Pay Electronically – This sends an invite via email to the vendor to provide their banking information. It requires an email address and application approval for electronic payments.
- Filter Vendors By
- Unpaid Payables (default)
- Paid Payables
- All
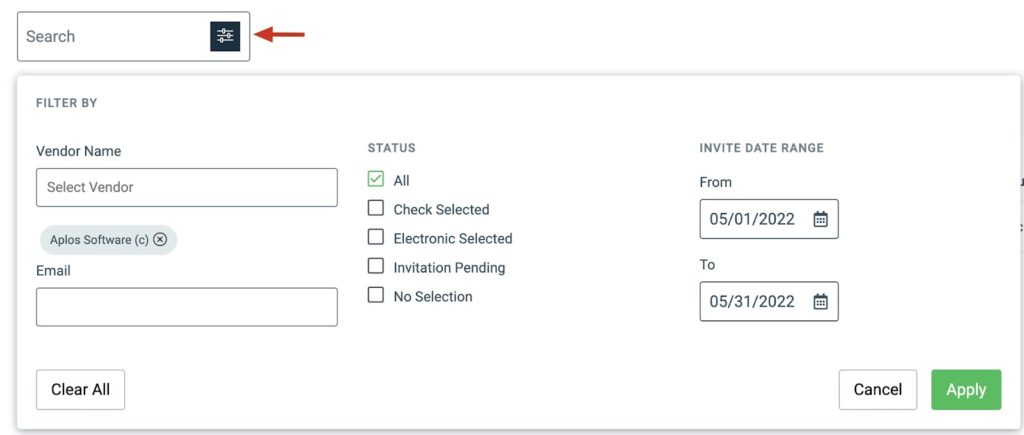
Search Vendors
- Simple Search – Vendor name (single)
- Advanced Search – Use these options in addition to the payable status filter. The search results return values that match all categories. If multiple values are set for a single category, the match returns any of those values for that category.
- Vendor Name (multiple)
- Status
- Invitation Date Range
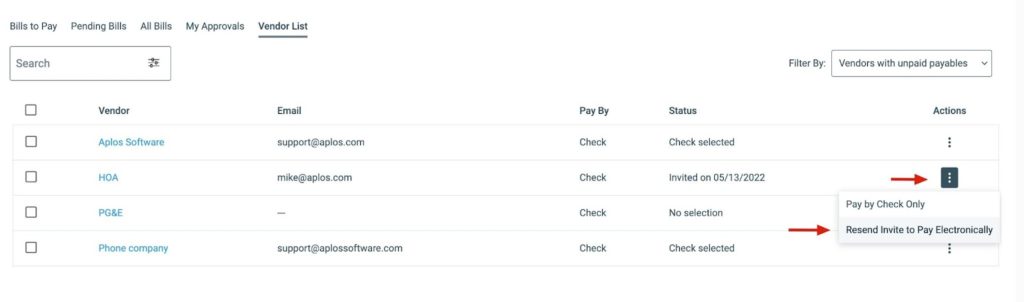
Inviting A Vendor To Pay Electronically
When a vendor is invited to be paid electronically, the invitation email will include a link that can be used only by the vendor to connect their My Aplos account to the organization. From there, they can set up their bank configuration to successfully accept electronic payments made by your organization.
If you need to resend the invitation, you can select the Actions menu and click “Resend Invite to Pay Electronically.” This will send another email to the email on file for the vendor to connect their My Aplos account.
Learn more about Vendor Registration.
Bulk Invite
You can send invites to multiple vendors at the same time by selecting the vendors you wish to invite and clicking “Bulk Update” on the bottom of the screen. Next, select the preferred payment method and click “Update.” This will send an invite to all preferred vendors.