How To Pay Bills
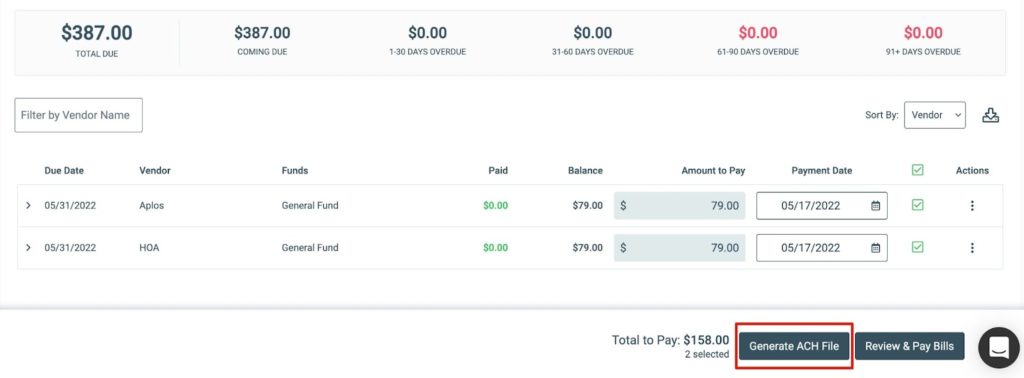
Once bills have been entered, or they have been approved to be paid through Bill Pay, they will be posted on the Bills to Pay screen. From there, you’ll see any outstanding bills with amounts that have been paid and the remaining balances. You’ll record the date of the payment and select the box next to the date to record the full amount.
Next, select “Review & Pay Bills” to verify the outstanding bills and the method of payment for each bill. You will also select which asset account the bill(s) will be recorded in.

Electronic Payments
If you have Bill Pay enabled, you can send electronic payments to vendors who have set up their preferred payment method to receive electronic payments. From the Pay Bills Review screen, verify the details of the payment. Once verified, select “Yes, Pay Bills.” This will initiate the process where funds will be moved from the bank account to Stripe and the vendor(s) will be paid from Stripe on your behalf.
*NOTE: This process can take several days to complete.
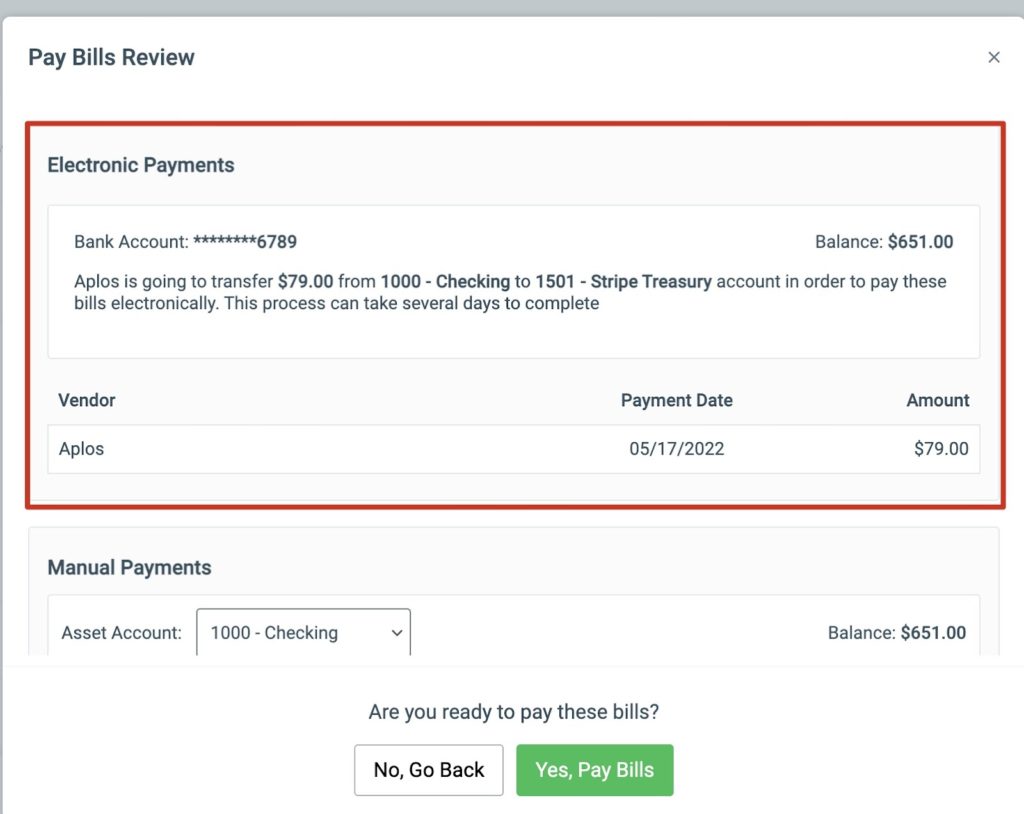
When paying electronically, there will be two entries posted to the account register.
- When an electronic payment is made, a transfer of funds is added from the asset account to the Stripe treasury account for the sum of all the invoices being paid electronically. This is recorded as a journal entry. There is one “funding” journal entry for the set of electronic payments. These transactions are not counted toward the monthly usage limit.
- When an electronic payment is made, a payment is made from the Stripe treasury register to the vendor. If multiple vendors are paid at the same time, multiple transactions are created in the Stripe treasury account. These transactions are counted toward the monthly usage limit.
Printing Checks
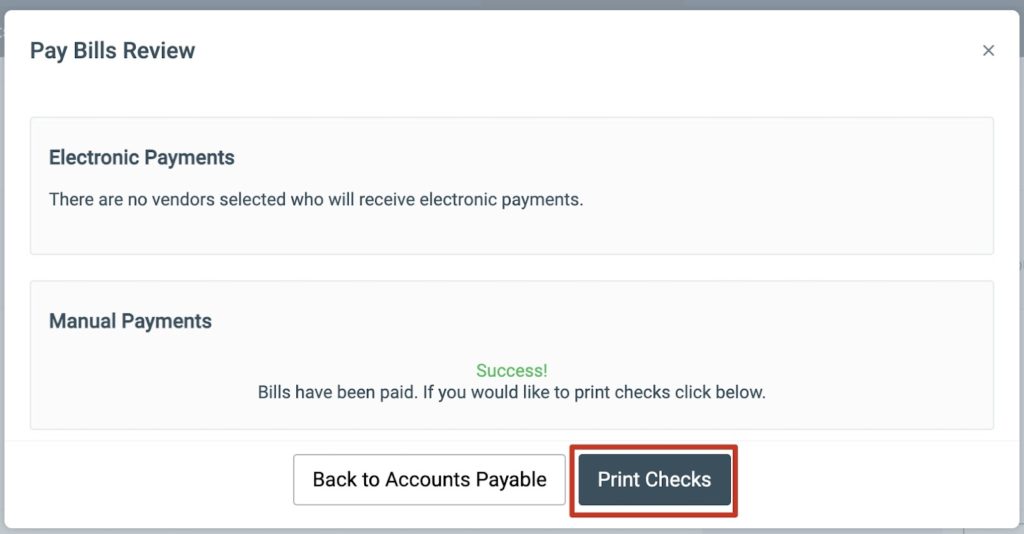
If you need to print a check for the payment from Aplos, select “Print Checks” in the Pay Bills Review modal. This option will be available after selecting “Yes, Pay Bills.” If this is your first time printing checks, you may have to configure your print settings. Reference the Printing Checks article for details.
With Bill Pay, you also have the option of setting up an e-signature that will be printed on all checks for payments.
ACH File Export
If you have ACH File Export enabled, you can select “Generate ACH File.” This will export a preformatted NACHA file for ACH payments through your bank. If you would like to utilize our ACH File Export tool, reference our ACH File Export resource for details.
Partially Paying Bills
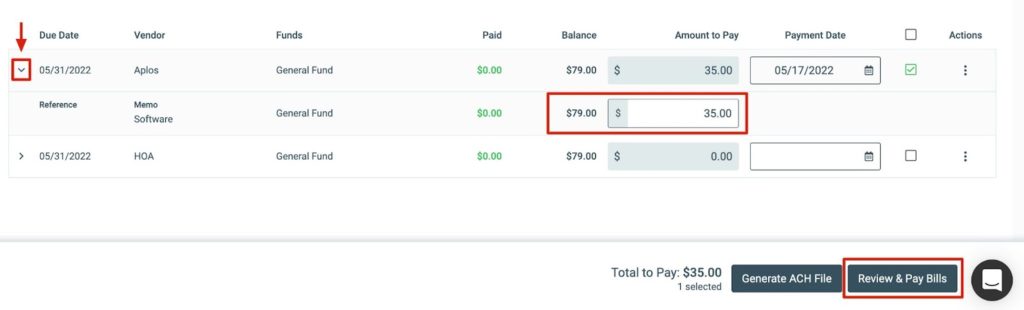
If a bill needs to be partially paid, or if the bill has multiple line items you wish to allocate specific amounts to, then select the arrow on the left side of the payable to drill down. You can enter the appropriate amount and continue paying your bill.
Pay Multiple Vendor Bills With One Transaction
If you receive multiple bills from a vendor and would like to pay them with a single payment, Aplos makes it easy for you to track this as a single transaction in the register and generate a single check for multiple bills in Accounts Payable. This can be helpful if you have multiple bills for a single vendor or if you need to post a credit to a bill.
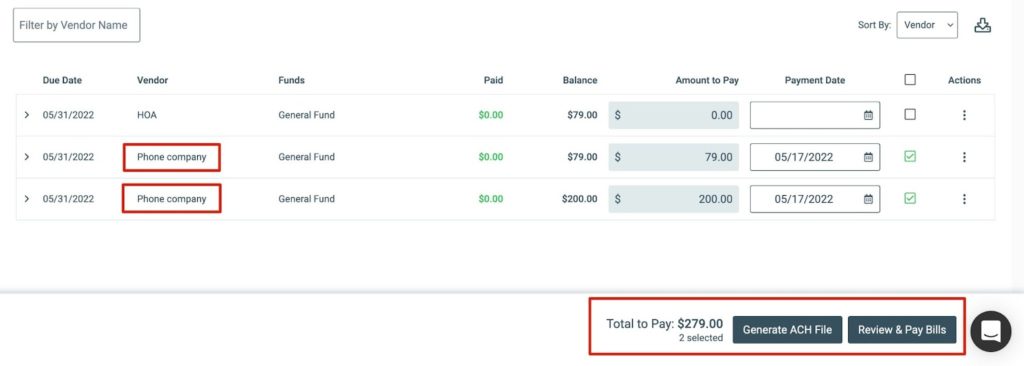
First, you will need to enter the amount you are paying on each bill. If you have more than one bill for a vendor, when you enter payment on your first bill, the same date will auto-fill on the second bill for that vendor. The example below shows two bills that were created to pay a phone bill. The sum of both amounts is listed on the Total to Pay section at the bottom. Once the dates and amounts are recorded, you will click “Review & Pay Bills.” A single transaction will be posted in the account register for a total of $279.00.
How To Print One Check For Multiple Bills
Using the example above, you’ll notice there is a single check available to print for the total amount of $279 to the vendor. You’ll select the check and click “Print.”

If you do not want to collapse these payments into a single check, you will need to record each payment separately. You can enter the amount and date on one bill and then click “Review & Pay Bills.” Then you will go back into the Payables module to record the second payment and print that check.
Voiding A Check On A Payable
It is important to know that you cannot void a check that is a payment on a bill. You will first need to delete the payment. Then record the check manually in your register and void it from there by following the steps in our Support article on using the account register to track income and expenses.