Overview
You can create customized donation pages in Aplos to provide your donors an easy and convenient option to support your organization with an online gift. Donors will be able to easily create a one-time donation or set up a recurring donation to be processed on a selected monthly or weekly schedule.
About Donation Forms
You can create an unlimited number of forms and build a form for any occasion or purpose. Forms are hosted by Aplos and do not require the organization to have a website to use them. They are also mobile-responsive, meaning they are great on any device. Organizations accepting donations must be based in the US or Canada. However, the donation forms can accept payments from anywhere. Once the donor completes the form, they will be given a success message informing them their donation is being processed, and they will also receive a customizable confirmation email receipt.
Creating a Donation Form
To create a form, go to Online Donation Forms by clicking the Donations section. Then click “Online Donation Forms.” From here, you’ll be able to create a donation form by clicking the green plus (+) button and then the New Donation Form button.

Setting Your Donation Page URL
To get started, give your form a name and a custom URL. The URL path will be displayed on top of your internet browser and can be unique to your organization. See the example below. The custom URL was set as “Shelter,” while “Animal_Rescue” (the primary URL) was provided by the organization’s setup. If you have not set your organization’s primary URL, or would like to edit it, go to Settings, and click “Org Info.”

Customize the Donation Form Design
On the left side, you’ll notice several headings that allow you to customize your donation forms, from design and branding to tracking donor information and donation customization. In the Design tab, you can add personal style to your online donation form with your organization’s colors and logo at the top of the form.

You can select any of the default color schemes or click “Create New Style” to customize the color scheme for your form. If you select “Create New Style,” you can see the options to choose your colors. Once you select your color style, give it a name, and click “Save.” This will prompt you back to your form where you can select your new custom style.

Logo and Main Image
In this section, you can choose to upload an additional image or select one from your Aplos Library. This image will appear along with your logo on your form. Additionally, you can enter a custom message for your donors to see. This is a great way to engage your donors and share your organization’s story.

Collecting Donor Information
The Donor tab lets you customize the information you wish to collect about your donors. You can require them to fill out certain boxes before finalizing their donation, such as their first name, last name, email, etc. Any information entered in these fields will automatically be tracked in your people database.

The three options mentioned are the minimum required fields, and they cannot be deleted. You can add other information for donors to fill out, such as your own custom fields. You can require these additional fields by checking the Required checkbox. You can also click the red trash can to delete any additional fields you have added. Finally, you will see an option to “Add Full Address” at the bottom, which will give donors the ability to include their address on the donation.
Customize Donation Amounts
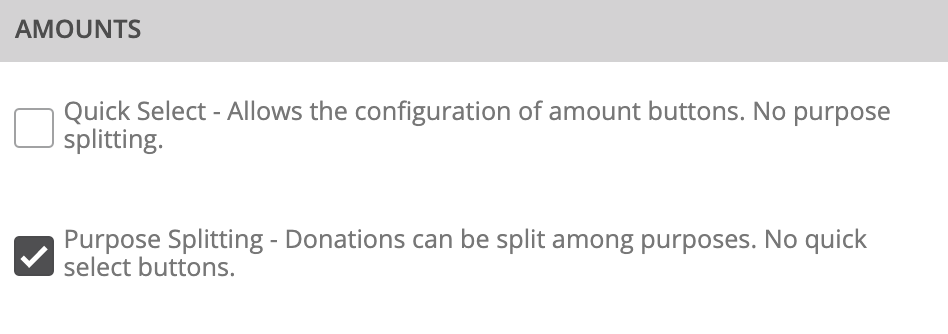
You have two options for how you would like your donors to give. The Quick Select option allows you to provide your own donation amounts for donors. The Default checkbox will let you choose which amount will be the default option. You can also edit the existing amounts. Simply click the pencil icon beside the red trash can (which removes amounts) for any option you wish to change. You’ll also be able to add additional amounts if you would like more than three.
If you prefer to give your donors the option to split their donations across purposes in a single gift, you can select the Purpose Splitting option. This will grant your donors the opportunity to give to multiple areas in your organization with one gift.
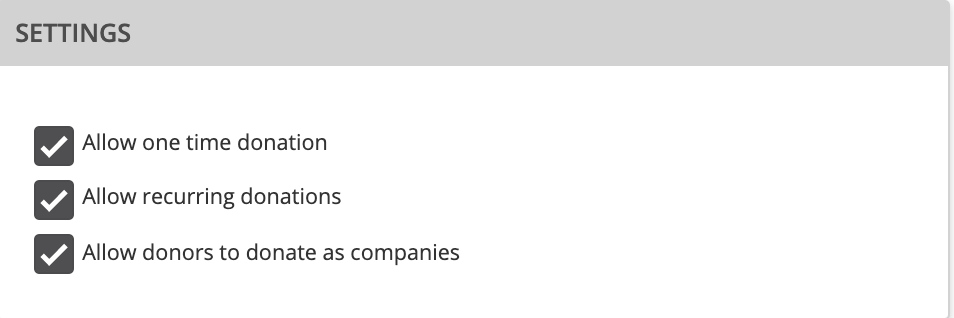
After you choose between “Quick Select” or “Purpose Splitting,” you can continue to “Settings.” From here, you can allow your donors to send a one-time donation or create a recurring donation. You can also allow donors to donate on behalf of companies. When this setting is enabled, any new donors who donate as a company will be created as a new company contact in your database, if the name of the company does not already exist. After you choose your settings, you can continue to “Purposes.”
Selecting Purposes
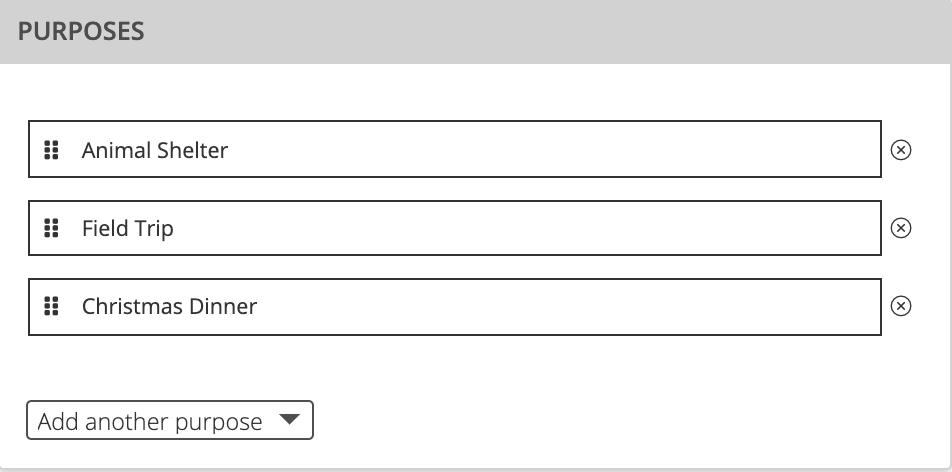
You must have at least one purpose for each donation form. If you would like the option for donors to donate to a specific purpose, then you can select that purpose or add additional purpose options. If you wish to have your online donations automatically tracked in your accounting, you must select a purpose that has been successfully linked to your accounting income and expense accounts.
If you haven’t set up your purposes yet, you will want to check out this resource to help get you started: How to Use Purposes in Aplos.
Donation Form Options for Donor Notes, Donors Paying Fees, and Button Text
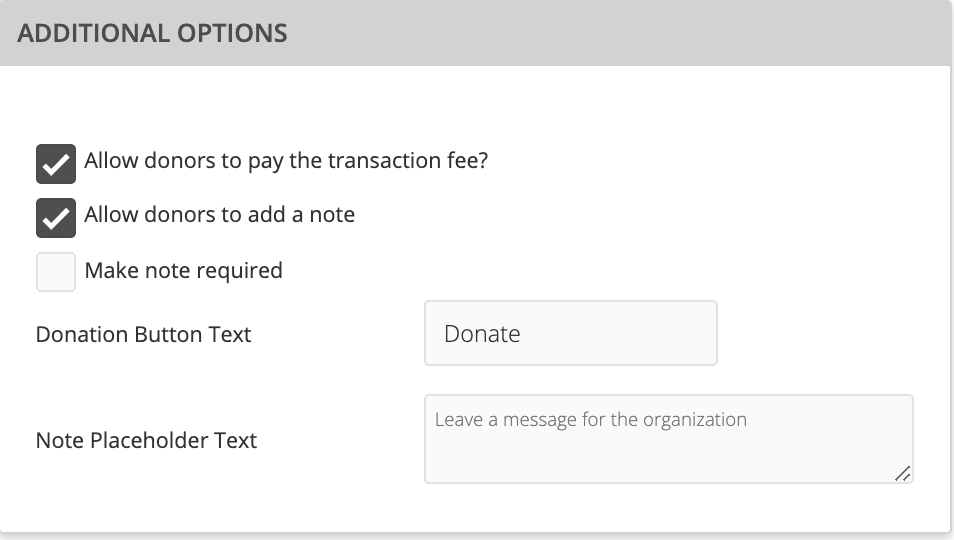
After you choose your purposes, you can continue to “Additional Options.” From here, you can give your donors the opportunity to increase their gifts to cover their transaction fees. Also, you can customize the donation button and offer donors the option to leave a customizable note along with their donation.
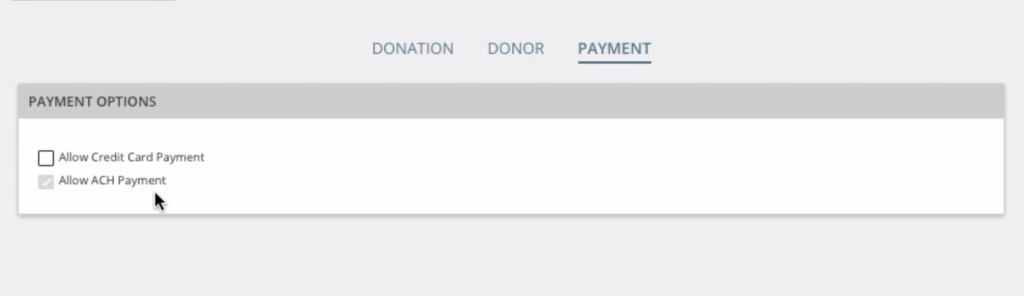
Donation Form Debit, Credit, and ACH Payment Options
The Payment tab allows you to choose which payment options you would like donors to use when donating. They can donate by credit or debit card, or by ACH. You can choose to have one or both of these options available.
Analytics
In the last tab, “Analytics,” you will be able to utilize Google Analytics on your form. Google Analytics allows you to track information on your form, including the number of visitors and page views, and the keywords that were used to find your form.
You will first need your Google Analytics Tracking ID from Google. To obtain this, log in to your Google Analytics account. Locate the Admin icon on the bottom left of the page. Under “Property,” click “Tracking Info.” Then click “Tracking Code” and copy your Tracking ID. Once copied, go back to the online donation form editor in your Aplos account. Click “Analytics” and paste the Tracking ID in the empty field.
*Note: If your code begins with G-***, you created your property to track an App. To get a UA-*** website code, you will need to create a new “Web” property. For more information on how to create a Universal Analytics Property, refer to Google’s Universal Analytic guide.
Save & Publish
Afterward, you can click “Preview,” “Save,” “Publish,” or “Exit” on the top right above the preview window. Choosing “Preview” will allow you to see the last saved version of your form. “Save” will save your work without updating your published form. “Publish” will update your form and make it active. Finally, “Exit” will leave your form without saving changes. Any saved forms will appear under the Donation Forms list.

You will want to set up your merchant account before activating your donation form. To learn how to set up your merchant, check out the AplosPay Setup Guide.
Managing Your Donation Forms
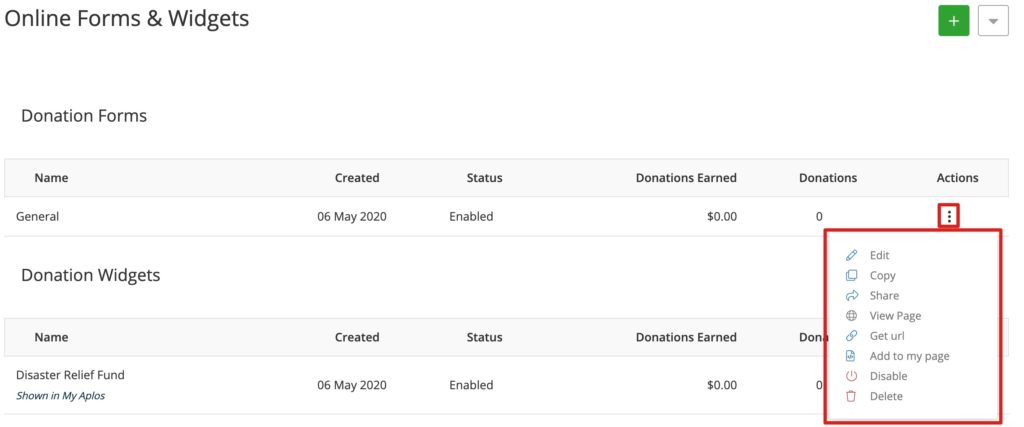
You can always make changes to your forms by clicking on the Actions icon on the far right side of the form.
- Edit: Make changes to your current donation form.
- Copy: Duplicate your current donation form so you can use your current settings and make edits for a new form.
- Add To My Page: You have the option to add the form to any website page or email by copying the URL link or copying the HTML for a donate button.
- Disable: Restrict access to the form. The form will not appear on the URL, but it can be re-enabled at any time.
- Delete: Remove the form on the page, as well as any saved settings. This action cannot be reversed.
Sharing Your Form
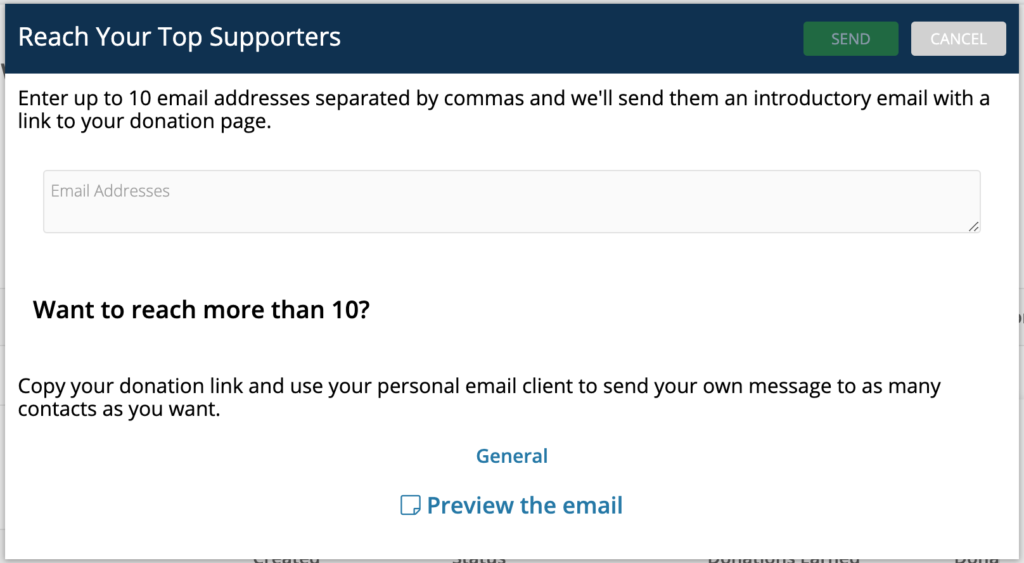
Once your form is created, you’ll want to get the word out. You will see some options for sharing your form by emailing it, sharing the URL, or adding it to your website. Once you are on the Online Donation Forms page, locate the Donation Form list at the top of the page. Pick one of the forms you have already created, and click the Actions symbol on the far right side. From here, click “Share.”
This will allow you to quickly send an email with a direct link to your donation form without leaving your account. You can use this tool to send up to 10 email addresses at a time. Separate the email addresses by commas, and preview your email before you send. Once you are ready to send your email, click “Send.”
Sharing a Link to a Donation Form
Another option for sharing your form is clicking “Add to my page.” Once you click “Add to my page” on the Online Forms & Widgets screen, you can view the options for putting your form on your website. The following page will provide you with two options regarding donation buttons. The first option will copy the URL of the form, and you can add it to an existing button on your website. By copying the link shown, you can add a hyperlink to a link on your social media profile, a button in an email campaign, or add a link from your website.
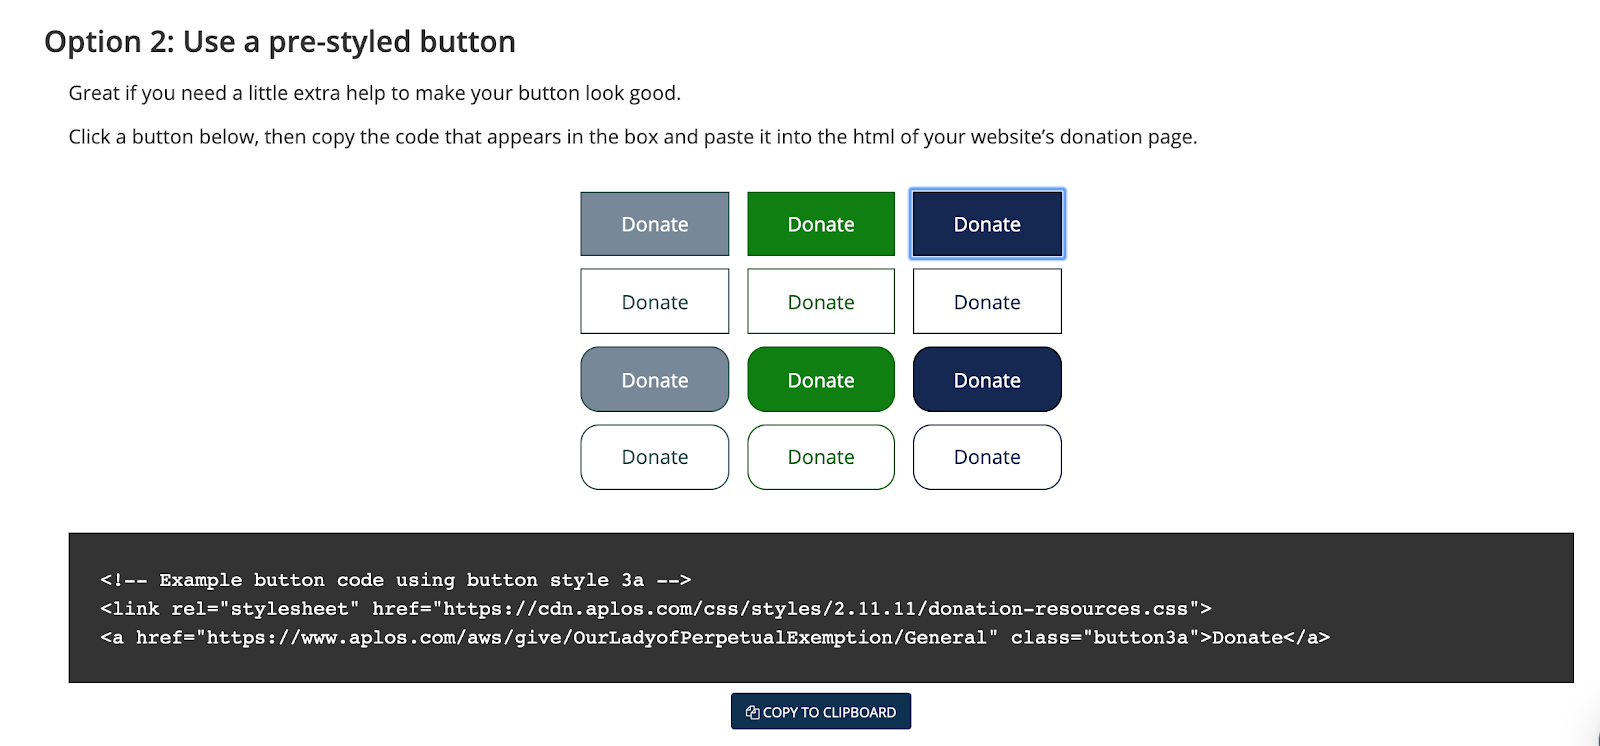
Creating a Donate Button
If you would like to use one of Aplos’ buttons, simply click on the button of your choice, and a code for that button will be generated in the field below. Click on the Copy To Clipboard button below the field.
Next, return to the web page you wish to add the button to, and make sure you are in the page edit tool. Navigate to the Text tab, where you will see the article’s text along with the HTML code for the page. Search for the place on the page where you want the button, and then use the paste tool to paste the button code you copied.
Once you save your edits, your page should now display the Donate button.
Other Resources
Managing Online Donations
If you would like to view details about your online donations, you can go to Online Donations in your Aplos account. This will include details of each donation, including the donor’s name, donation amount, any associated fees, the status of their donation, and other information about the donation. You can also search within specific fields as well as export this information. In your Aplos account, click “Donations” in the main navigation bar. Navigate to “Online Donations,” and click “Online Donations” in the dropdown menu.
Creating Your Merchant Account