Viewing Contact Details On A Contact Record
The Contact Record stores all information about a specific contact, including contact details, donation history, accounting transactions, and relationship connections. It also tracks activity, such as events and any communication history with your organization. Below is an overview of how to navigate through the sections of the Contact Card and manage this information.
If you need to create a contact and add contact details, view our resource on creating contacts.
Contact Highlights On The Contact Card
Contact Information
When a contact is opened, the panel on the left-hand side details some of the basic information most people wish to see for a contact as well as links for popular actions. The information displayed will vary based on the role permissions of the user, whether the contact is an accounting contact or donation contact, and the information that has been entered for the contact.
Actions On The Contact Card
With the Actions tool, you can quickly perform tasks for the specific contact. You can locate the Actions tool under the name of the contact. Each function will prompt you to complete the action. Once it is finalized, it will be saved on the Contact Card.
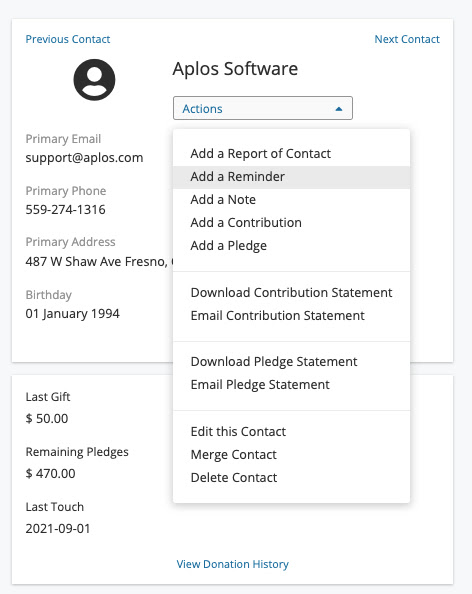
Here are the actions you can complete:
Payables, Receivables, And Summary Of Giving
On the left panel, outstanding bills and invoices, and a summary of giving information are visible for users who have access to these areas of the software. This information is displayed in more detail on the related tabs on the Contact Card.
Contact Tags
Contact tags track additional details for the contacts within your database. For example, you can add a tag to group similar people, such as children within a certain school grade, or those who participate or volunteer in a particular program for your organization. The check-in tool and Smart Lists utilize these contact tags for faster filtering.
For more information on how to create contact tags, view the resource for using contact tags for check-in.
When viewing details of your contact, you’ll see an area on the left-hand side of the screen where you can apply and manage contact tags. In this area, you will want to select which tag you’d like to apply to the contact. You can also add a new tag on the spot. Once applied, the tag will be listed under the “Tags” title in this section.


Contact Tabs On The Contact Card
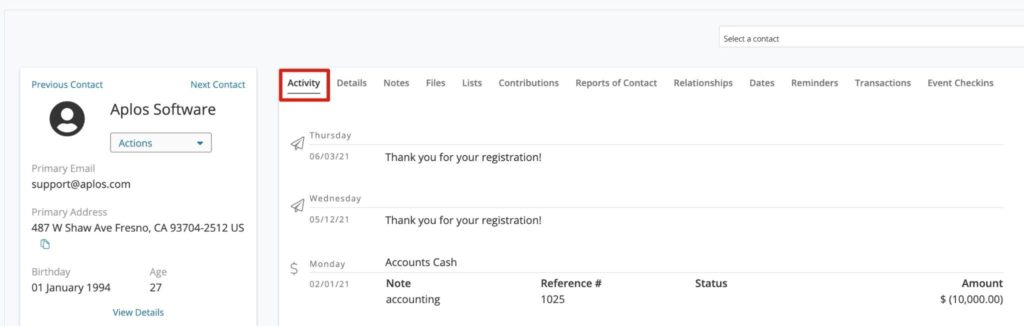
Activity
The Activity tab displays a history of different types of activities over the lifespan of the contact. From here, you can see dates of the following activities:
Transactions (Cash, Payables, Receivables)
Email Communications (Event Registration, Email Campaigns, Contribution Statements)
Each time an activity is performed, the Contact Record will be updated with a new activity under the history records for the contact.
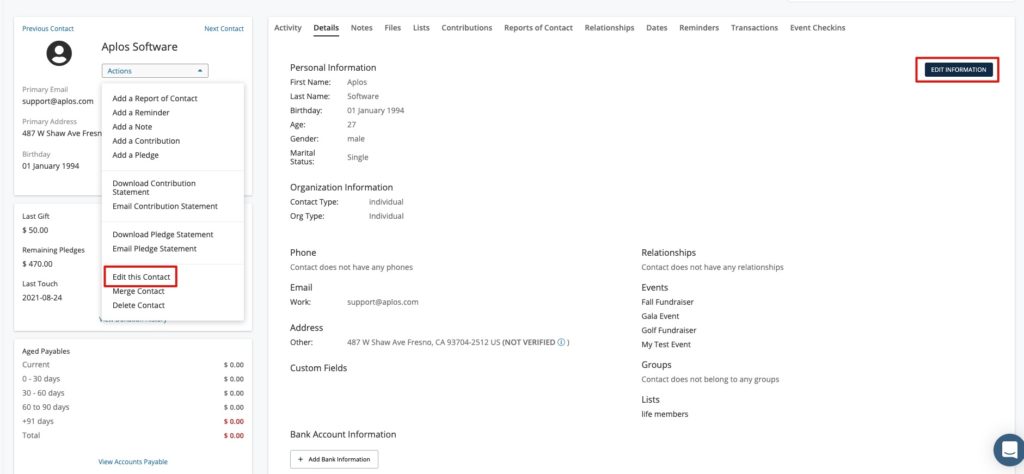
Contact Details
From the Details tab, you can quickly view, add, and edit information for any contact, including an address, phone number, and email address. You will also see relationships, events attended, any custom field information, and groups or lists they belong to.
Contact information can be edited from the Contact Card. You can either click the Actions option in the upper left-hand corner (beneath the contact’s name), or you can go to the Details tab on the Contact Card to find the option to edit your contact’s information. Once the information is updated, click “Save.”
*Note: To edit and update date fields, click the “Dates” tab to make any changes.
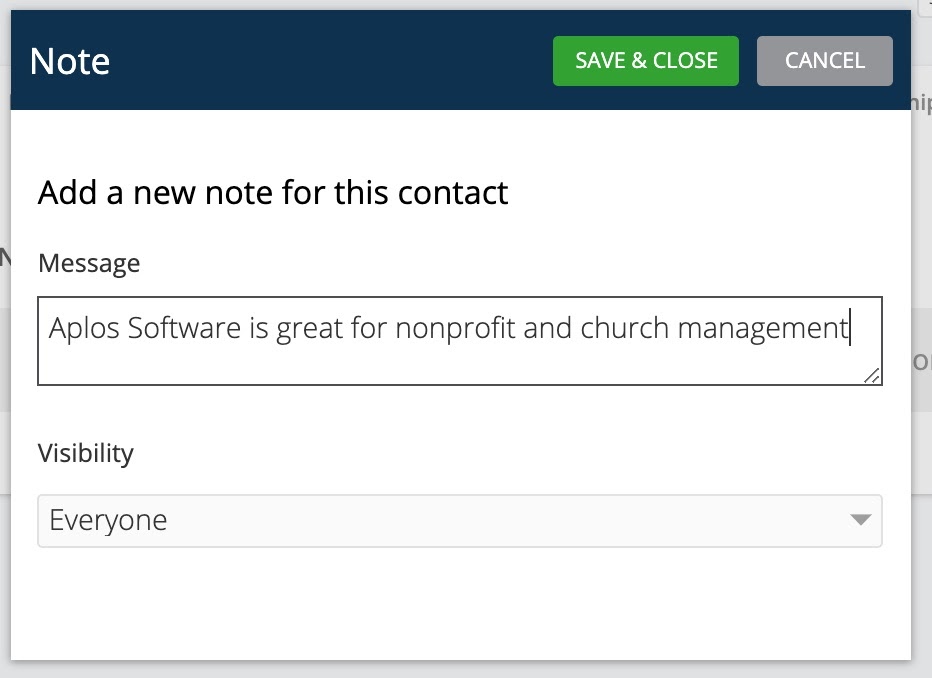
Notes
Notes allow you to enter any additional information about the contact. You can leave communication notes or make general notes for your records. To create a note, you can either click the Actions option in the upper left-hand corner (beneath the contact’s name), or you can go to the Notes tab on the Contact Card and click “Add a New Note.”
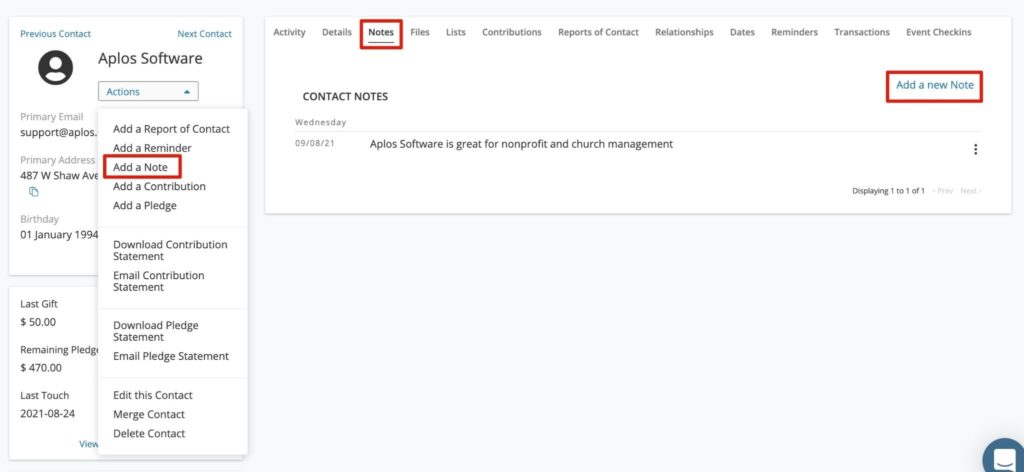
This will prompt a box to open where you can enter any note you wish to record. You can also set the visibility level to ensure that only certain users have access to this note. Below is a description of each visibility setting:
- Everyone: All users with access to this report
- Restricted User: Only users with the following roles: Restricted Notes & Files Access, Administrator, and the creator
- Private: Only the user who created the note
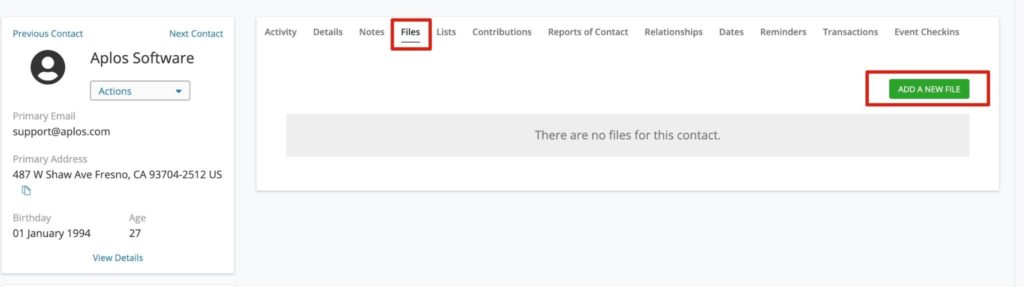
Files
The Files tab allows you to upload files from your computer directly to the Contact Record. This will also be uploaded to the Filebox for your account.
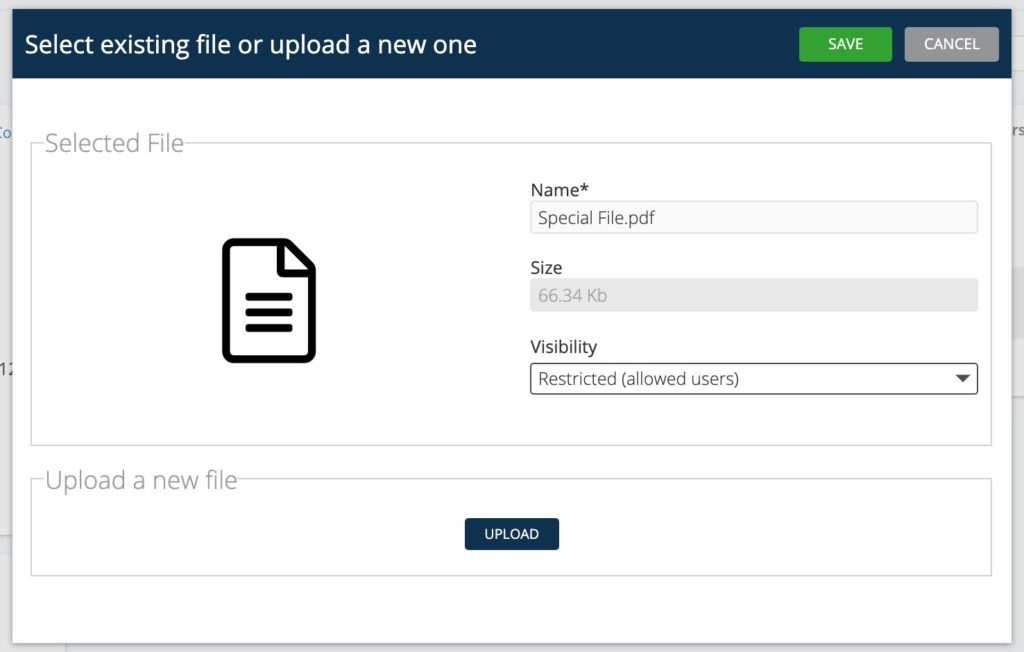
File Requirements:
- Size: 50 MB or less
- File Type: JPEG, JPG, PNG, XLSX, ZIP, PDF
To upload a file, go to the Files tab on the Contact Card and click “Add a New File.”
This will prompt a box to open where you can upload a file to the Contact Record. Similar to Notes, you can set the visibility level to ensure that only certain users have access to this file on the Contact Record and in the Filebox. Below is a description for each visibility setting:
- Everyone: Any user with a role permission for contacts, not including Custom Report Managers
- Restricted User: A user with the role permission set as “Restricted Notes & Files Access” as well the user who created the file
- Private: Only the user who created the file
Finally, you can change the name of the file before completing the upload. Once uploaded, the file will be available for download to those who have access to it.
Lists
From the Lists tab, you can view static lists that you’ve created, and you can add or remove the contact from any associated lists. Check or uncheck the list you wish to update and click “Save.”
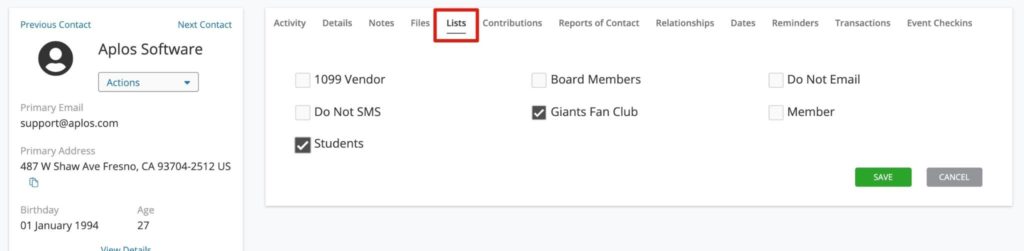
If you need to create a list or Smart List and don’t know how, view the resource for creating lists.
Contributions
Within the Contact Card, you can view the giving history of that selected contact in two areas. A quick summary of their giving is provided below the contact Name and Email. From here, you can view:
- All-Time Total Giving Amount
- Last Gift Amount
- Remaining Pledges Amount
- Last Contacted
You can also view a full breakdown of the contact’s giving, including open and/or closed pledges, and any soft credit contributions. From the tab menu on the right-hand side, select “Contributions” to see a list of all contributions recorded from the contact. You can view:
- Date
- Amount
- Purpose
- Status
- Notes
The contributions displayed are populated by online donations as well as manual contribution entries in Aplos.
To learn how to manage and track contributions, view the resource for tracking donations.

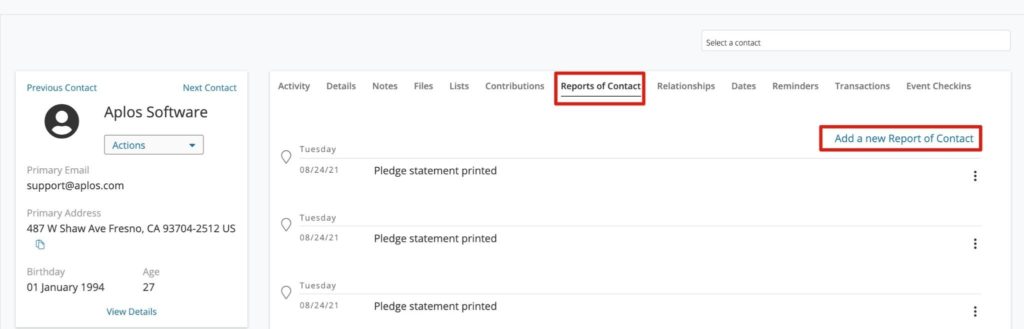
Reports Of Contact
Similar to the Activity tab, Reports of Contact track the history of communications generated in Aplos for each specific contact. They do not include transaction history. From here, you can see the dates of the following activities:
Email Communications (Event Registration, Email Campaigns, Contribution Statements)
Printed Contribution Statements
Manually Entered Reports Of Contact
Each time an activity is performed, the Contact Record will update with a new Report of Contact. You can also add a Report of Contact on the Contact Card by clicking “Add a new Report of Contact.”
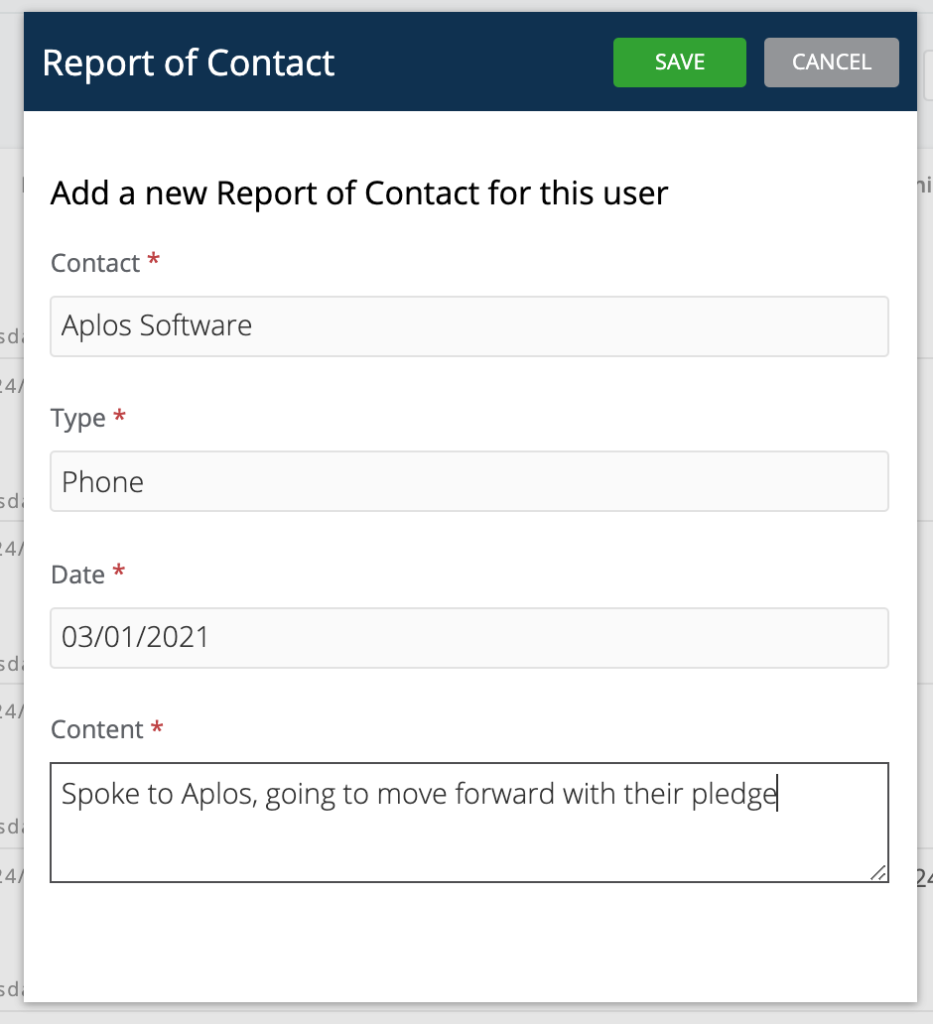
When adding a new Report of Contact, begin by selecting the preferred contact. Next, enter the type of communication you had with the selected contact. This could be a phone call, an email, an in-person meeting, etc. Add the date the Report of Contact occurred as well as the content. Once complete, select “Save.”
Relationships
From the Relationships tab, you have the ability to link contacts together and assign them to a household. This allows you track the activity of each contact under a single household. In the Relationships section for each contact, you can define the relationships between your contacts so you can better understand how people are connected to family members, companies, and co-workers.
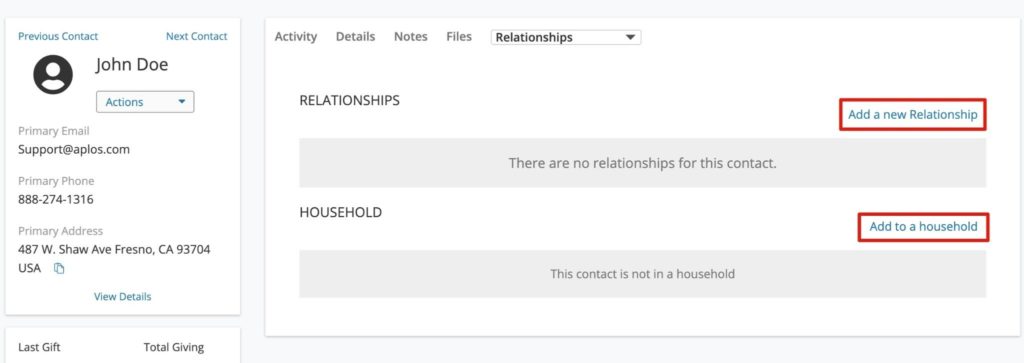
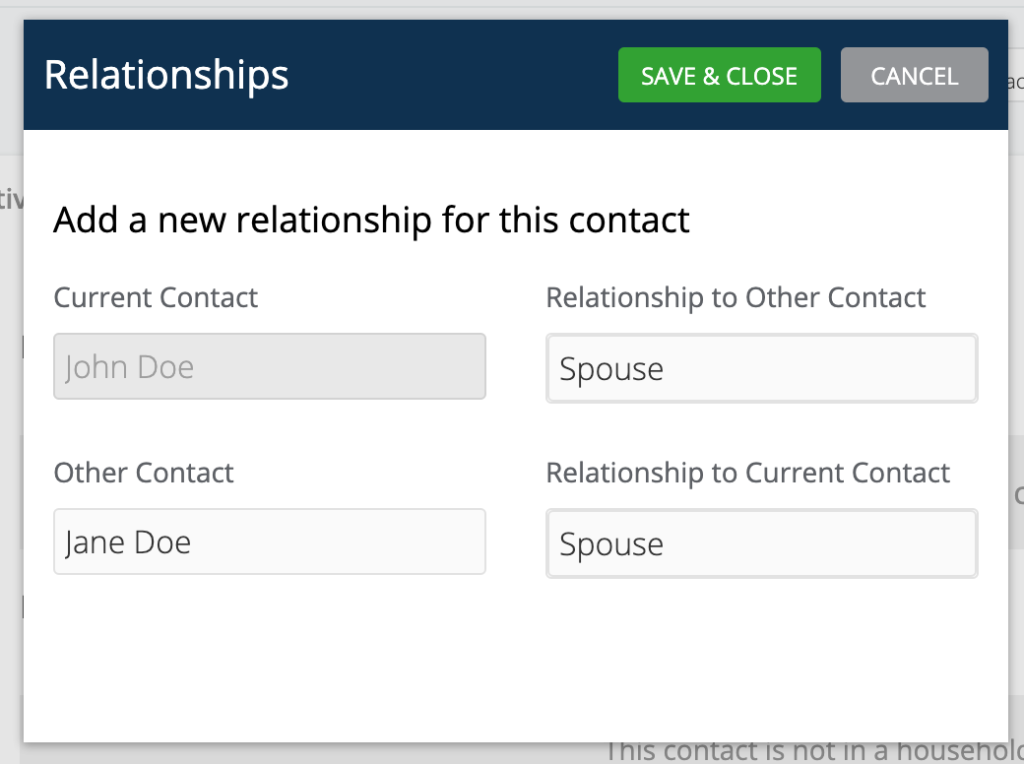
To connect contacts to a relationship, click “Add a new Relationship.” This will prompt a box to open where you can build a relationship between two contacts. Select a second contact from your contact database and define their relationship. You can select from the predefined relationships or create an additional type of relationship inside the box. Once complete, click “Save & Close.”
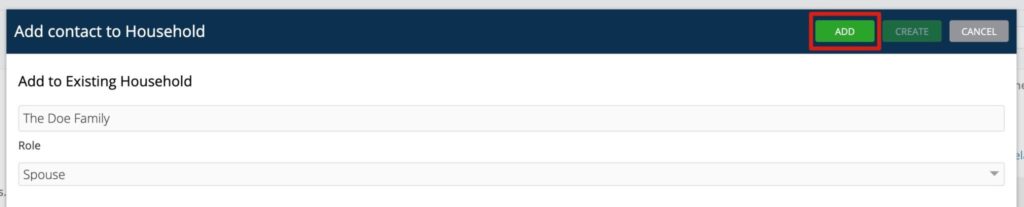
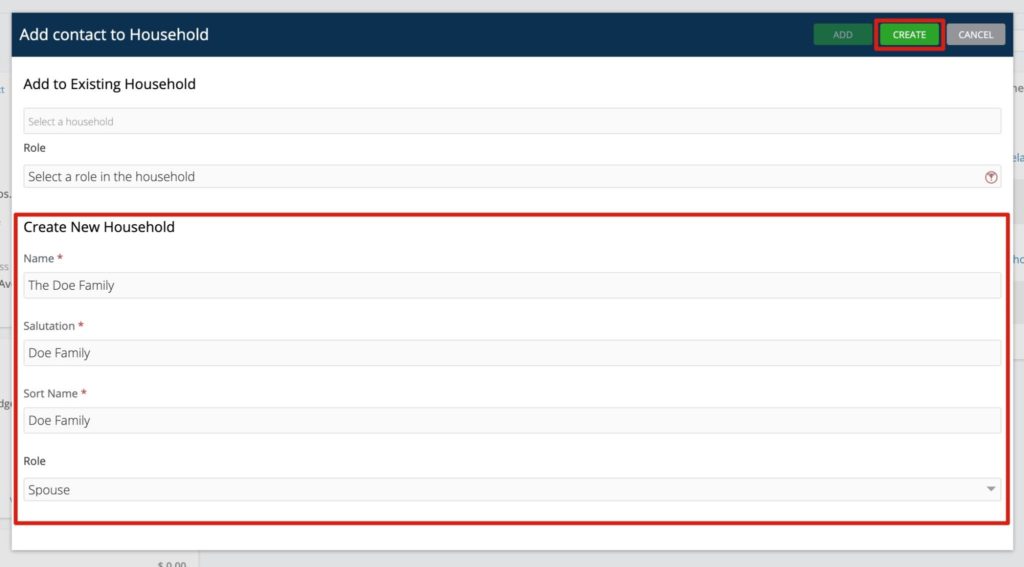
You can also include a contact in a household from the Relationships tab. Begin by clicking “Add to a household.” This will prompt a box to open where you can either add the contact to an existing household or create a new household. To add the contact to an existing household, search for the household name in the search box, provide a role for the contact, and click “Add.”
To create a new household, simply provide the following:
- Name: The name of the household
- Salutation: The preferred name used for addressing the household in email communication and household contribution statements
- Sort Name: Sort by the preferred name in the Household List
Not using households yet? Check out this resource for how to create households.
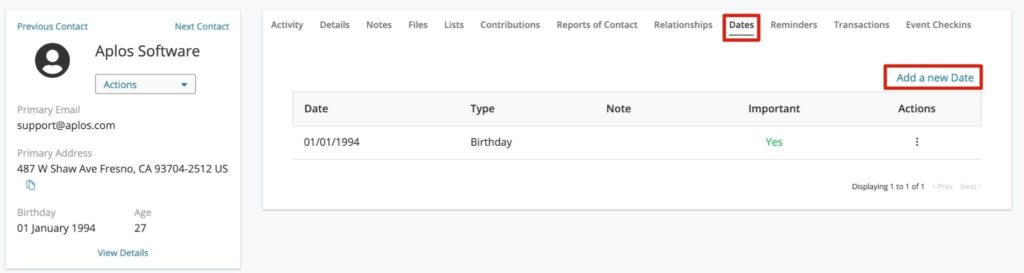
Dates
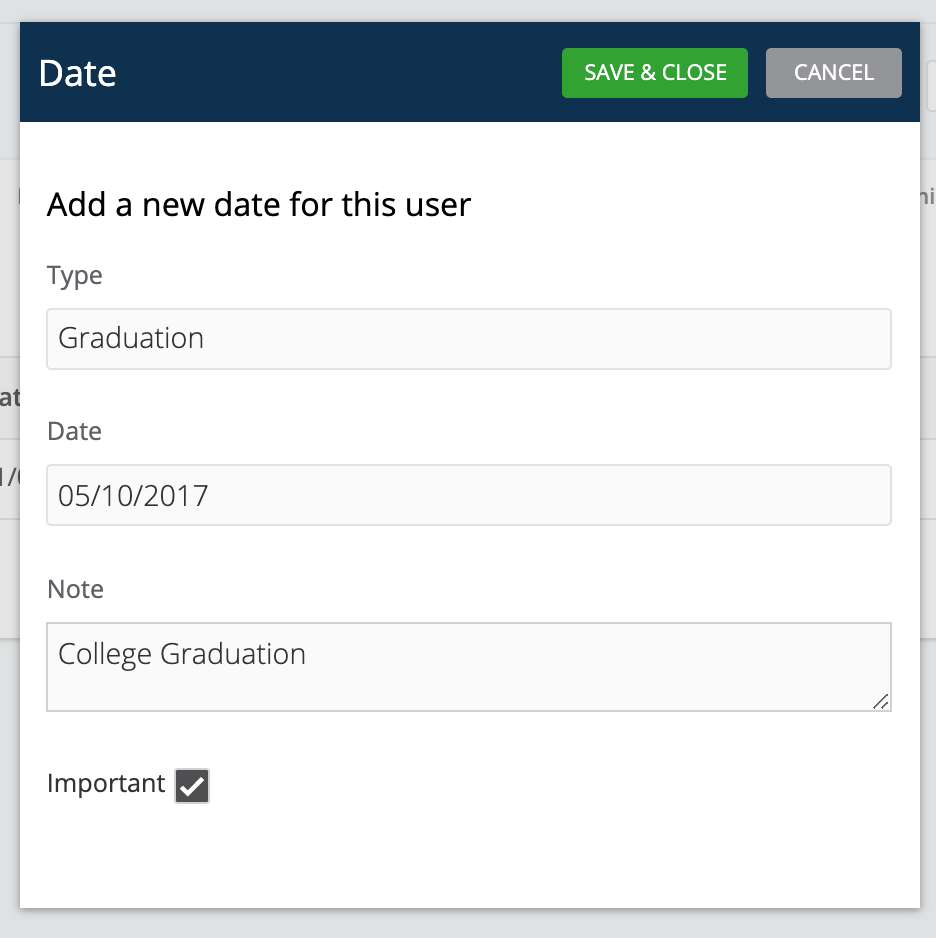
The Dates tab tracks and manages specific dates for your contact. You can track dates that are related to your contact, such as birthdays, anniversaries, graduations, or membership dates. To create a new date, click “Add a new Date” in the Dates tab to prompt a new date entry.
Enter the type of date you wish to create. By default, you will see the predetermined selections. However, you can create a new type within the box by entering a new type and clicking “Add as New Date Type.” This will save the new date type on the Contact Configuration screen for future use. Next, enter the date and a note associated with the date.
Important Dates: You can mark a date as “Important.” Marking the date as important will allow you to segment important dates in the Dates report and when using Smart Lists.
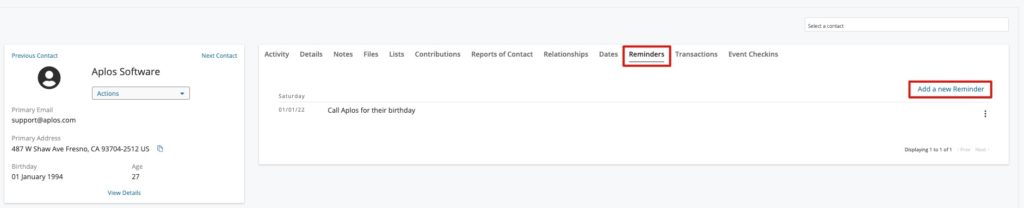
Reminders
Reminders can help you remember to follow up with a contact through the communication tools provided in Aplos. When a reminder is created, it will be displayed on the Contact Card and inside The Feed, where you can send communications to your contacts.
For more information on how to use The Feed, view the guide on individual communication on The Feed.
To view and create a reminder, click “Add a new Reminder” from the Reminders tab to prompt a new entry. Set the date and the message for your reminder, and then click “Save & Close.” You can edit your reminders by selecting the three-dot icon on the right-hand side and clicking “Edit Reminder.”
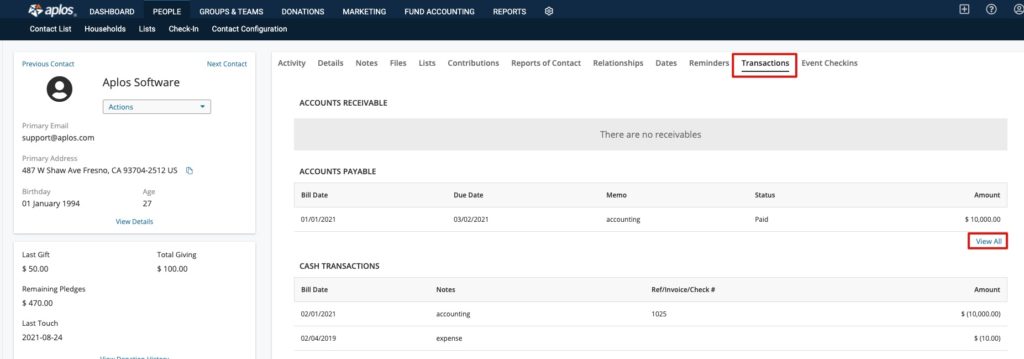
Transactions
View a full list of all transactions, including payables and receivables of the selected contact, by navigating to the tab menu on the right-hand side and clicking “Transactions.” This will display a list of all transactions segmented by the transaction type. You can drill down into each segment by selecting “View All” under each section. This will filter transactions for that specific type.
For more information on how to enter transactions in Aplos, view the resource on recording and reconciling transactions.
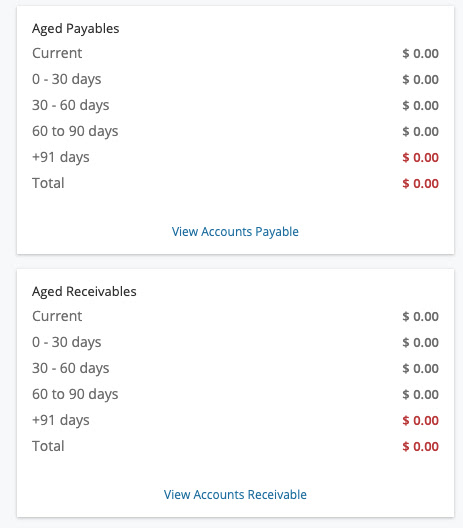
You can also view a summary of any Aged Payables or Aged Receivables for that selected contact on the left panel. This includes any open payable or receivable that is current or outstanding. View the total outstanding amount based on segments of days to quickly view what’s due or owed. You can click on the quick links below each section to view a full list of all Account Payable and Account Receivable transactions for the contact.
For more information on how to track and record these transactions, view our guides on Accounts Payable or Accounts Receivable.
Event Check-Ins
The Event Check-In tab displays previous events that the contact has attended and checked in to using the Event Check-In tool. You cannot edit any of this information since it is read-only access.

Navigate And Search Fields On The Card
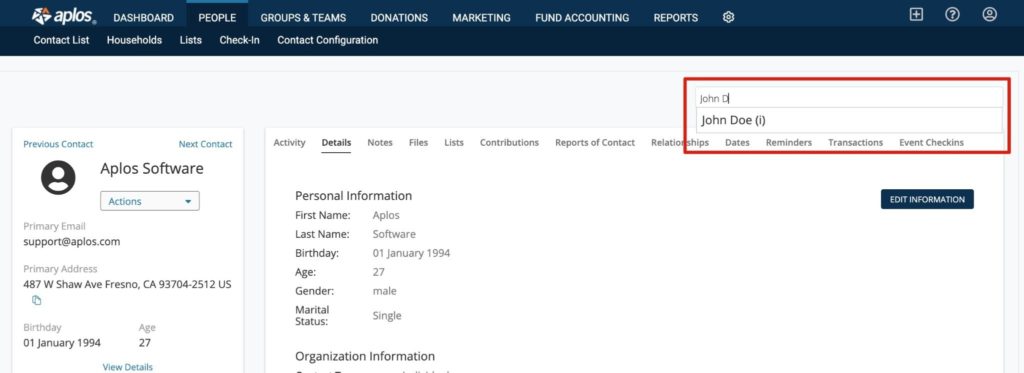
While on the Contact Card, you can navigate between contacts using the search bar on the right-hand side of the screen. Begin typing out the name you wish to locate, and the software will provide names in a dropdown that match your criteria. Click on the preferred name to load their Contact Record.
From the Contact Card, you can also navigate between contacts alphabetically based on the first name. Select either the “Previous Contact” or “Next Contact” button above the current contact’s name to load the next Contact Card.
